
Introduction
Here is a video on connecting a workstation to GSS for cloud customers.
What to do when you first receive your GSS workstation mini-pc.
Some of these steps are optional. Look through each and do the ones that apply to your set up and conditions.
Video Overview
-
-
You'll need to set your password for the admin account, so that you can log in and configure the pc.
-
Click on pcadmin account. Without typing a password, hit enter.
-
Hit ok, then click "reset password."
-
The answers are "1", "2", and "3", in that order. Type those in, and hit the next arrow.
-
Enter your new admin password. Confirm it, and then log in.
-
-
-
It is recommended to change your security questions to protect your computer.
-
Open the Settings menu by searching "Settings" in the taskbar search bar.
-
Click on "Accounts."
-
Click on "Sign-in Options" on the left of the window.
-
-
-
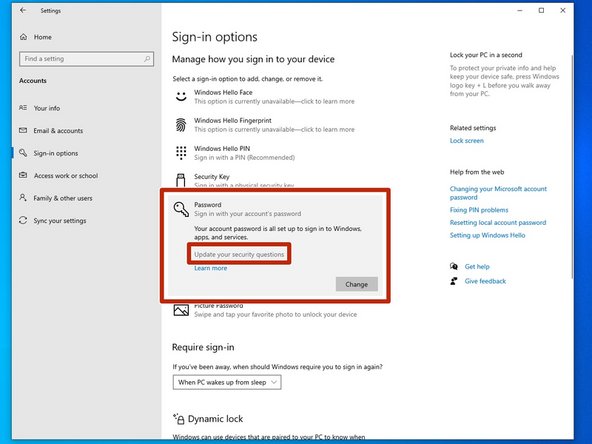
Click on "Password," and then on "Update your Security Questions."
-
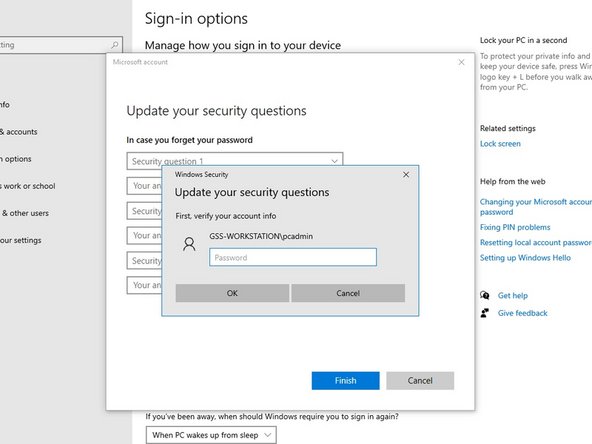
Confirm your credentials to verify your account.
-
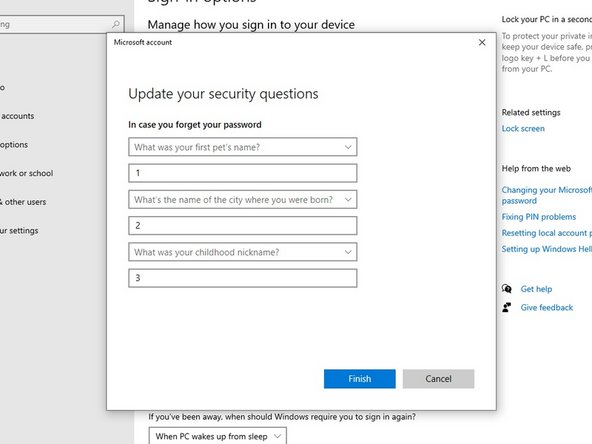
Select your new questions and fill in the appropriate answers. Make sure you'll be able to remember these answers. If you forget the admin password, this is the only way to reset it.
-
-
-
You can change the PC's name to make it more recognizable om your network.
-
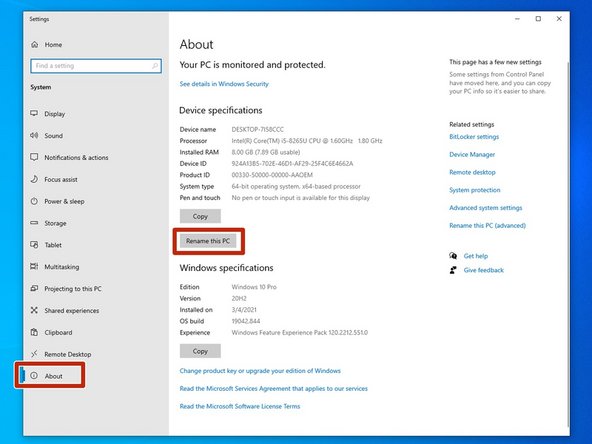
In the Settings menu, open the 'About' tab.
-
Click on "Rename this PC."
-
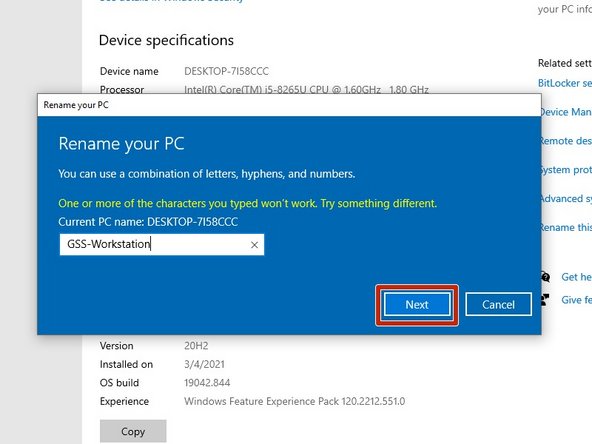
In the box, enter the new name you wish to give the PC. It's a good idea to use something distinct and easily recognizable. Hit "Next" to confirm.
-
Here, I used the name "GSS-Workstation" as an example. It's worth noting that you can only use letters, numbers, and hyphens. Spaces and special characters won't work.
-
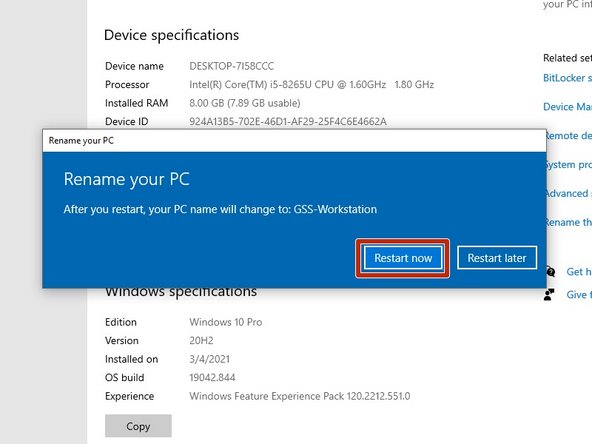
The new name will take effect the next time you restart the PC. You can choose to restart the computer now, or to wait and do so later.
-
-
-
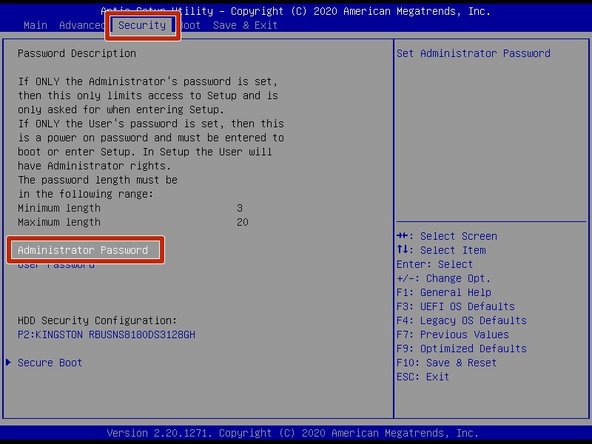
Adding a password to the BIOS (Basic Input/Output System) will prevent unauthorized users from booting or installing alternate operating systems, or editing the boot settings of the current operating system.
-
Restart the computer.
-
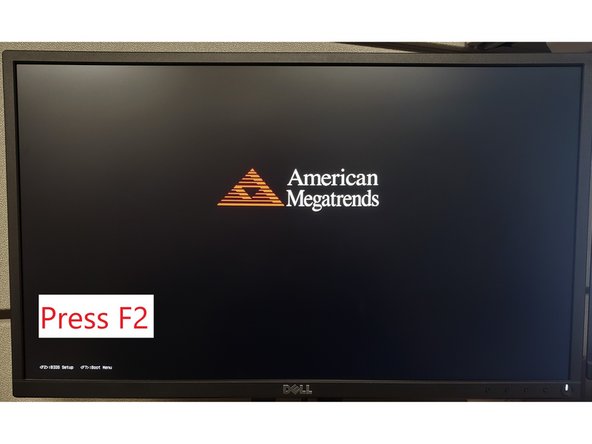
While the screen show a red pyramid and the words "American Megatrends," press the F2 key on your keyboard for about 1 second. It can be a little finicky, so you may have to restart the computer and try again a few times.
-
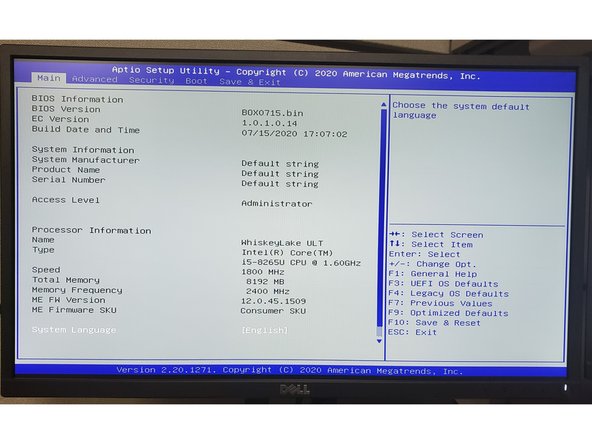
When done correctly, the computer will boot to the BIOS, showing a simple text-based menu.
-
Use the arrow keys to navigate to the "Security" tab. Makes sure the words "Administrator Password" are highlighted, and hit the enter key.
-
-
-
Type in the password you wish to use. Hit the Enter key on your keyboard to continue.
-
It's worth noting that the password must be at least 3 characters long, but no more than 20.
-
Type in the password again to confirm. Hit the Enter key on your keyboard to continue.
-
Now that you have set a password, hit the F10 key on your keyboard to save your settings and restart the computer. Hit the Enter key while "Yes" is highlighted to continue.
-
The computer should now restart.
-
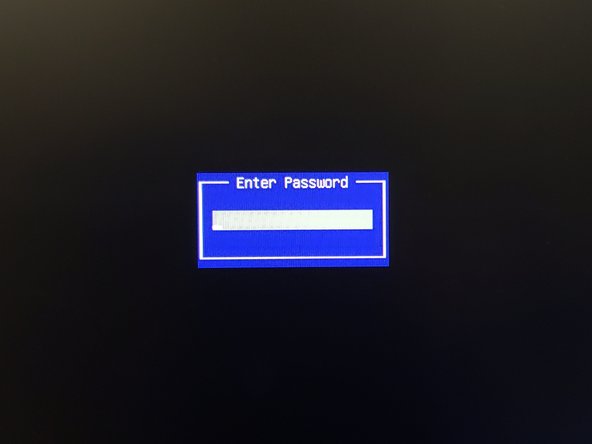
If you start the BIOS now, you should see a password prompt.
-
-
-
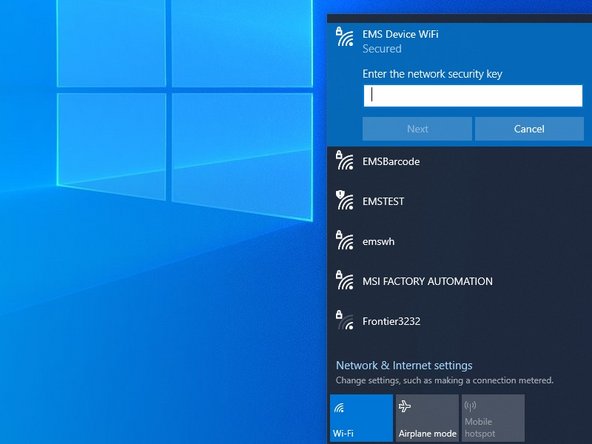
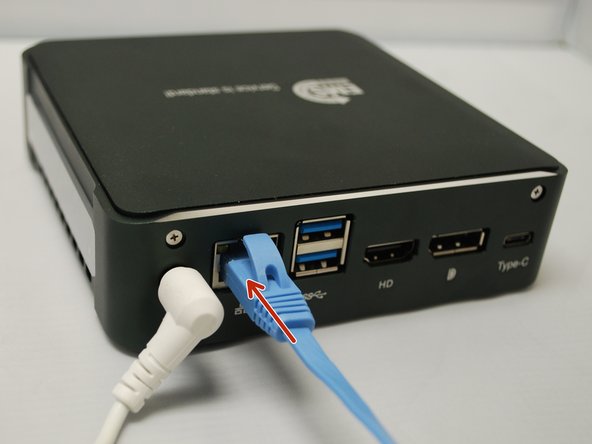
Many of the intended functions of the mini pc and workstation require internet to work.
-
Either add the computer to a local Wi-Fi network, or plug it directly into your network with an ethernet cable.
-
-
-
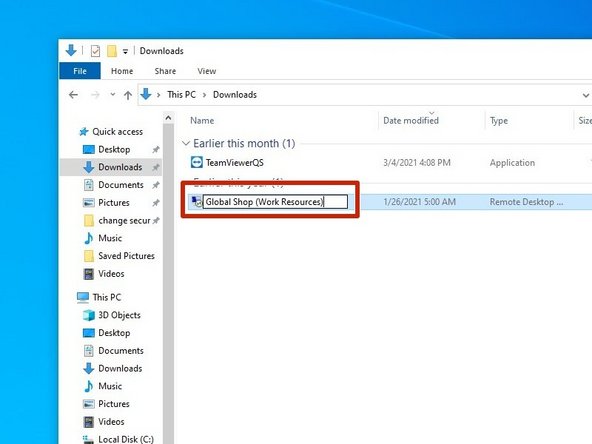
Log into the RD Web website that was provided by Global Shop, and download the Remote App you wish to use on your PC.
-
Rename the file to "Global Shop (Work Resources).
-
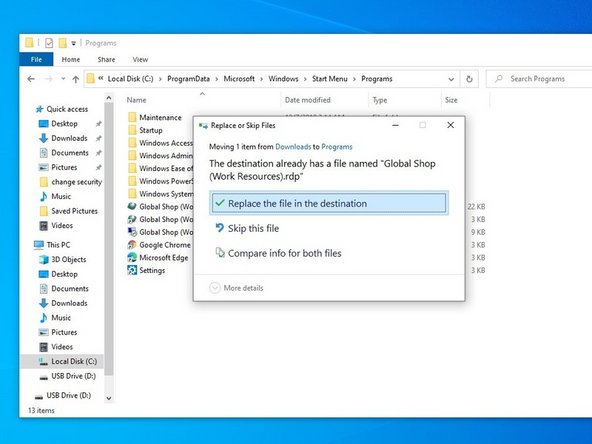
Copy and paste the file to >C:\ProgramData\Microsoft\Windows\Start Menu\Programs (replacing the file in that location).
-
Windows may ask you to provide administrator permission. Click "Continue" to confirm.
-
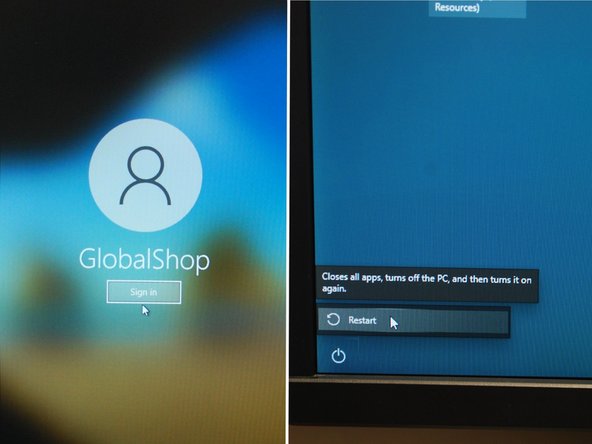
Log in as the global shop user and restart the pc to make sure it automatically logs into the Global Shop account.
-
-
-
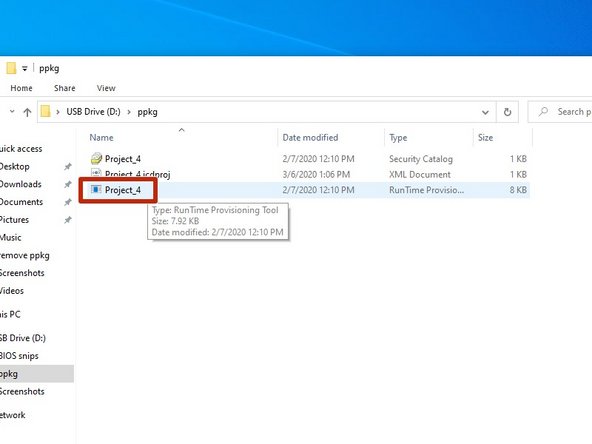
A provisioning package can be used to easily configure a PC, such as adding users with specific permissions and capabilities. This step shows how to add a provisioning package, and the next shows how to remove one. You'll need administrator access.
-
The file may be saved as a .ppkg RunTime Provisioning Tool; you may be able to install it by simply double clicking on the file. It will open, and then you have to confirm you wish to add the package. If that doesn't work, continue below:
-
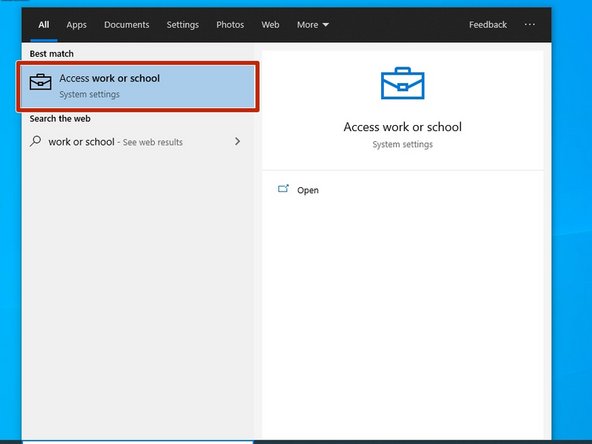
In the taskbar search bar, type "work or school" and select the "Access Work or School" option.
-
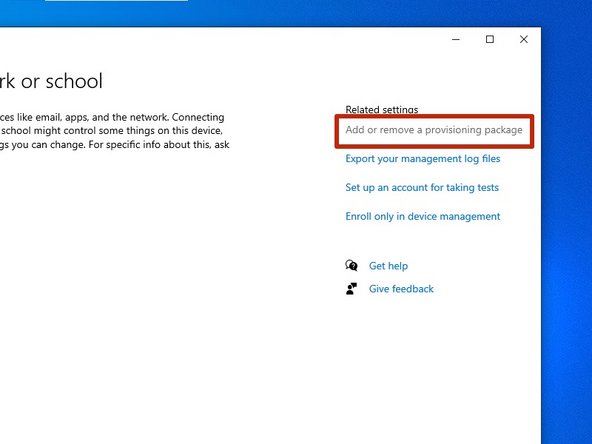
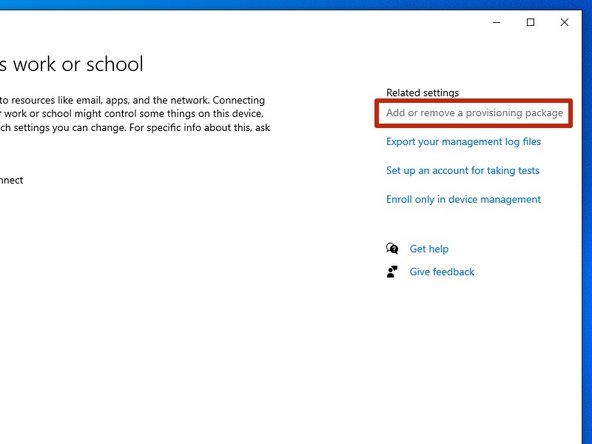
Click on "Add or remove a provisioning package" in the top right.
-
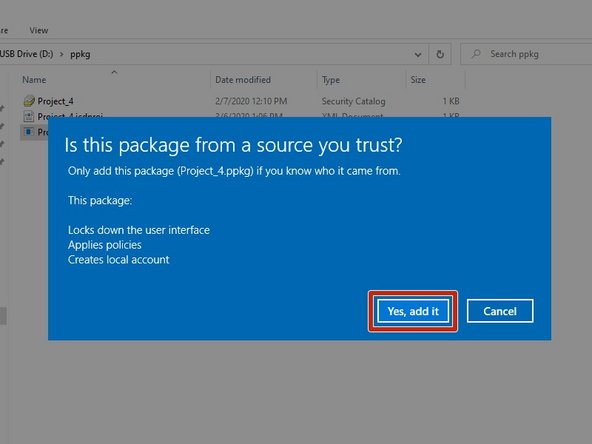
Click on "Add a package," and then "Yes, add it" (assuming it is in fact from a source you trust).
-
-
-
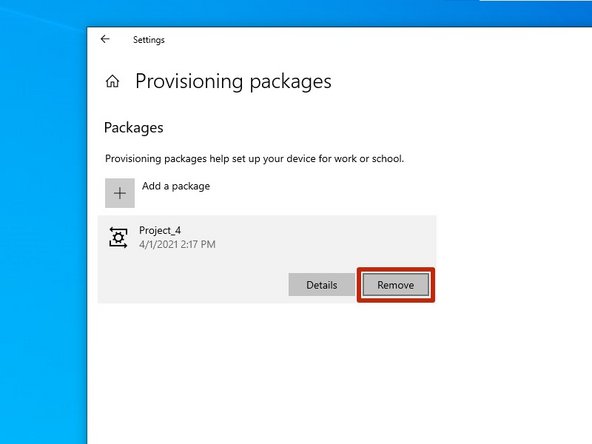
As with adding a package, you'll need administrator access to remove one.
-
In the taskbar, type "work or school," then click on "Access work or school."
-
Click on "Add or remove a provisioning package" in the top right.
-
Click on the package you wish to remove, then click "remove."
-
You may need to manually remove any accounts added by the provisioning package.
-


Cancel: I did not complete this guide.
One other person completed this guide.
