Introduction
How to load Direct Thermal labels in your Global Shop industrial printer.
Tools
No tools specified.
Parts
-
-
Grab the bottom of the cover and lift all the way open, until it's resting on the top of the printer.
-
Fold down and pull forward the label roll guard (the metal bar in the red circle).
-
-
-
Place the roll of labels on the spindle, so that they unroll from the top
-
Fold the label roll guard back up and and press it against the side of the roll.
-
-
-
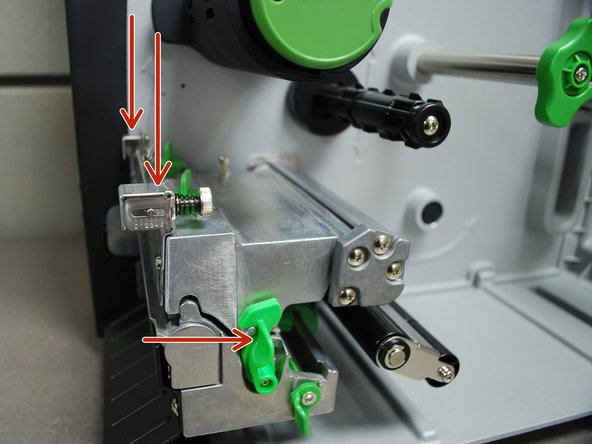
With one hand, press down on the top of the printhead.
-
With the other, push the green release lever to the right.
-
The printhead should now be able to be lifted up.
-
-
-
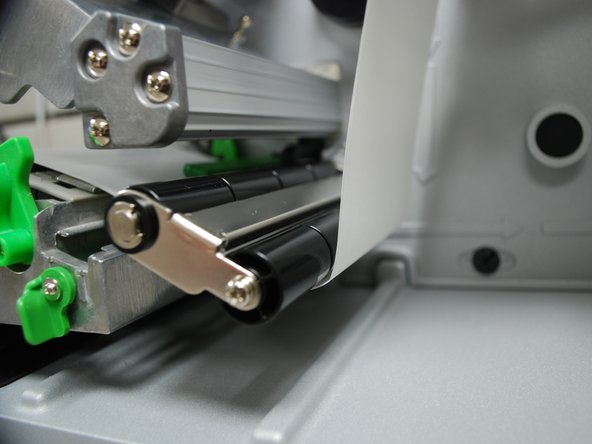
Feed the labels over the media guide bar (1st picture), and under the damper roller (2nd picture).
-
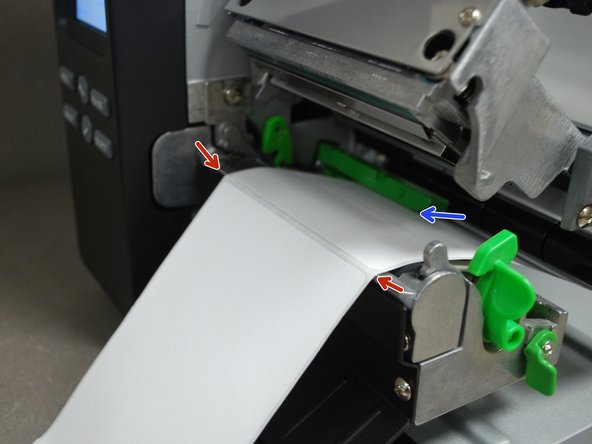
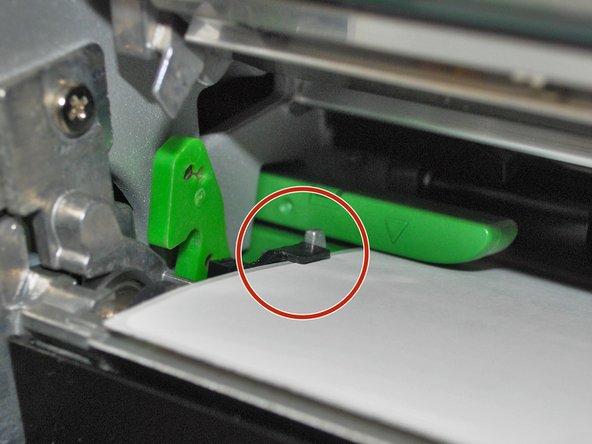
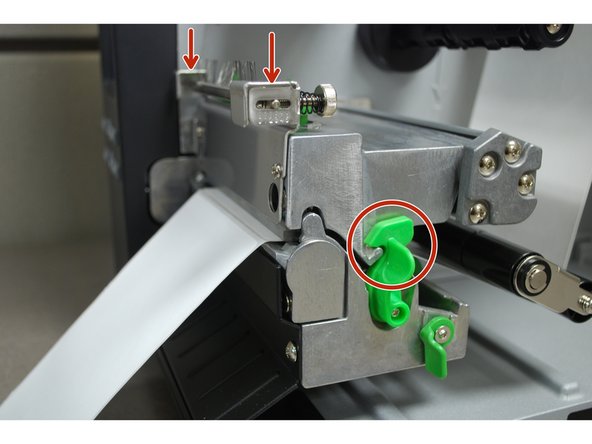
Feed the labels through/under the green media sensor bar (blue arrow in the picture).
-
Pull through until the leading edge of one label is even with the tear-off edge (red arrows).
-
-
-
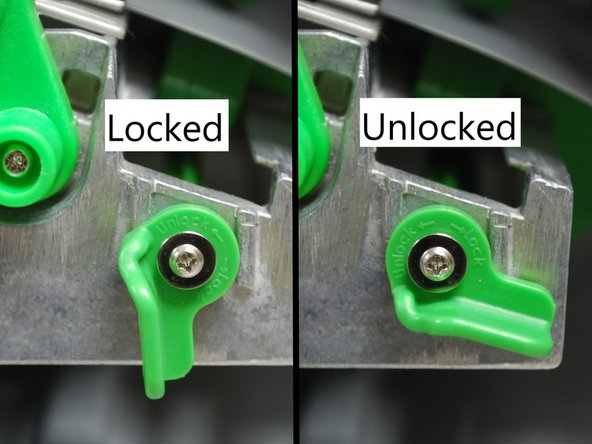
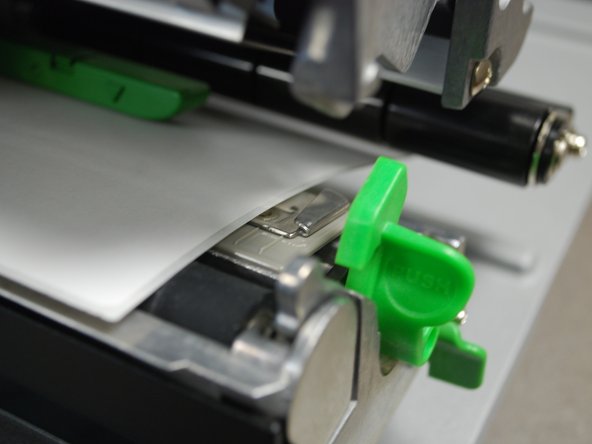
Unlock the media sensor locking lever by twisting it counter-clockwise.
-
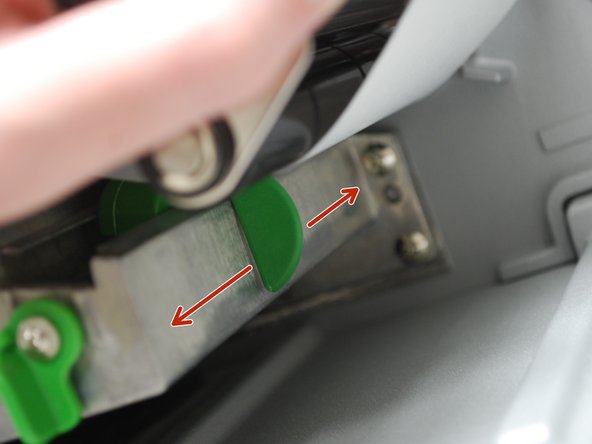
After unlocking the lever, use the green tab (second picture) underneath the damper roller to adjust the media sensor.
-
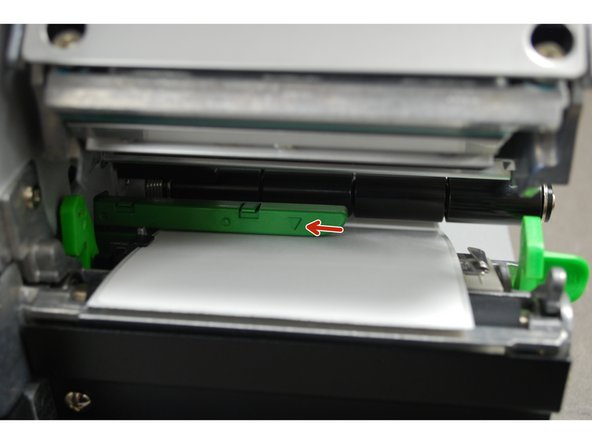
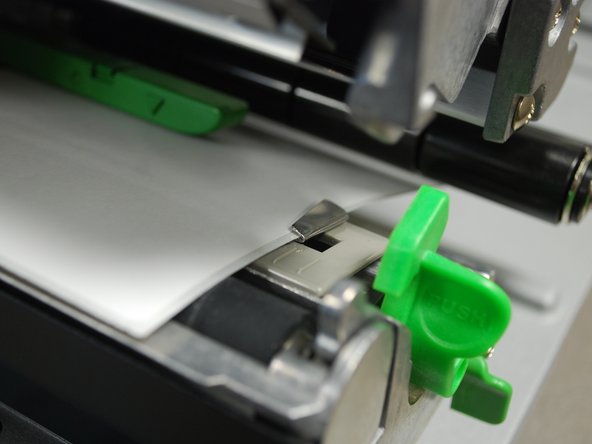
The arrow on the media sensor (3rd picture) should be approximately centered on the label. The arrow marking indicates the position of the sensor the printer uses to calibrate, so it's important to make sure it's in the right place.
-
Once the media sensor has been adjusted, switch the locking lever back to the "locked" position by twisting it clockwise.
-
-
-
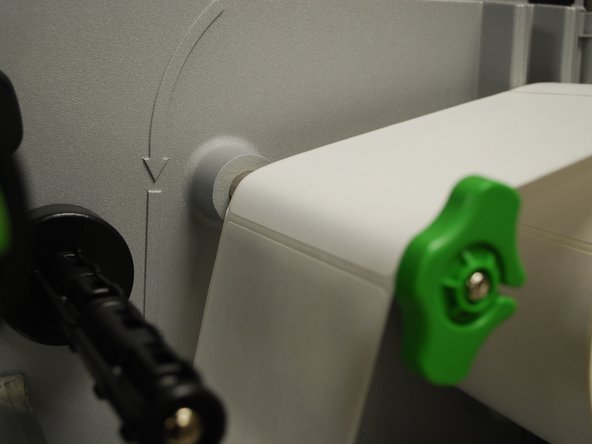
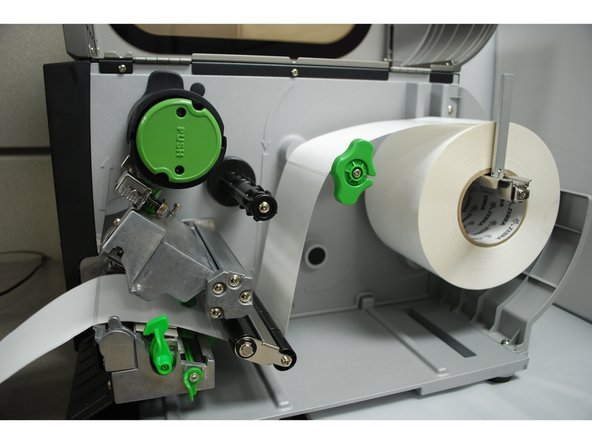
Make sure the far edge of the label roll lines up with the black clip at the back of the printer.
-
Slide the metallic clip next the to release latch forward until it fits against the close edge of the labels.
-
These clips keep the labels running straight, so it's important to make sure they're not so tight they stop the labels from coming out smoothly.
-
-
-
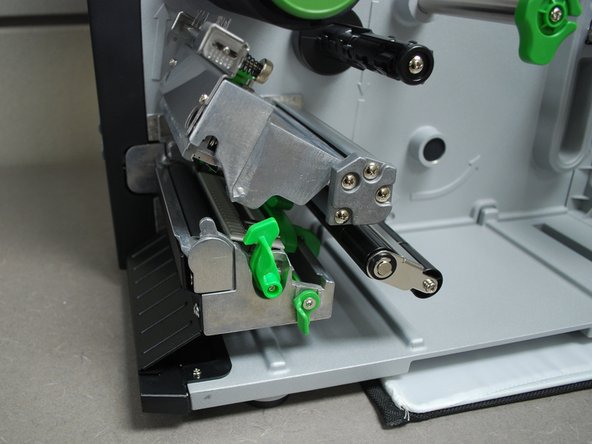
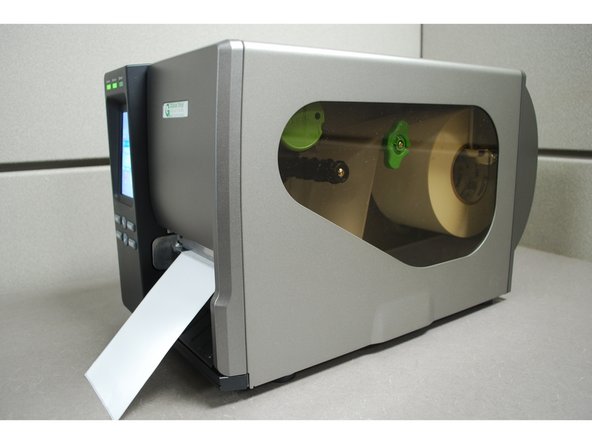
Check the path of the labels. It should look like the first picture here.
-
Close the printhead by pressing down firmly on top until you hear a 'click,' making sure that the green release lever is latched closed.
-
Close the cover.
-
-
-
Press the "Feed" button, to make sure the labels lineup with the tear-off edge when they eject.
-
If they don't, open the printer, release and lift the printhead, and pull the labels forward until they line up.
-
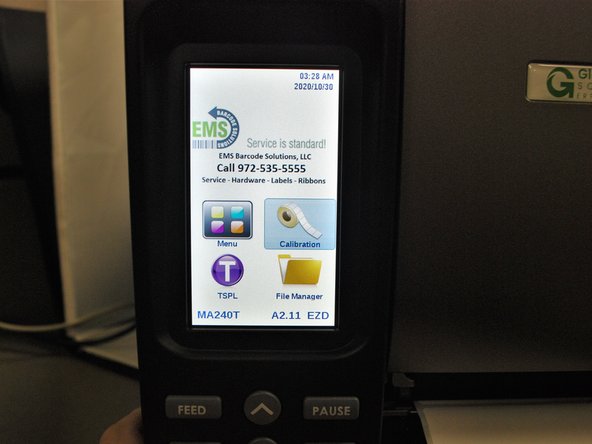
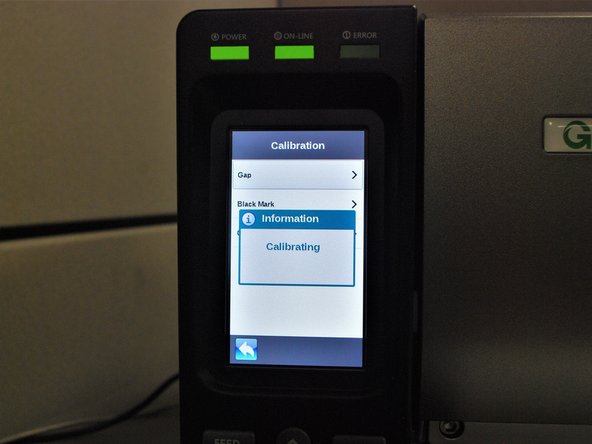
Select the "Calibrate" option, and then "Gap."
-
The printer will now self-calibrate; several blank labels will be printed in the process.
-