Introduction
This guide shows you how to calibrate your GSS Mobile Printer, using the GSS Wireless Setup Utility or the built-in screen.
Download the GSS Wireless Setup Utility here.
Go to Step 1 to calibrate with the GSS Wireless Utility Setup desktop software.
Go to Step 3 to calibrate with the built-in screen of your GSS Mobile Printer.
Go to Step 6 to make sure the calibration went through correctly.
-
-
If this is first time setup, make sure that the printer is connected to the computer by USB.
-
Download and run the GSS Wireless Setup Utility.
-
-
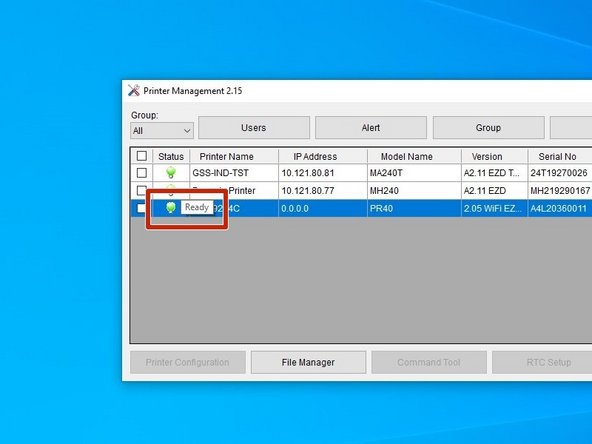
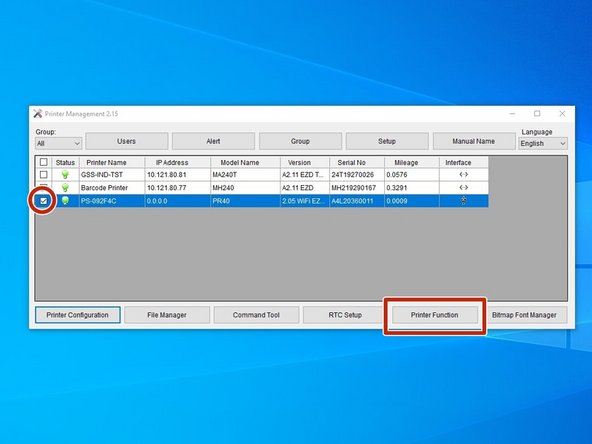
Check the box for the right printer.
-
If connected by USB, it will show the three-pronged USB icon under "Interface."
-
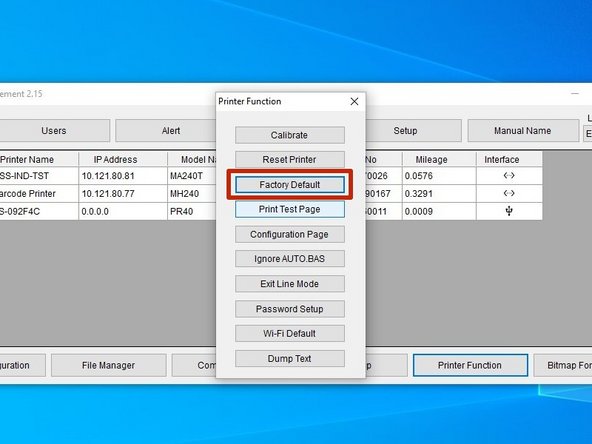
Select the "Printer Function" option.
-
-
-
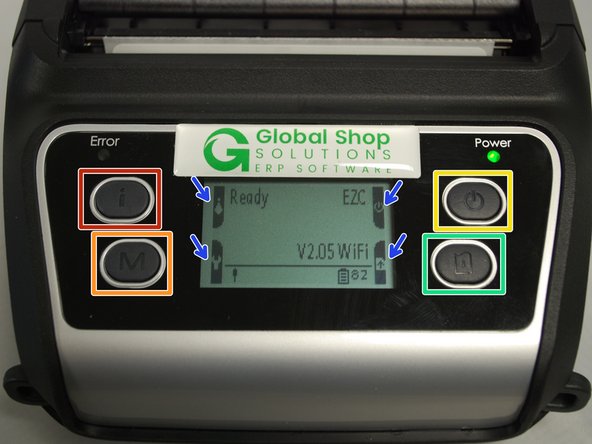
At the top left is the Info button. It has a lowercase "i" on it.
-
At the bottom left is the Menu button. It has an uppercase "M" on it.
-
At the top right is the Power button. It has a power icon on it.
-
At the bottom right is the Feed button. It has page with an arrow on it.
-
These buttons do different things depending on what screen you're on. You can look at the little icons on the left and right edges of the screen to see what they will do.
-
On the home screen, the Power button will turn the printer off, and the Feed button will print one blank label.
-
-
-
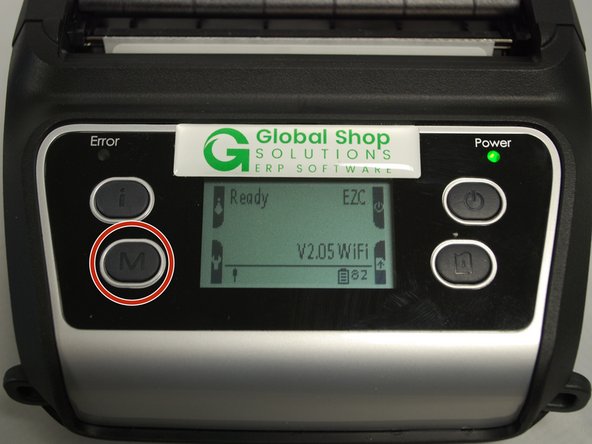
On the main screen, press the Menu button to open the Main Menu.
-
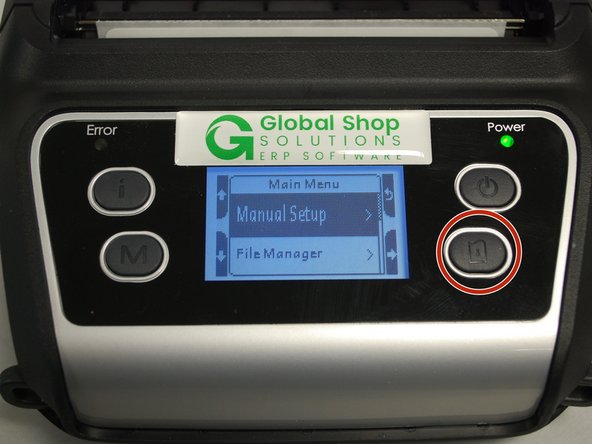
Press the Feed button to open the Manual Setup menu.
-
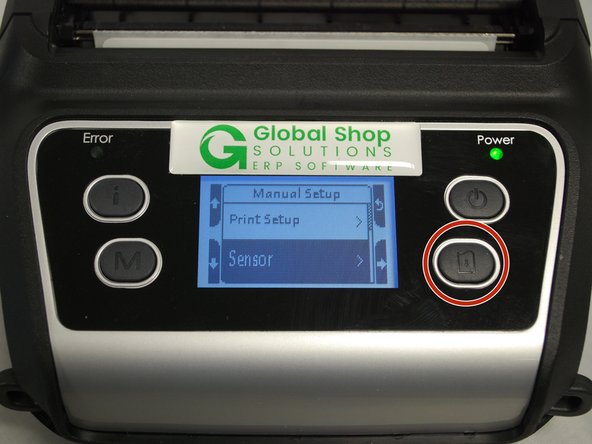
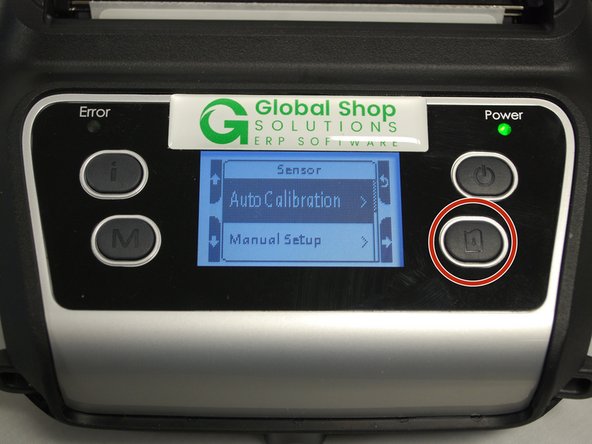
Press the Menu button to scroll down until the "Sensor" option is highlighted, then press the Feed button to open that menu.
-
-
-
Press the Feed button to start the Auto Calibration.
-
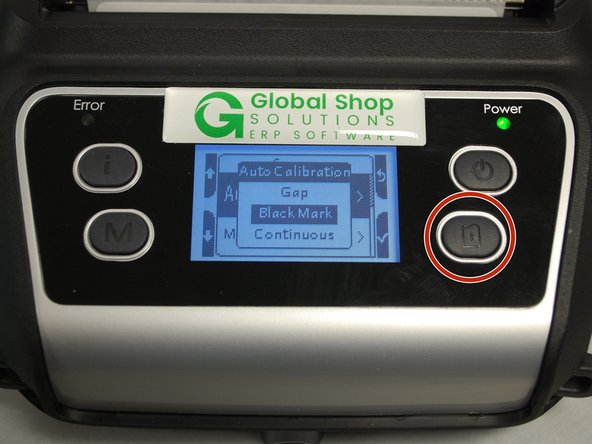
Use the Menu button to scroll down to the "Black Mark" option, then press the Feed button to confirm.
-
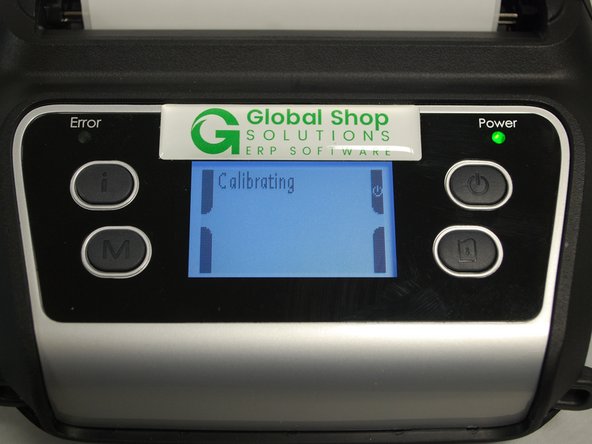
The printer should begin calibrating now. It will print a few blank labels as part of this process. Go to Step 6 to make sure calibration was successful.
-
-
-
If the calibration has worked correctly, you can know by checking the following:
-
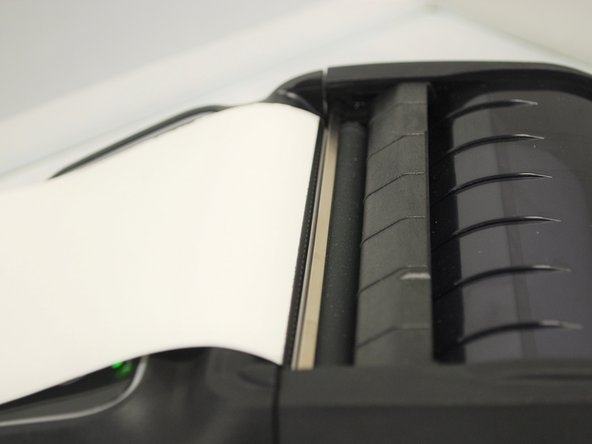
The edge of the labels line up with the tear-off edge (the flat metal edge just outside the printhead).
-
In the GSS Wireless Utility software, a green lightbulb symbol is displayed under "Status," and is you hover over the symbol with your mouse cursor it will say "Ready."
-
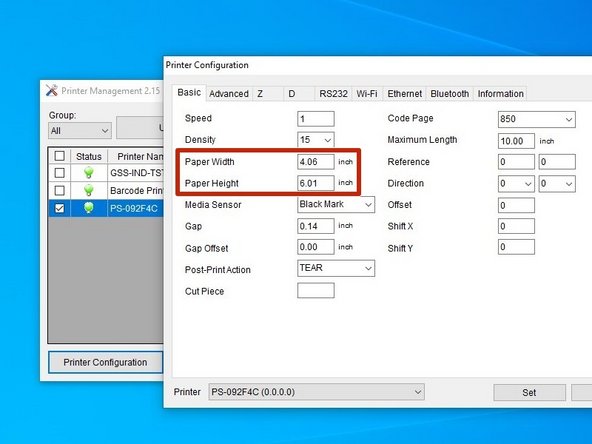
In the "Printer Configuration" menu (bottom left button) for the printer, the correct length and width is shown for the labels (within a few hundredths of an inch is fine).
-
For my setup, I'm using 4 in. x 6 in. labels, which the software is showing.
-
-
-
If the calibration fails to produce the correct results, you can take the following steps:
-
Open the GSS Wireless Utility, and select the printer.
-
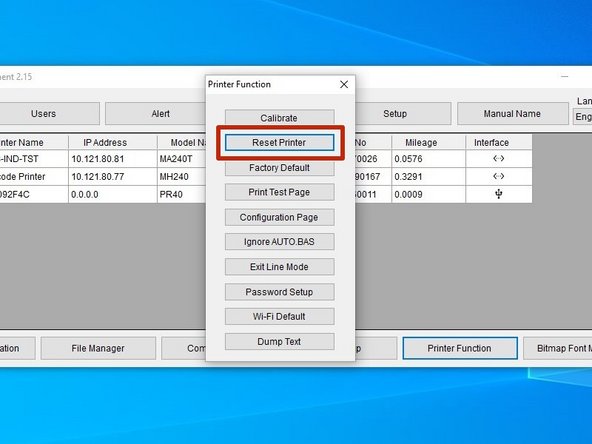
Select "Printer Functions" at the bottom right.
-
Select the option to "Reset Printer." Once it's done restarting, run the calibration again.
-
If the calibration still comes back wrong, repeat the above steps, but instead of selecting "Reset Printer," choose "Factory Default."
-