Introduction
Before starting, make sure the mobile printer is charged and connected to your PC by the provided USB cable.
Keep in mind you are changing the name of the printer and the IP. Start to think about what you will want these to be.
The GSS Mobile printer can only be set up with a wireless IP, which this guide details.
Click here to download the GSS Wireless Printer Setup Utility software needed for this method,
-
-
Make sure your printer is charged and has a direct wired USB connection with your computer.
-
Find and launch the GSS Wireless Utility
-
You can download it again here again if necessary.
-
Check the box for the printer that shows the three-pronged USB symbol under "Interface."
-
If you don't see an option for USB, stop and close the software. Restart the printer and check the USB connection, then start the GSS Wireless Utility again, running it as an administrator this time.
-
-
-
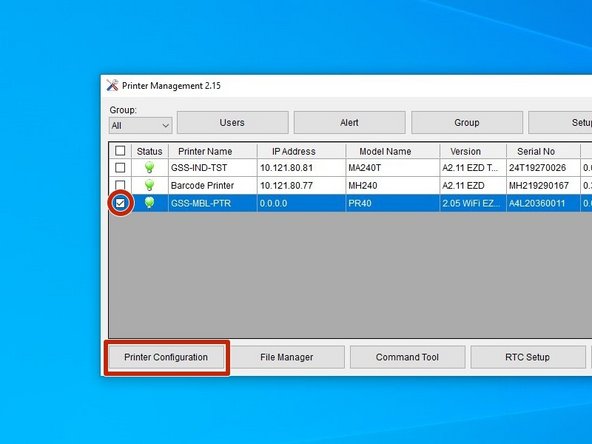
Check the box for the mobile printer (it should be the one connected by USB), then hit "Printer Configuration" at the bottom left.
-
Open the WiFi tab at the top.
-
-
-
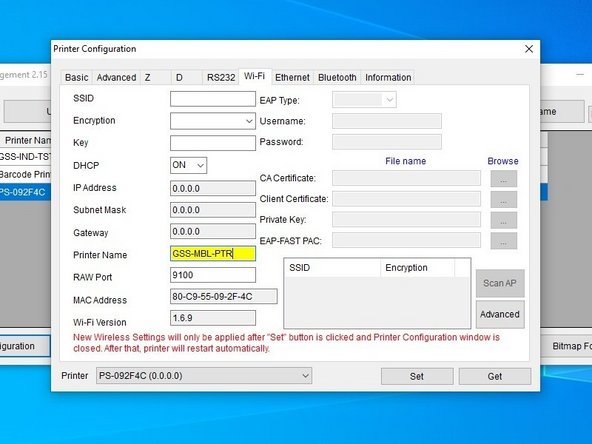
In the "Printer Name" box, enter a new name for the printer that is simple and easy to remember.
-
For example, I set mine to GSS-MBL-PTR for Global Shop Solutions Mobile Printer.
-
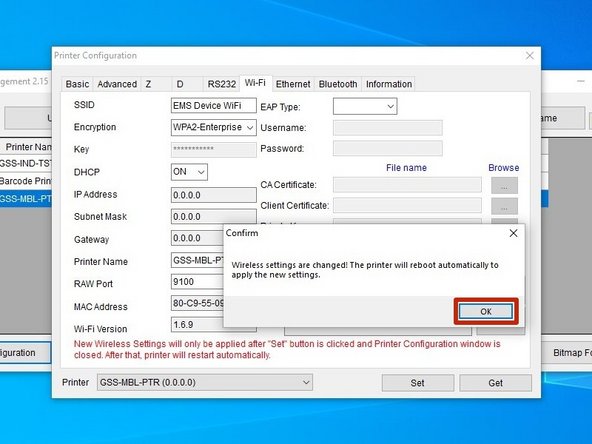
Hit the "Set" button in the bottom right of the window, and then close the window with the "X" button at the top right.
-
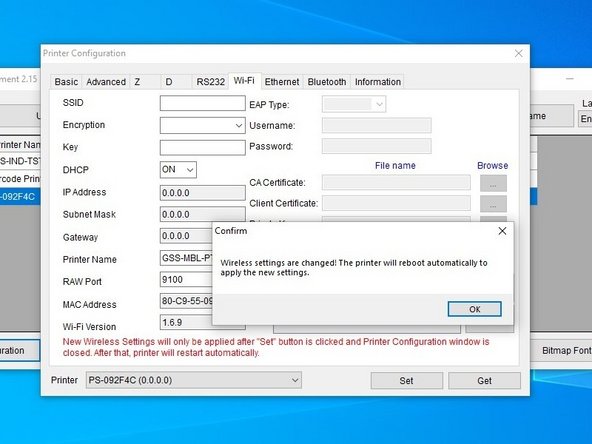
Hit "OK" in the confirmation pop-up.
-
After you close the Configuration window, the printer will restart. This is normal.
-
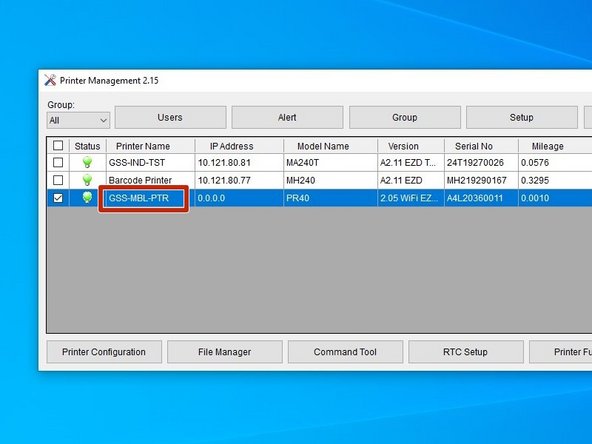
When you reopen the GSS Wireless Utility, you should see the printer appearing with the new name.
-
-
-
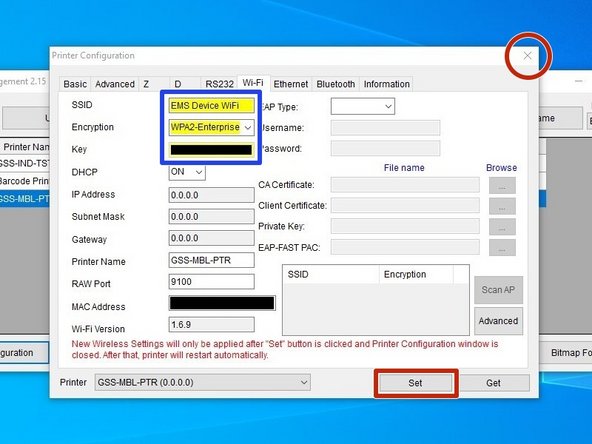
With the box for the correct printer checked, hit "Printer Configuration," and open the WiFi tab again.
-
Enter the name of your WiFi network under "SSID" and the password for that WiFi under "Key."
-
Make sure to leave DHCP set to "ON." This allows for initial automatic setup.
-
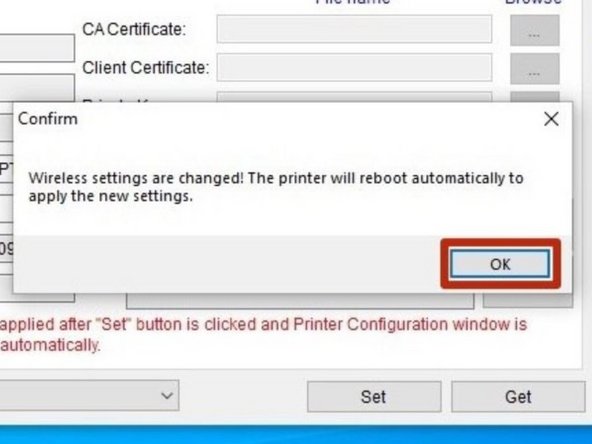
Hit "Set" at the bottom right, and then the "X" button to close the window.
-
Hit "OK" in the confirmation pop-up.
-
After you close the window, the printer will restart. This is normal. Once it has turned back on, after ~30 seconds a prompt on the screen should home screen that shows the printer's IP address.
-
If you wish to assign a specific static IP to the printer, repeat this step, but switch DHCP to "OFF," and enter the IP.
-
-
-
This step shows how to set a Static IP. If you don't want or need to do this, skip this step.
-
Re open the GSS Utility, and with the box for the correct printer checked, hit "Printer Configuration," and open the WiFi tab again.
-
Change DHCP to "OFF."
-
Enter the desired IP in the "IP Address" field.
-
Hit "Set" at the bottom right, then the "X" button to close the window.
-
Hit "OK" in the confirmation pop-up.
-
After you close the window, the printer will restart. This is normal. Once it has turned back on, after ~30 seconds a prompt on the screen should home screen that shows the printer's IP address.
-
-
-
Now, unplug the USB cable connecting the mobile printer to your computer.
-
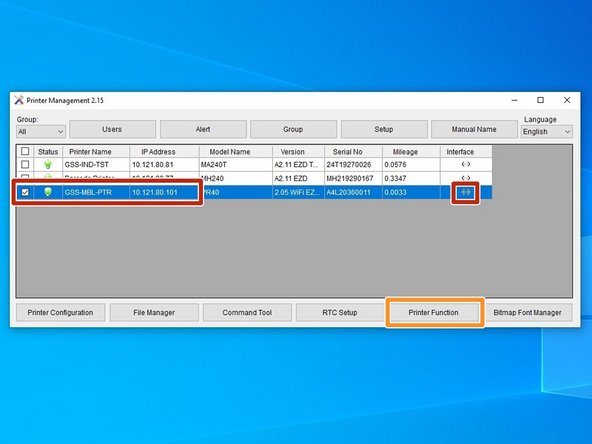
If you close and re-open the wireless utility, you should now see the printer we've been working on, connected wirelessly - it will show the IP the printer is connected to.
-
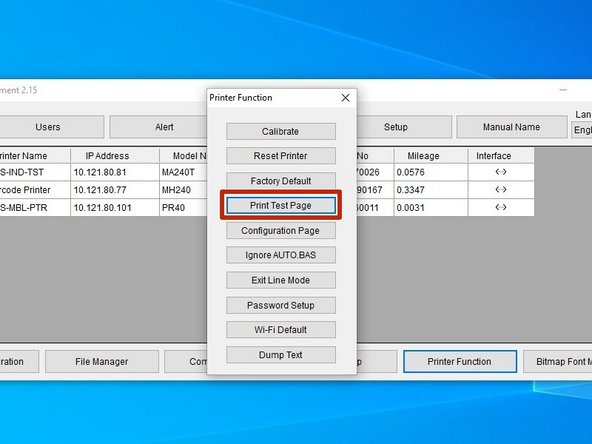
Check the box for the printer, and the hit the "Printer Function" button.
-
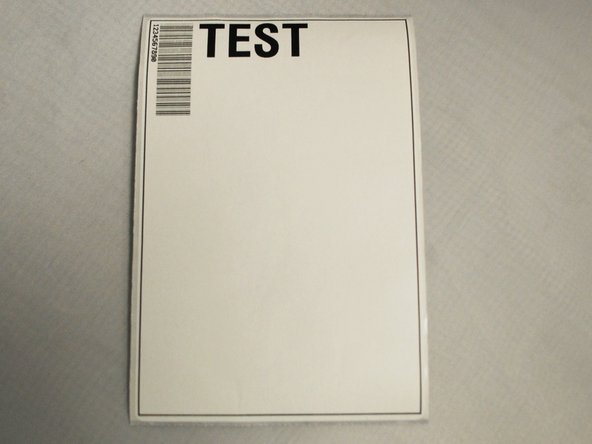
In the list of options, click "Print Test Page." A single label with the word "TEST" and a small barcode on it should print. See the third image for an example.
-
If you can print this test page through this connection, without a wired connection from the printer to the computer, you have set up the wireless connection correctly.
-
If you are having problems interacting with the printer through the wireless connection, try turning both the printer and the computer off and on again, changing which wifi network you connected the printer to, or even toggling the DHCP settings. You will have connect the printer to the computer via USB to change these settings.
-