-
-
Direct transfer labels will show a grey mark if you scrape your thumbnail along it, while thermal transfer will not. Make sure the labels you are using are of the Direct Thermal variety.
-
-
-
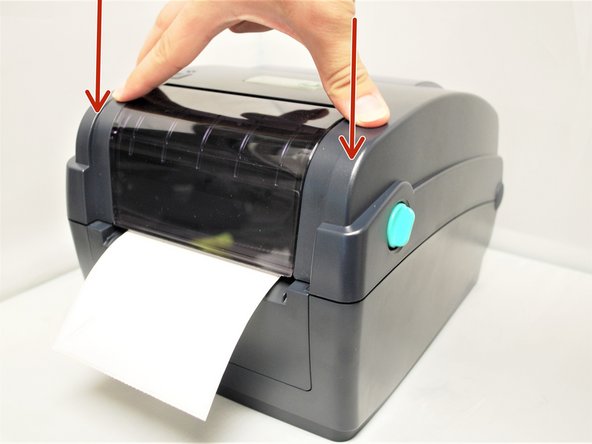
Make sure the printer is on a stable, flat surface, and turned off
-
The indicator LED should be unlit.
-
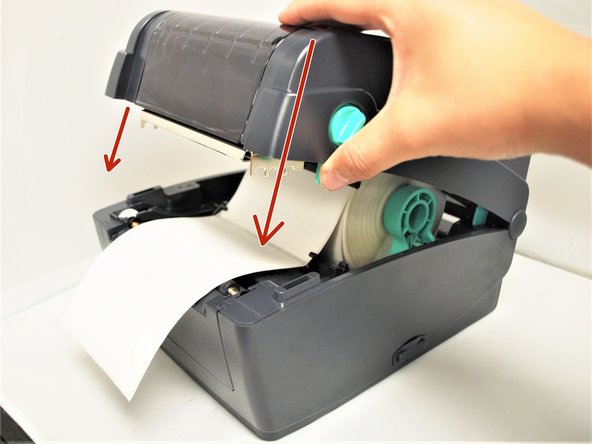
Pull forward on the green Top Cover Open Levers on either side of the printer.
-
You will feel the cover release, and then you can lift the cover until the top cover support clicks into place.
-
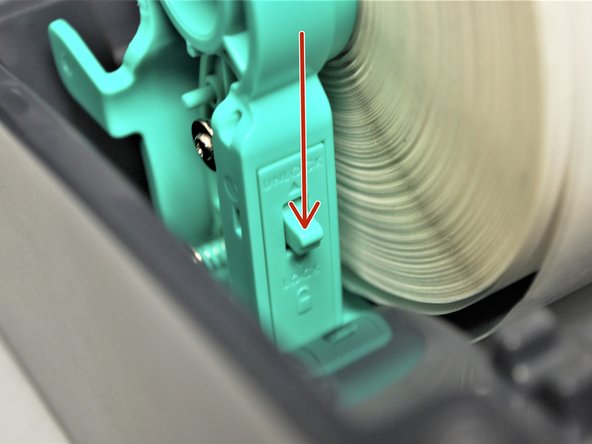
Ensure the Media Holder Lock Switch on the Media Holder is switched to 'unlock.'
-
Fully open the green media holders
-
-
-
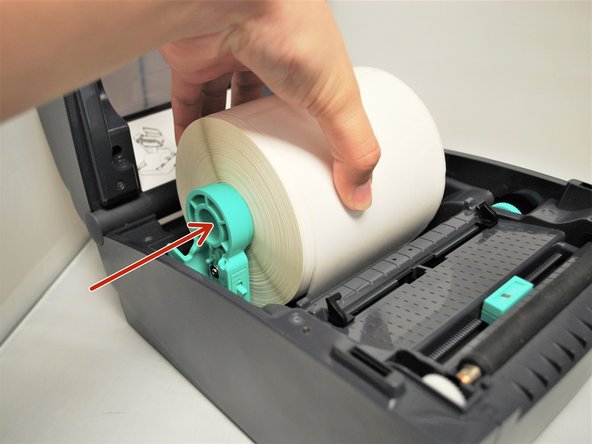
Use one hand to hold the roll of labels and place it on one holder
-
While holding the labels in place, use your other hand to push the holders together, so that they hold the roll of labels.
-
Push the locking tab down into the 'Locked' position. It will snap firmly into place.
-
If you need to remove the roll, make sure that you move the tab back up into the "Unlocked" position; otherwise the holders won't open. NEVER force the holders open, you WILL break them.
-
-
-
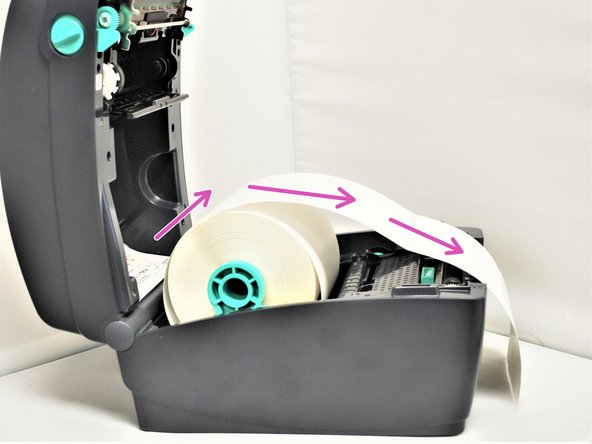
Take the leading edge of the labels, and pull it out past the front of the printer.
-
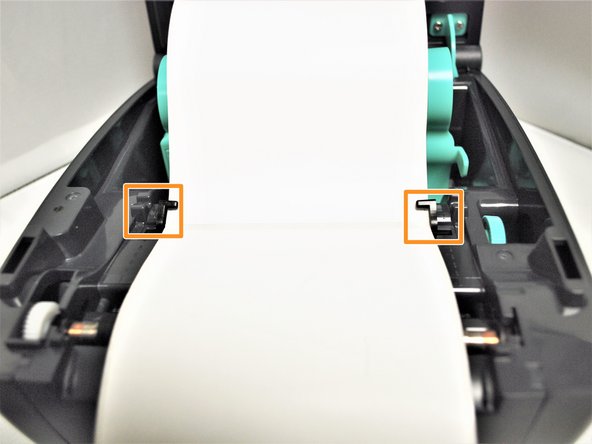
The label should face upwards, as shown in Image 1, and follow a similar path as shown by the pink arrows.
-
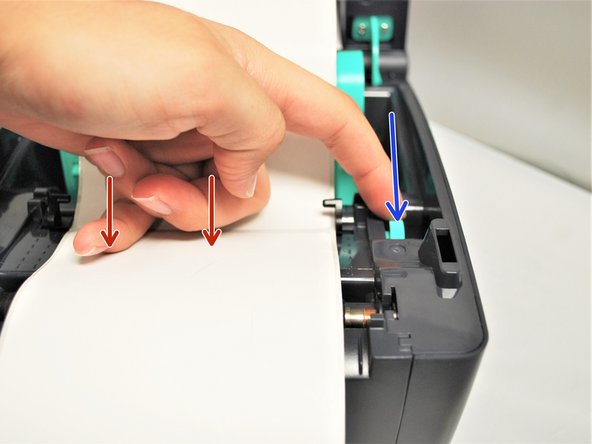
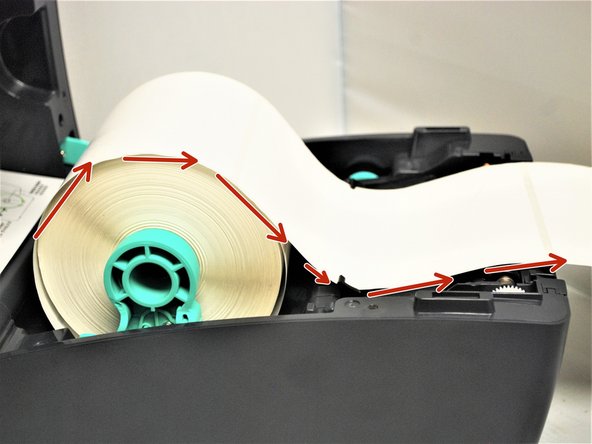
While pressing the labels flush, spin the green Media Guide Adjustment Knob on the right, shown by the blue arrows in Image 2, towards the front of the printer.
-
Do this until the black Media Guide clips are holding the labels in place, as shown by the orange boxes on Image 3..
-
These guides keep the labels running straight, so it's important to make sure they're not so tight they stop the labels from coming out smoothly.
-
-
-
Pull the labels forward until the perforated border between labels line up with the tear off edge of the printer.
-
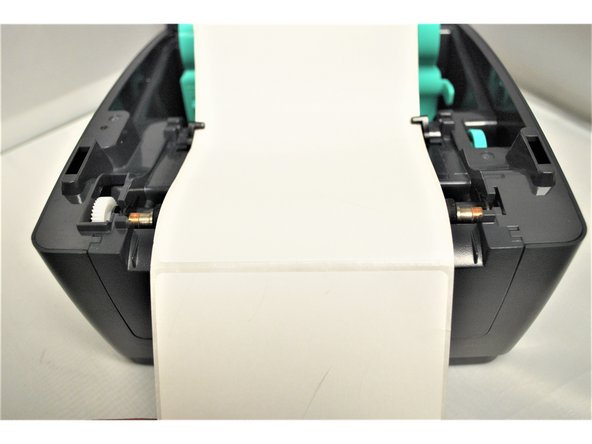
Check the path of the labels. It should look like the second picture here.
-
-
-
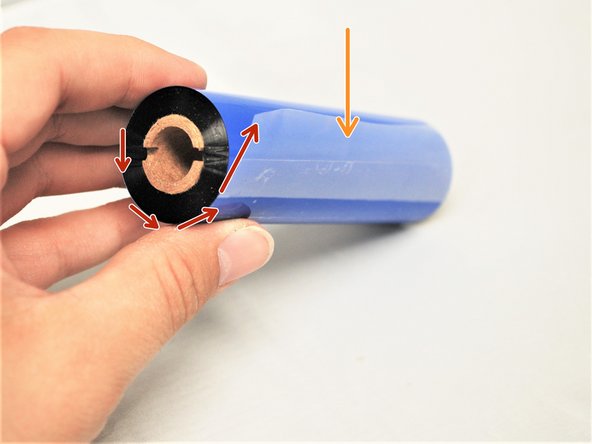
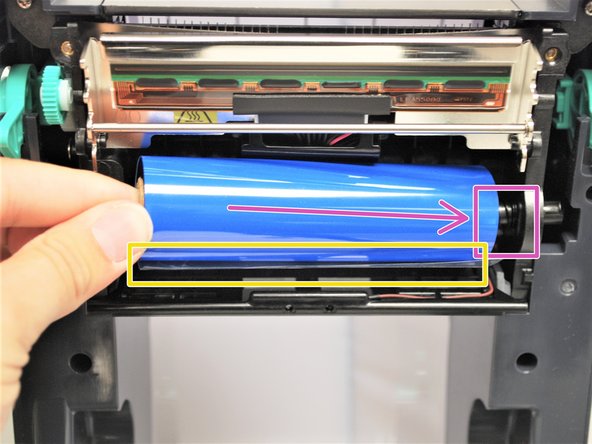
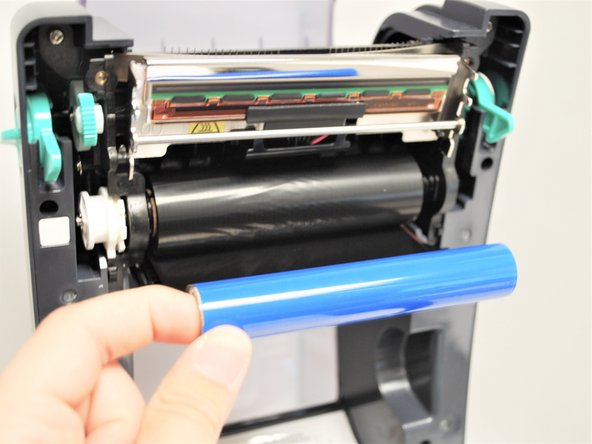
Identify the plastic tab (shown by the orange arrow) on the ribbon and which way the ribbon is wound around the core (shown by the red arrow), as shown in Image 1.
-
Insert the ribbon by first pressing it into the spring loaded holder on the right.
-
Be sure to keep the plastic tab on the bottom and while having the ribbon being fed towards you, shown by the yellow box.
-
Fit the other side of the ribbon into the holder on the left.
-
-
-
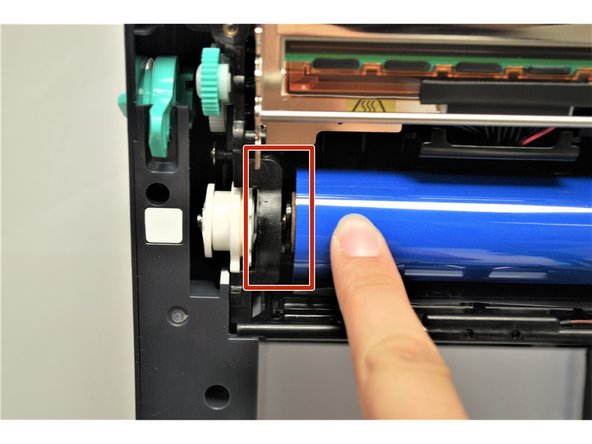
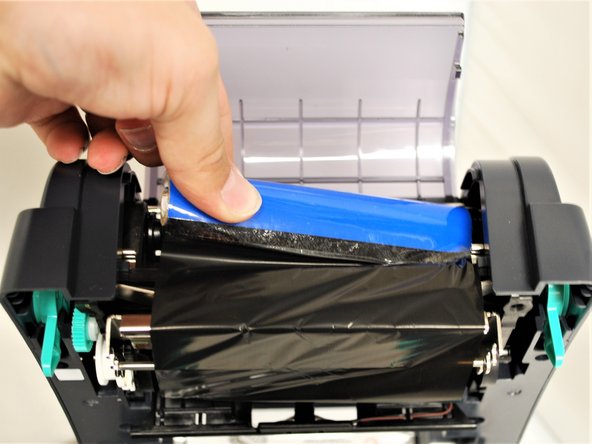
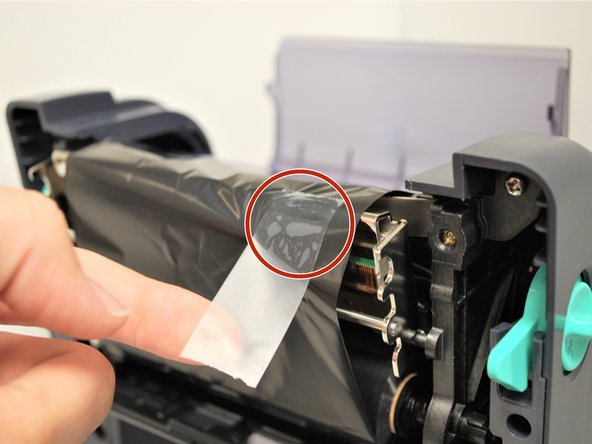
Now that the ribbon is mounted, pull on the plastic tab to unwrap the ribbon.
-
It will unwrap from the bottom, as shown in Image 1.
-
If it unwraps from the top, take the ribbon off and repeat the last step with it mounted in the other way.
-
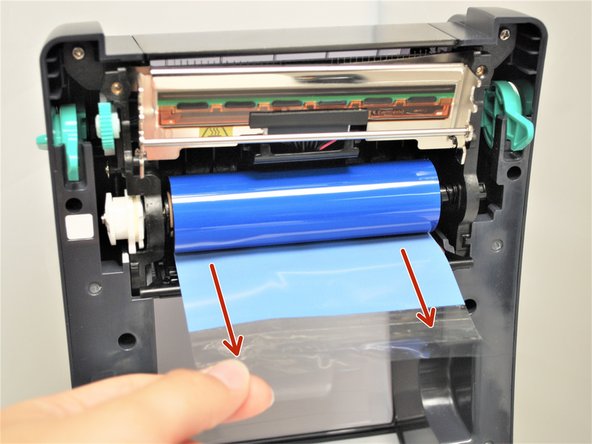
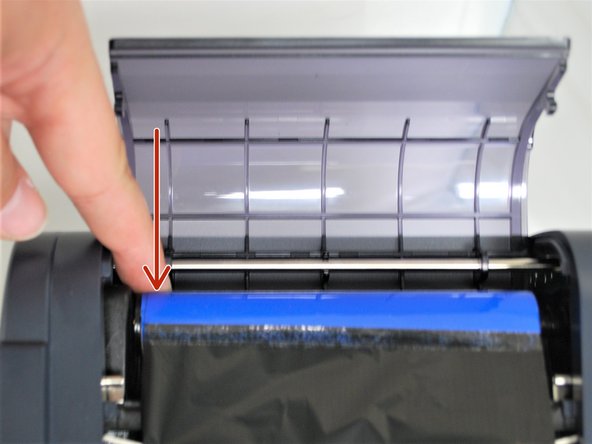
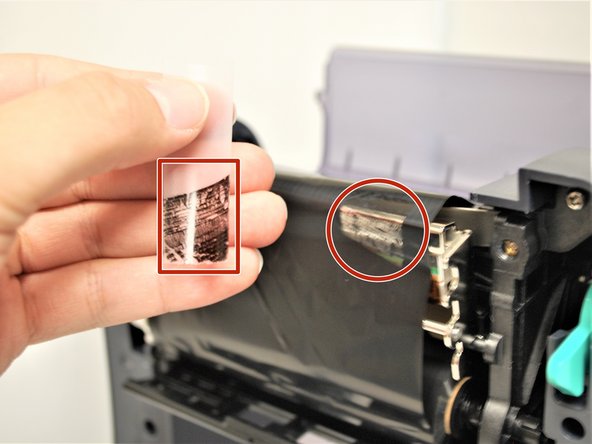
Begin wrapping the plastic tab around the core, it will adhere to it.
-
Continue wrapping the ribbon around the core until you begin to see the black ink, as shown in Image 3.
-
-
-
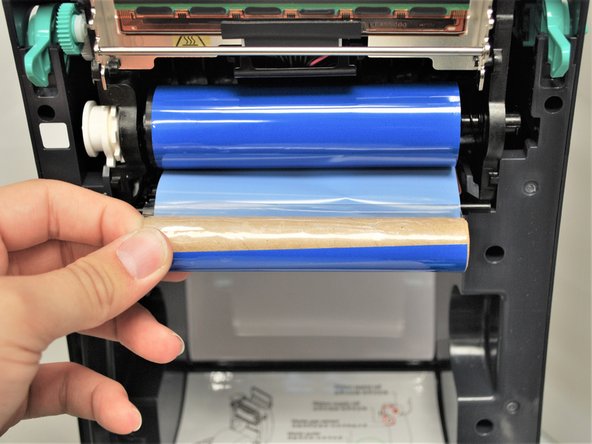
Much like loading the ribbon, load the core on the right first into the spring loaded holder.
-
While holding it to the right, out the core into the holder on the left to hold it in place.
-
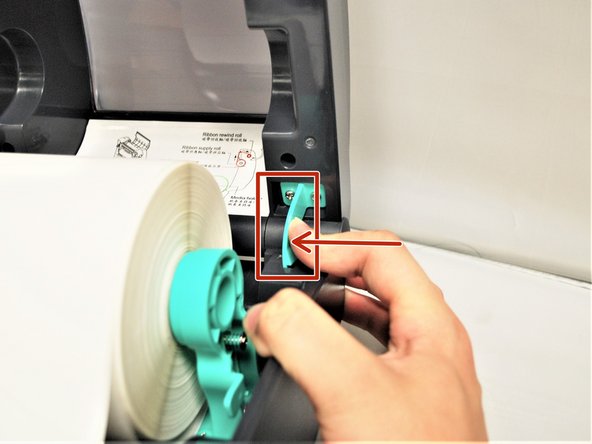
Once the core is secure, use the Ribbon Rewind Gear to remove any slack from the ribbon loaded into the printer
-
To use the gear, turn it upwards.
-
-
-
Test the orientation of the ribbon:
-
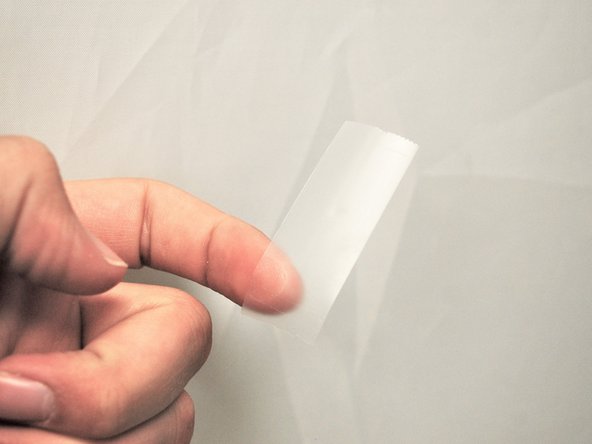
Get a piece of regular tape.
-
Put the piece of tape on the ribbon.
-
Remove the piece of tape.
-
If there is ink on the tape and ink came off the ribbon, the ribbon is facing the correct direction. If there is no ink, repeat Step 6 with the ribbon facing the correct direction.
-
-
-
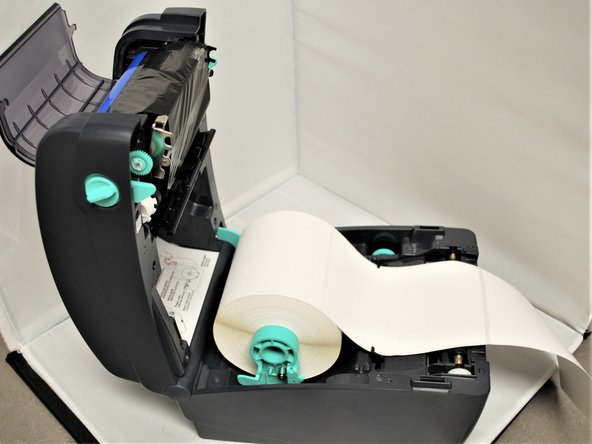
Check the path of the labels and ribbon. It should look like the first picture here.
-
Close the ribbon access cover
-
-
-
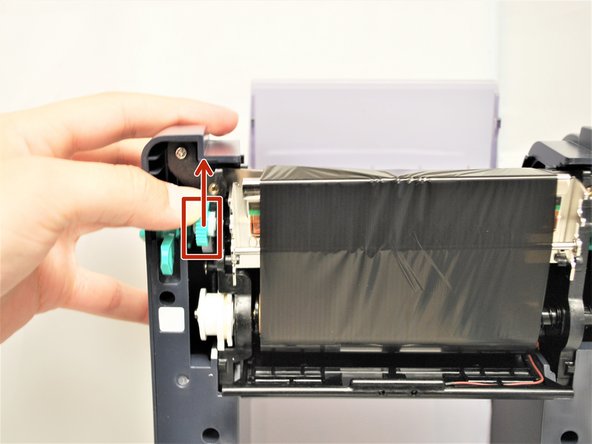
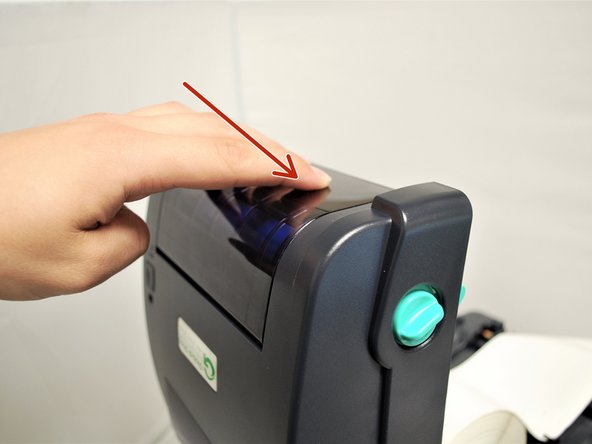
Before you close the printer cover, you MUST move the Top Cover Support tab at the back out of the way.
-
Be VERY careful to not force the cover shut or break the support. If the tab breaks, the cover won't hold open.
-
In the back right of the printer, push the green Top Cover Support in.
-
While pressing on the support, carefully close the printer and remove your finger as you shut the Top Cover
-
Press down on the top of the printer so it 'clicks' shut.
-