Introduction
How to load Thermal Transfer Labels and Ribbons in your Global Shop industrial printer.
-
-
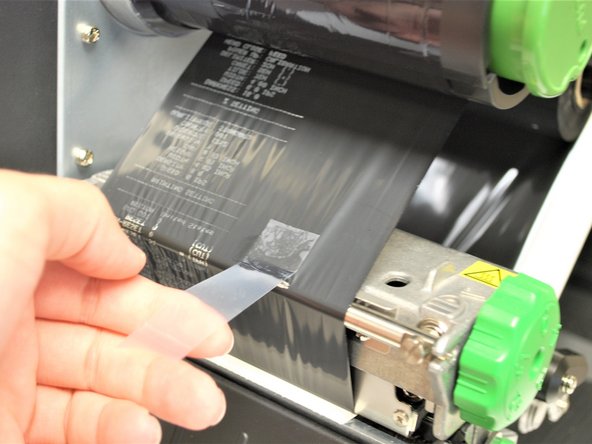
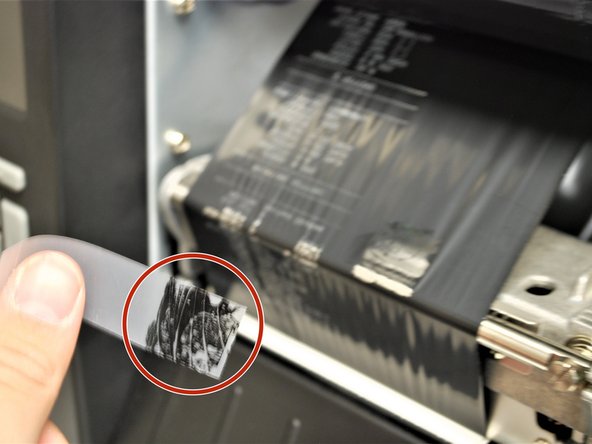
Direct transfer labels will show a grey mark if you scrape your thumbnail along it, while thermal transfer will not. Make sure the labels you are using are of the Thermal Transfer variety.
-
In the first picture, the Direct Transfer labels (with the grey mark) are on the right. You want the Thermal Transfer labels on the left, which won't show a dark mark if scratched with your thumbnail.
-
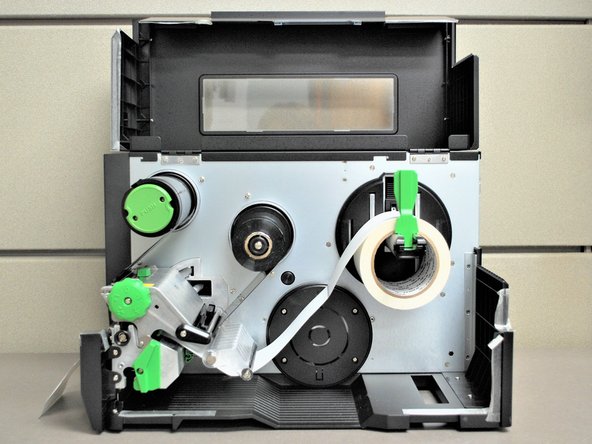
Lift the cover all the way open, until it's resting on the top of the printer.
-
-
-
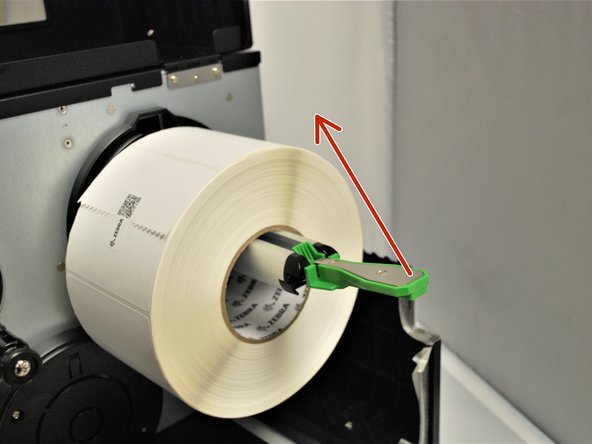
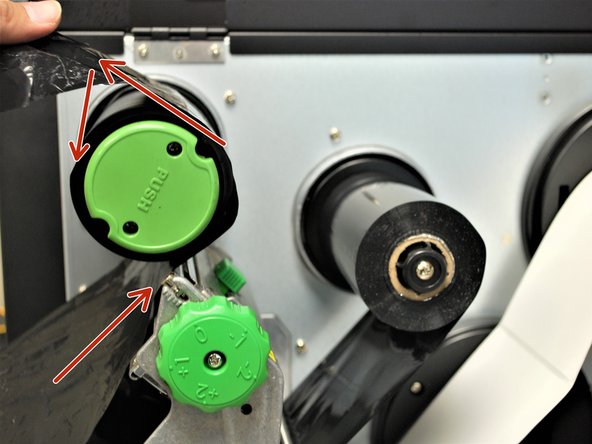
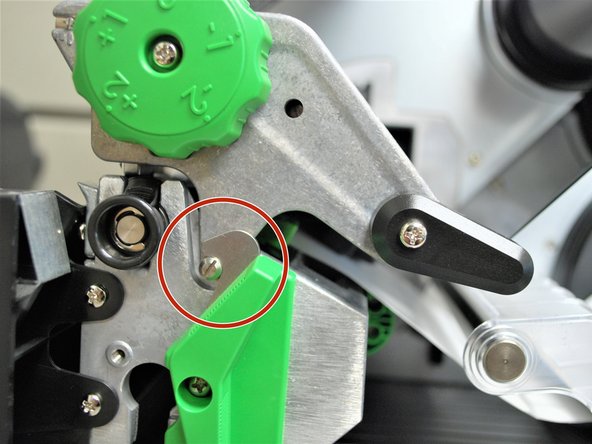
Locate the green label roll guard pictured and pull away from the printer.
-
Be sure to grab this by the bottom of the guard to help pull it with ease.
-
Fold down the label roll guard away from the printer.
-
-
-
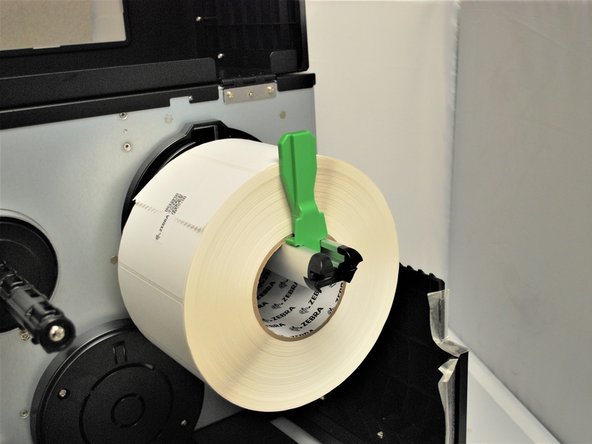
Place the roll of labels on the label supply spindle, so that they unroll from the top
-
Fold the label roll guard back up.
-
Press the label roll guard against the side of the roll.
-
Be sure to press this by the bottom of the guard to help push it with ease.
-
-
-
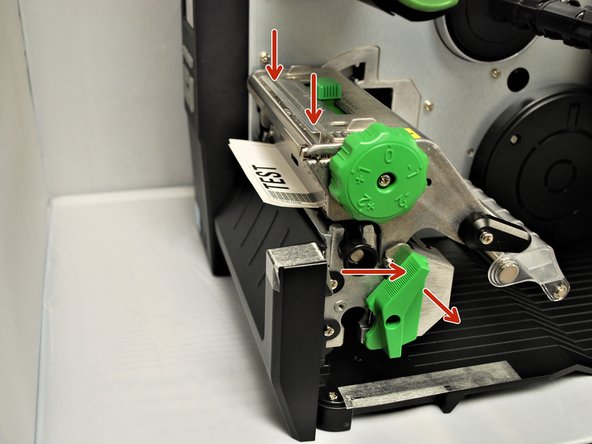
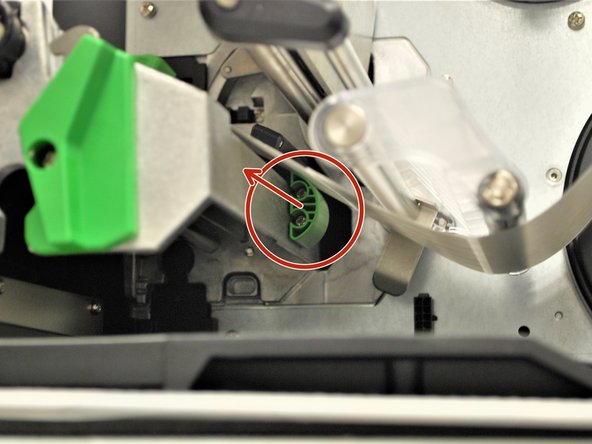
With one hand, press down on the top of the printhead.
-
With the other hand, rotate the green print head release lever clockwise.
-
Remove your hand from the printhead and the printhead should now be able to be lifted up.
-
-
-
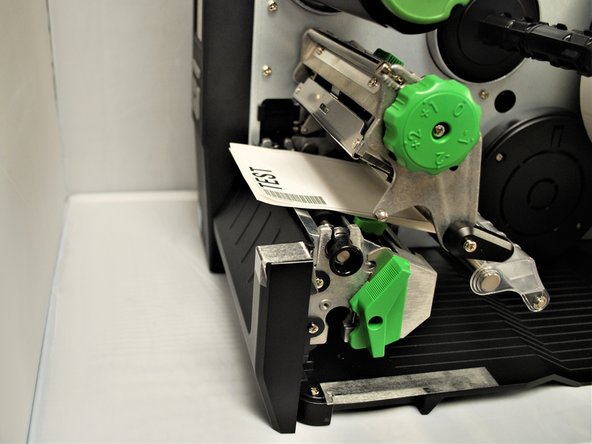
Feed the labels under the damper roller (1st picture).
-
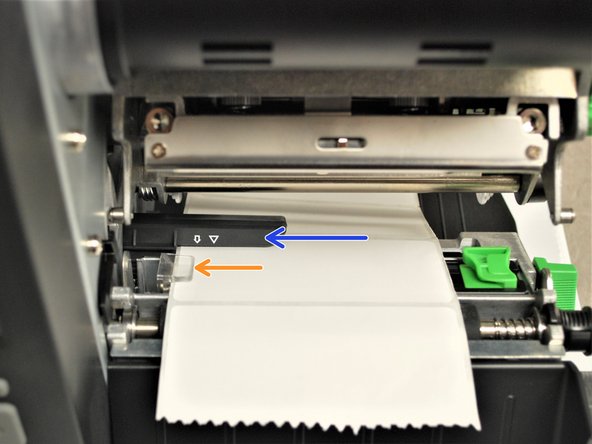
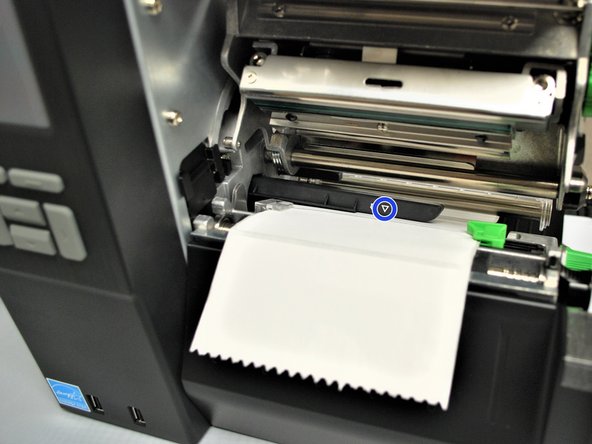
Feed the labels through/under the black ribbon sensor (blue arrow in the picture) and clear label guide (orange arrow in picture).
-
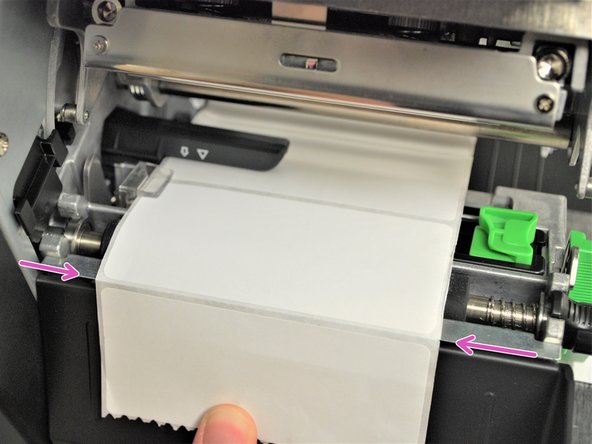
Pull through until the leading edge of one label is even with the tear-off edge (pink arrows).
-
The length of the label shown may vary from your own. Be sure to pull it through to a distance equivalent to one label to the first tear-off edge.
-
-
-
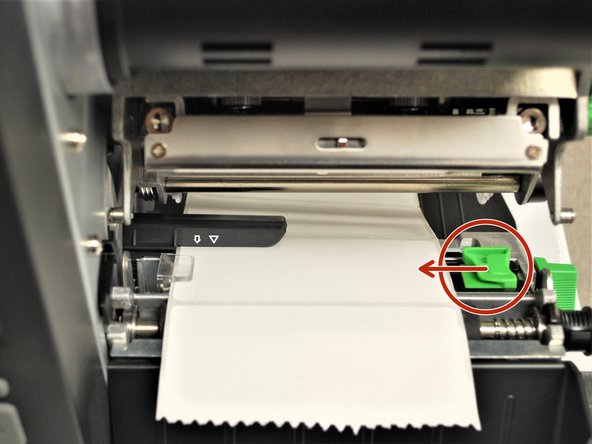
Make sure the far edge of the label roll lines up with the clear label guide.
-
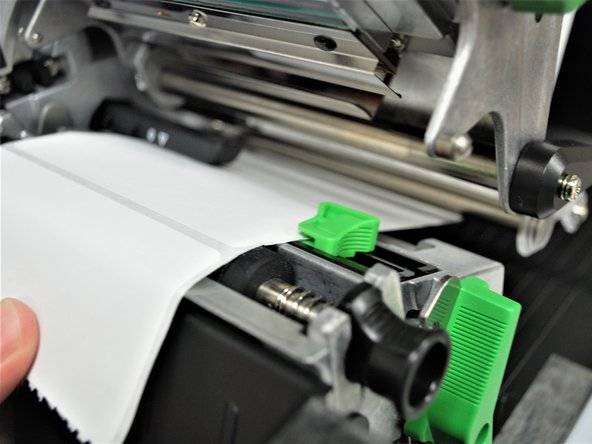
Slide the green front label guide forward until it fits against the close edge of the labels.
-
These guides keep the labels running straight, so it's important to make sure they're not so tight they stop the labels from coming out smoothly.
-
-
-
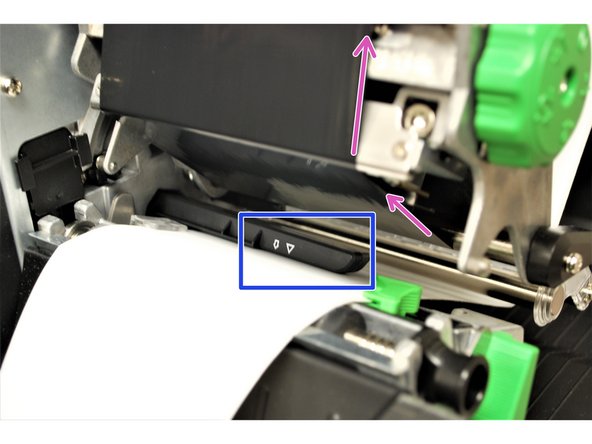
Use the green tab (first picture) underneath the damper roller to adjust the ribbon sensor.
-
The gap sensor (shown as ▽) on the ribbon sensor (shown with a blue circle in the 2nd picture) should be approximately centered on the label.
-
The gap sensor marking indicates the position of the sensor the printer uses to calibrate, so it's important to make sure it's in the right place.
-
-
-
Place the roll of ribbon on the ribbon supply spindle - the black plastic spindle located a little bit above and behind the print head.
-
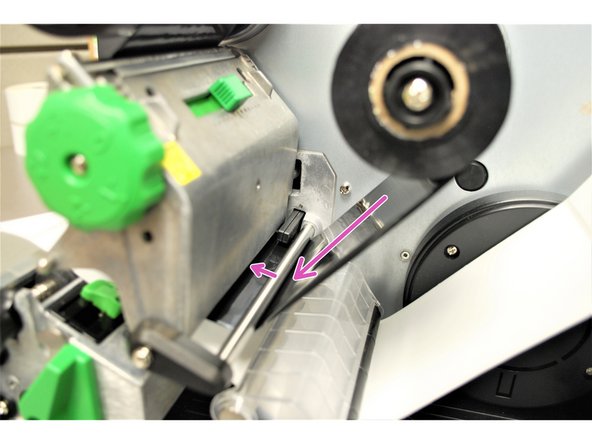
Identify the Ribbon Sensor located behind the printhead (shown by the orange box in Image 2).
-
Feed the Ribbon through the Ribbon Sensor following the purple arrows in Image 3.
-
-
-
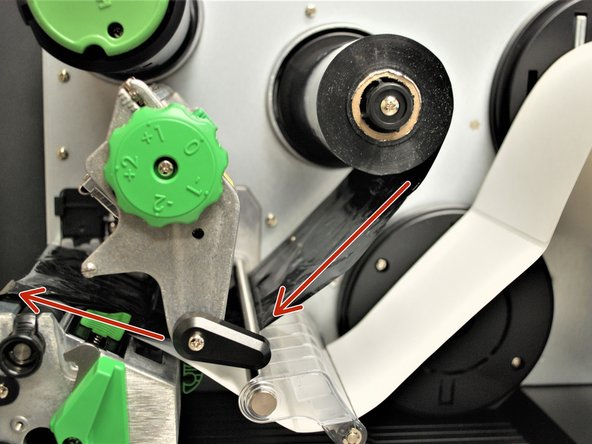
Feed the ribbon under the printhead and out to the front, making sure to feed it above the media sensor (the black clip on the bottom of the printhead, shown by the blue box).
-
The path of the ribbon is shown by the pink arrows.
-
-
-
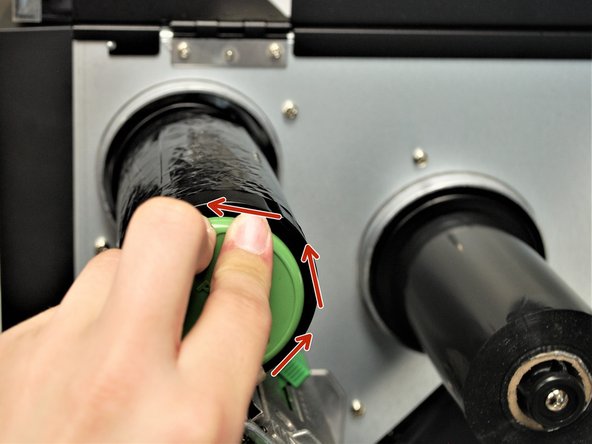
Wrap the ribbon around the rewind spindle.
-
While keeping the ribbon on the rewind spindle. push and hold the green button that says "PUSH" on the spindle.
-
While holding the green 'PUSH' button, rotate the whole spindle counter-clock wise until the ribbon is taut.
-
-
-
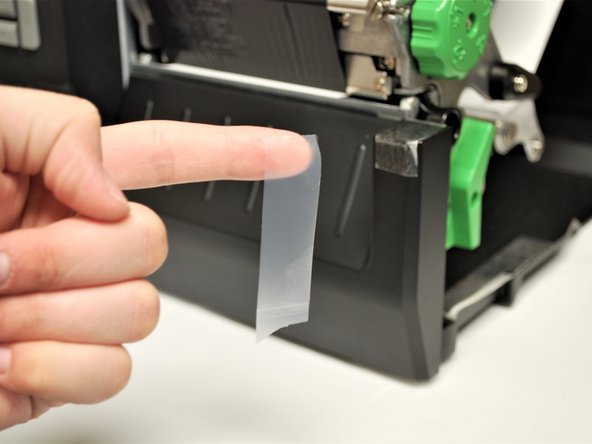
Test the orientation of the ribbon:
-
Get a piece of regular tape.
-
Put the piece of tape on the ribbon.
-
Remove the piece of tape.
-
If there is ink on the tape and ink came off the ribbon, the ribbon is facing the correct direction. If there is no ink, repeat Step 4 with the ribbon facing the correct direction.
-
-
-
Close the printhead by pressing down firmly on top until you hear a 'click,' making sure that the green print head release lever is latched closed.
-
Close the cover on the printer.
-
-
-
Press the "Feed" button, to make sure the labels line up with the tear-off edge when they eject.
-
If they don't, open the printer, release and lift the printhead, and pull the labels forward until they line up. as shown in Step 6 Image 3
-
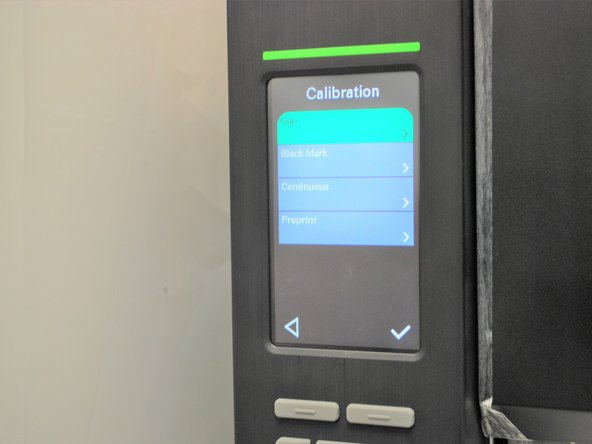
On the printer screen, select "Calibrate," and then "GAP."
-
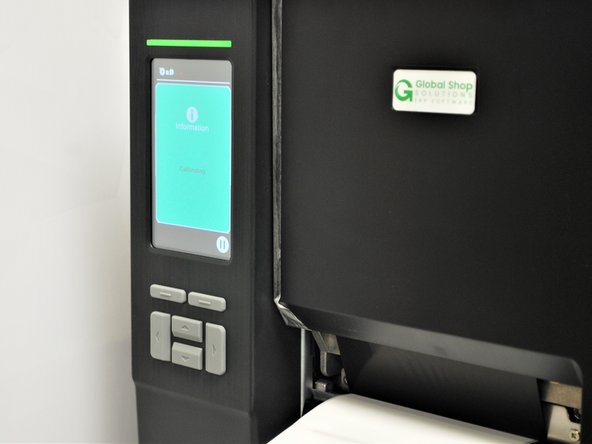
The printer will now self-calibrate; several blank labels will be printed in the process.
-