Introduction
Establish wired USB connection from printer to computer and have the printer plugged in and turned on before starting.
Keep in mind you are changing the name of the printer and the IP. Start to think about what you will want these to be.
This guide sets up a wired and a wireless IP for this printer. Technically, only one is required, but we recommend setting it up both ways just in case one connection stops working.
On the Global Shop industrial barcode printer, built-in wireless connectivity is optional. If you did not purchase this option, then you only need to worry about the wired method.
Click HERE to download the Diagnostic Tool needed for the wired method.
Click HERE to download the GSS Wireless Printer Setup Utility needed for the wireless method.
-
-
Make sure your printer is connected to your computer via a USB cable.
-
Download the Diagnostic Tool using the link provided.
-
-
Once downloaded, find the file and right click it. You want to "Run as Administrator."
-
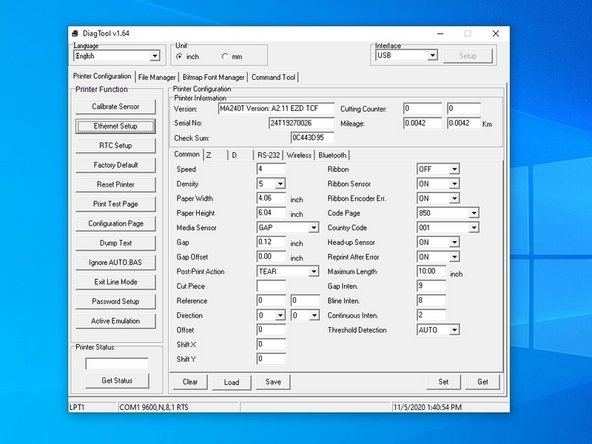
When the application opens, all fields should populate.
-
If fields DO NOT populate, stop here and do not continue. Check to make sure the USB connection is secure and you are running this application as an administrator. If fields populate, then continue on to the next step.
-
-
-
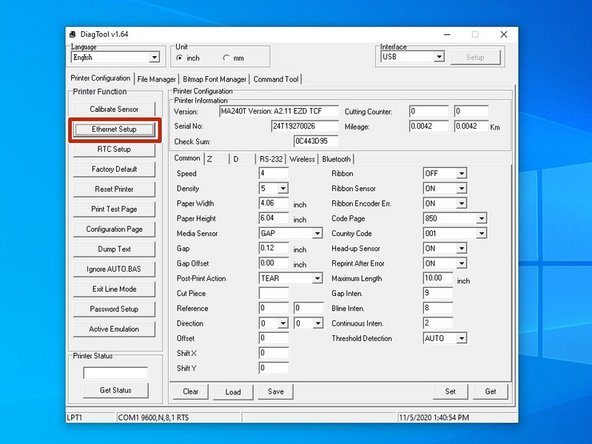
Go to the "Ethernet Setup" function on the left of the application.
-
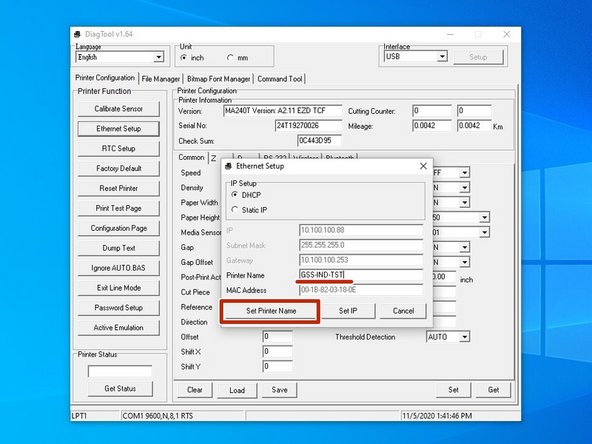
Set the printer's name to anything you want that's simple and easily understood.
-
For example, I set mine to GSS-PTR-TST for Global Shop Solutions Printer Test.
-
Click on "Set Printer Name" in the bottom left corner of the pop-up.
-
After you click "Set Printer Name," the printer will restart. This is normal.
-
-
-
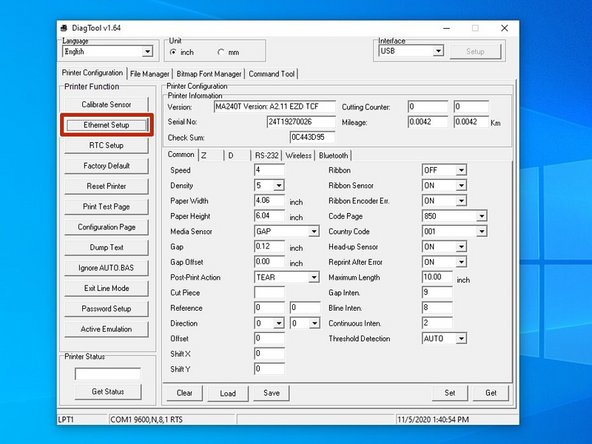
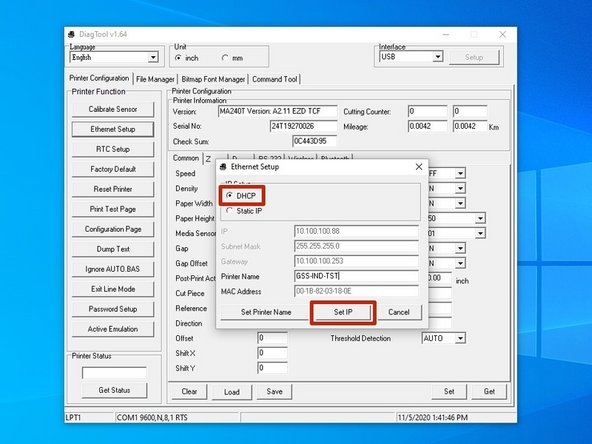
Go to the "Ethernet Setup" function on the left of the application.
-
Under "IP Setup," change it from "DHCP" to "Static IP."
-
You can now change the IP to whatever you desire it to be where it asks for the IP.
-
Once your new IP is set, click "Set IP" at the bottom of the pop-up.
-
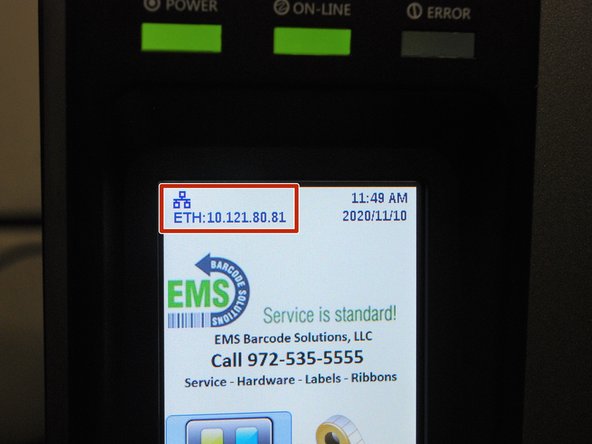
''After you click "Set IP," the printer will restart. This is normal. If the IP has been set properly, it should now display the IP address on the front screen.
-
-
-
This step is optional, and only possible if WiFi capability was purchased with your printer. If not, you can skip this portion of the guide.
-
Download the GSS Wireless Printer Setting Utility using the link provided.
-
-
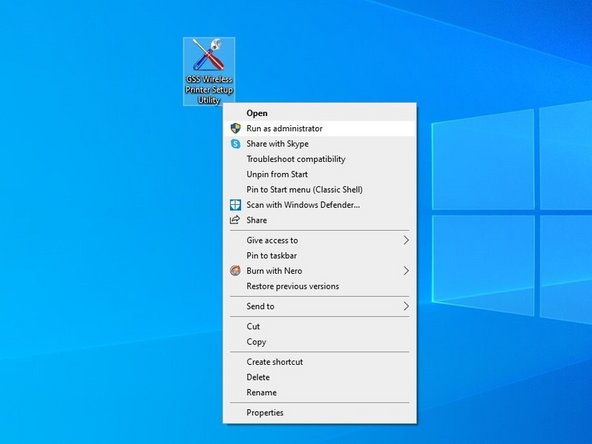
When downloaded, find the file and right click it. You want to "Run as Administrator."
-
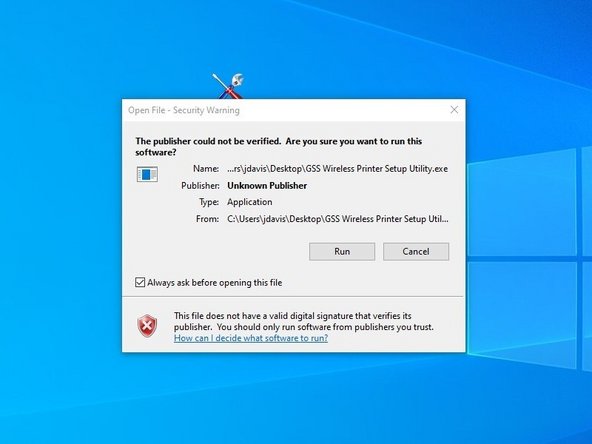
If a Security Warning pops up, select "Run."
-
Check the printer connected via USB - it should display the name you set in Step 2.
-
Select "Printer Configuration."
-
-
-
These photos are temporary. Your screen may look slightly different than here.
-
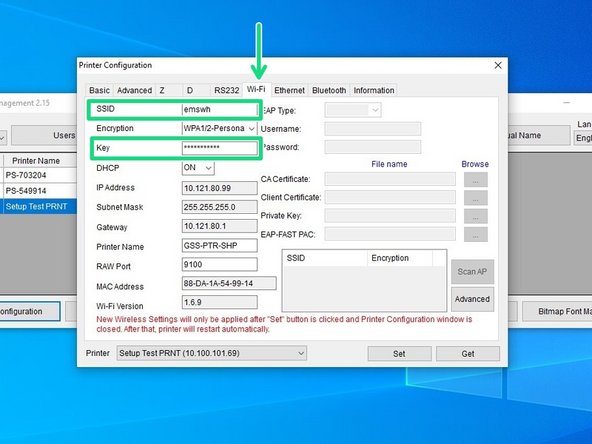
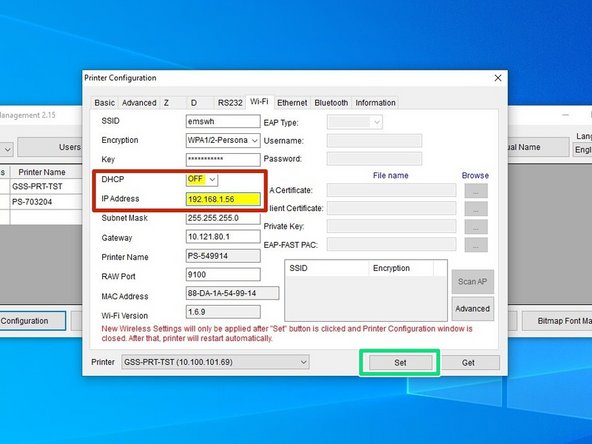
Go to the "Wi-Fi" tab.
-
Enter the name of your Wi-Fi under "SSID" and the password to your Wi-Fi under "Key."
-
Leave DHCP enabled to allow the program to establish an IP and configure network settings.
-
Hit the "Set" button in the bottom right of the pop-up and close out of the program completely to update this information.
-
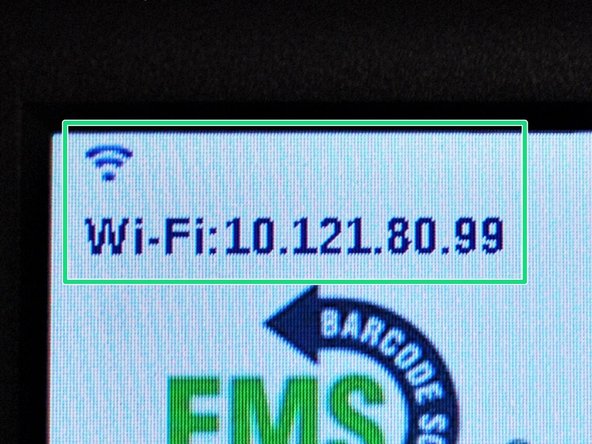
After you click "Set" and close the window, the printer will restart. This is normal. Once it has, after ~30 seconds a prompt should appear on the home screen that says "WiFi" and shows the automatically assigned IP address.
-
-
-
Repeat the last 3 parts of Step 5.
-
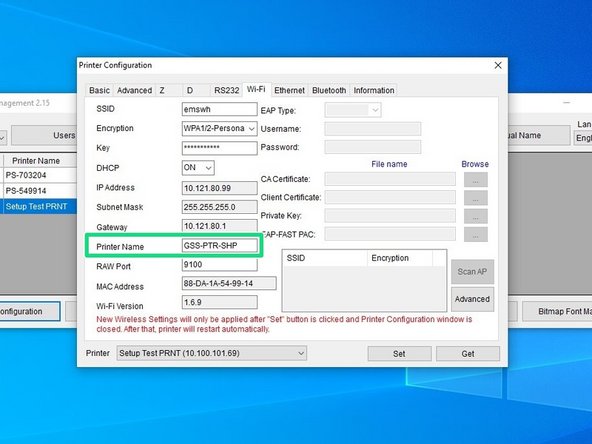
Go to the "Wi-Fi" tab.
-
Set the printer's name to anything you want that's simple and easily understood. It doesn't have to be the same as the previous, and using different names to differentiate them might be useful.
-
For example, I set mine to GSS-PTR-SHIP for Global Shop Solutions Printer for Shipping.
-
Hit the "Set" button in the bottom right of the pop-up and close out of the program completely to update this information.
-
After you click "Set ," the printer will restart. This is normal.
-
-
-
This step is optional. If your system admin wants a specific IP set, they can tell you which one.
-
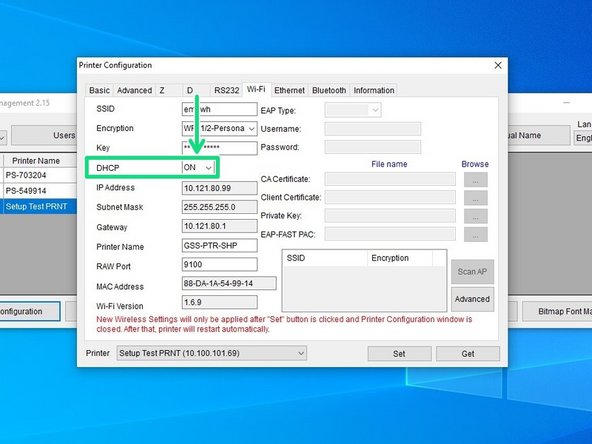
Repeat the last 3 parts of Step 1, and then go to the "Wi-Fi" tab.
-
Turn DHCP off.
-
You can now change the IP to whatever you desire it to be where it asks for the IP.
-
Make sure the IP you assign here is DIFFERENT to the one you assigned for the wired connection.
-
After you change your IP, hit "Set" in the bottom right and close out of the program completely.
-
After you click "Set," the printer will restart. This is normal. Once it has restarted, wait about a minute and check the display. It should have a prompt on the top left that says "Wi-Fi" with your new IP.
-