
Introduction
Download the drivers here.
This is a 2 part guide. The first part is for installing the driver when the printer is plugged directly in the computer with a USB cable. The second part is for installing if the printer is only connected to the computer through the network (via ethernet, WiFi, etc.). You only need to install the drivers once, so you only need to do one method. The first method is slightly easier.
MA240T
Tools
No tools specified.
Parts
-
-
If installing while connected to the printer by a USB cable, go to step 2.
-
If installing while connected to the printer over the network, go to step 9.
-
-
-
Before running the driver program, please make sure you have connected the printer using the provided USB cable.
-
After downloading the driver program, open the program and choose "Run".
-
Review the EULA. If you agree to the terms of use, select the appropriate response and press the "Next" button.
-
-
-
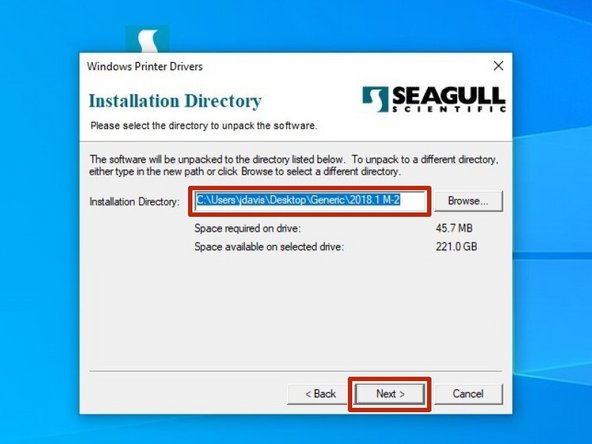
Review the Installation Destination and change the location, if desired. Click "Next" to continue.
-
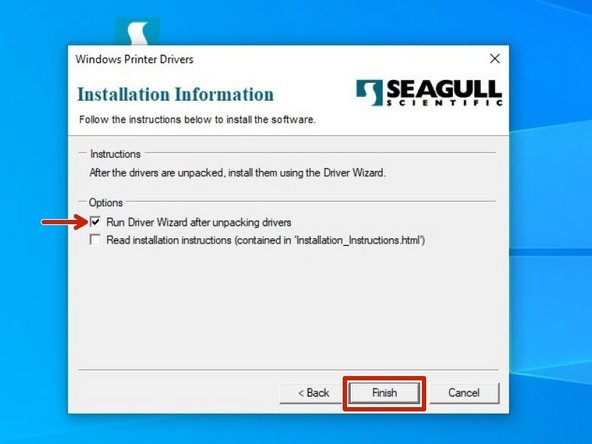
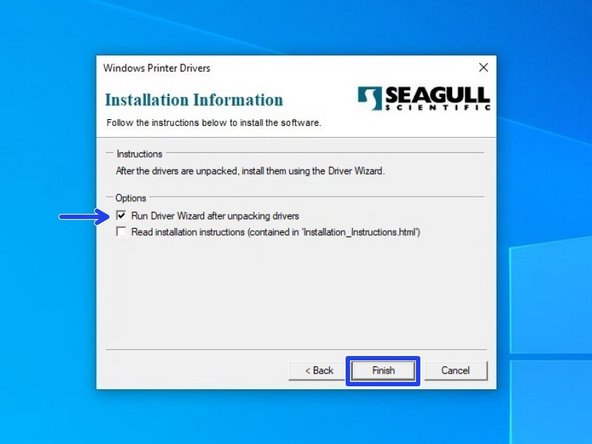
Select the option to "Run Driver Wizard..;" the second option is not necessary. Then click "Finish."
-
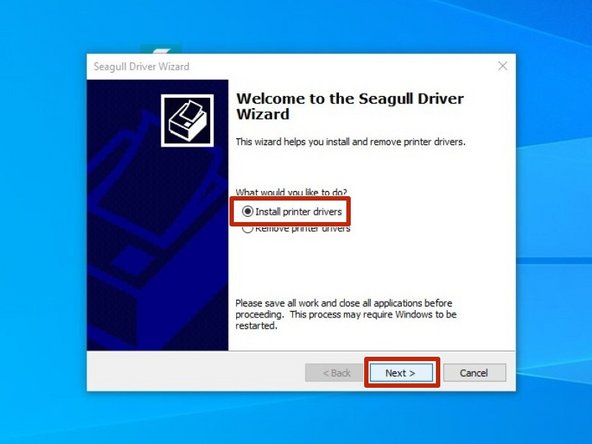
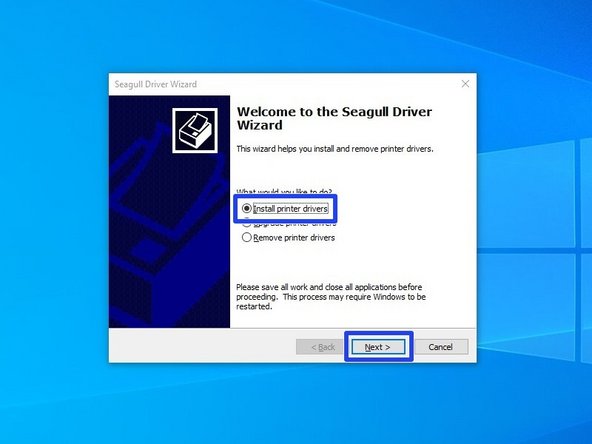
After installation is completed, the Driver Wizard will start. Choose the option to "Install printer drivers" and click "Next".
-
-
-
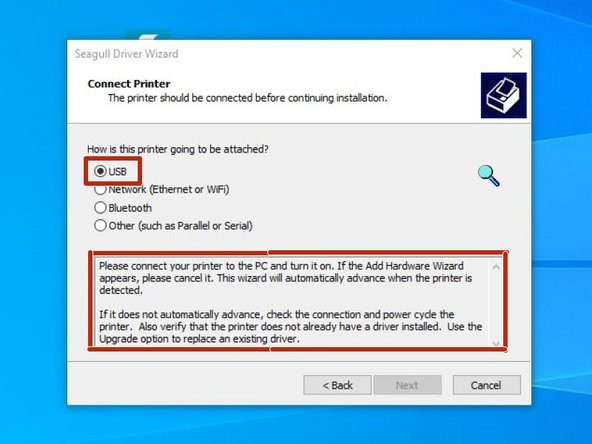
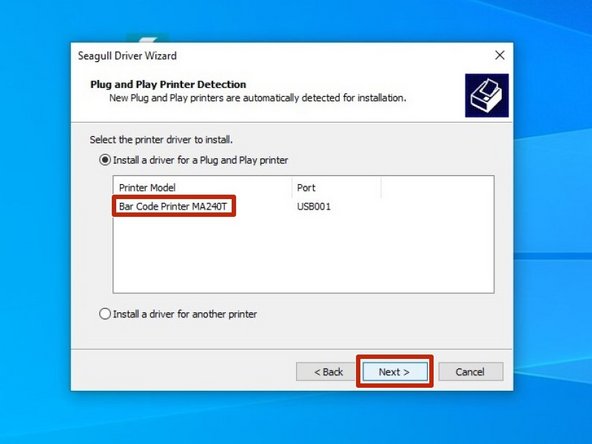
If you have connected the printer via USB prior to downloading and installing the drivers, your computer will automatically detect the printer. Click "Next" to continue.
-
If you did not connect the printer prior to installation, close the program, connect the printer, and re run the program from the location where you saved it to restart the process.
-
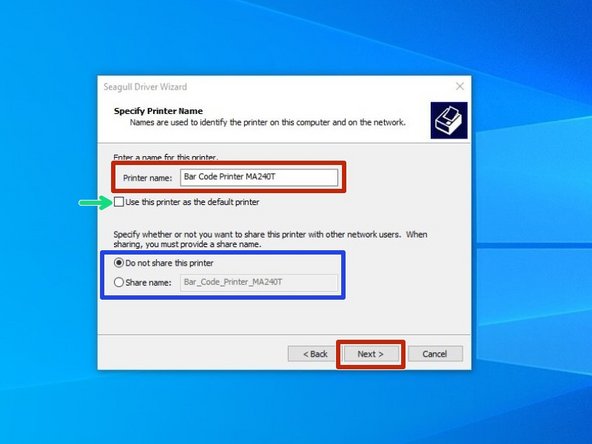
There are some options that can be customized before installation of the driver. You can choose to rename the printer (Red), check it as the Default printer (Green), and make it visible on your network through your computer with a specific name (Blue.) Hit "Next" when you've made your choices.
-
For standard setup, we recommend against setting the printer as default printer or sharing it. If you know what you're doing, adjust the settings as you please.
-
-
-
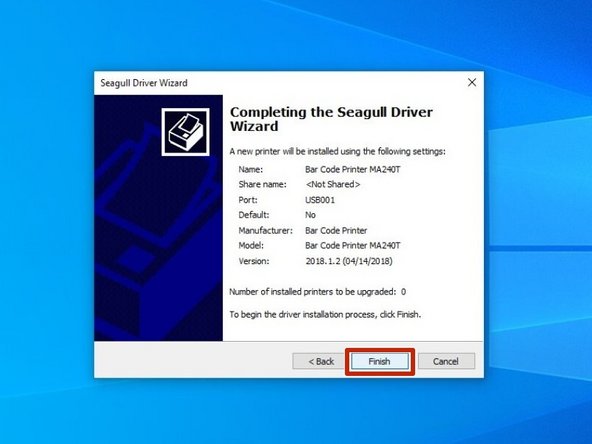
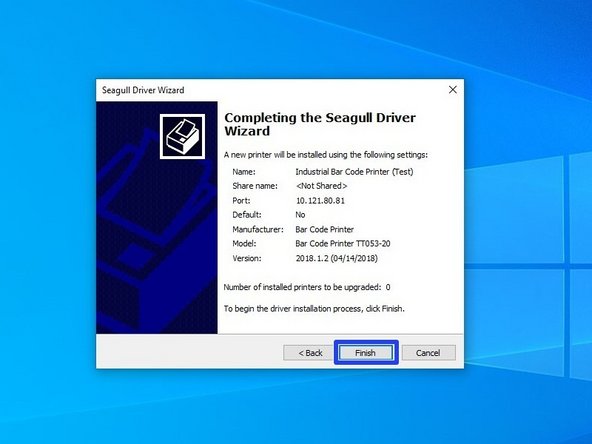
Confirm setup option before pressing "Finish." If anything needs to be changed, press "Back."
-
You may receive a security warn from Windows. If you do, choose the option to "Install".
-
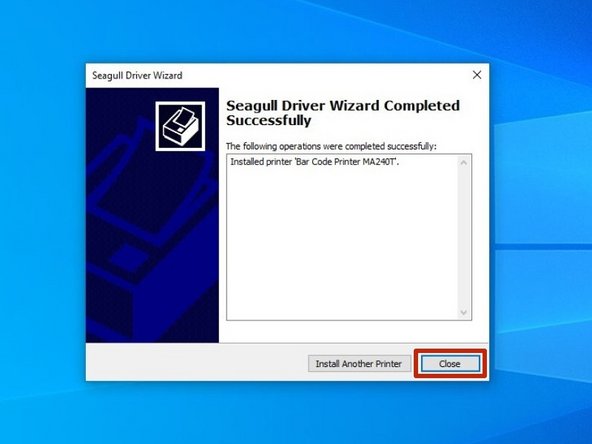
Once installation has been completed, hit the "Close" button.
-
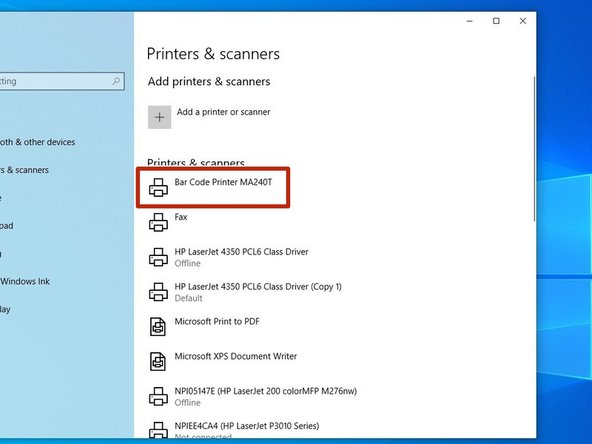
Check your Devices and Printers in Windows to verify setup has been completed.
-
-
-
These next few steps (6 to 8) show how to set up a network port for the printer. If you're setting it up via USB because you haven't connected the printer to the network/assigned the printer an IP, you'll need to do that first. See the previous guide, "5 - Assigning an IP" to see how.
-
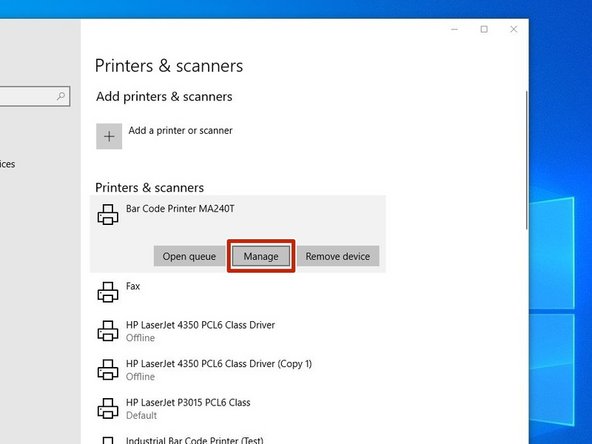
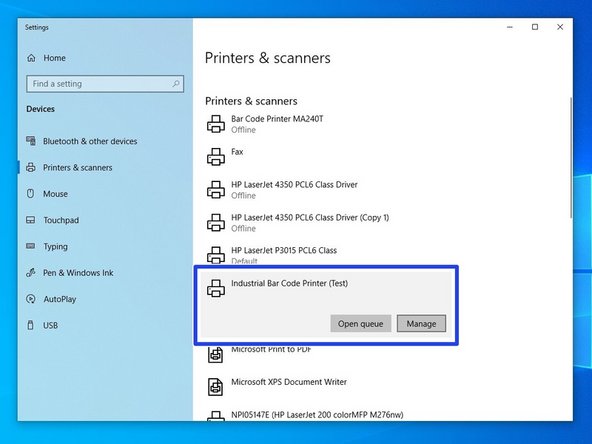
Select the printer you just installed, and click "Manage."
-
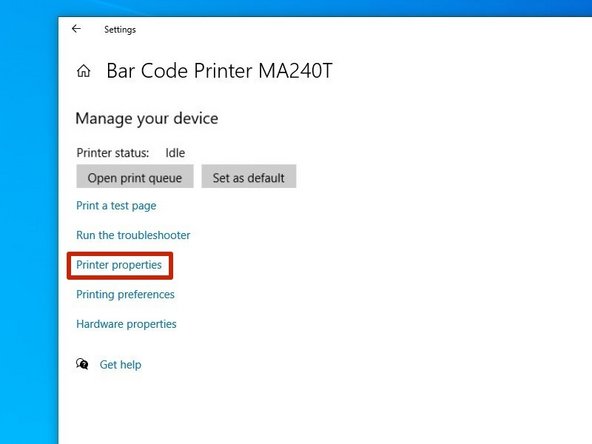
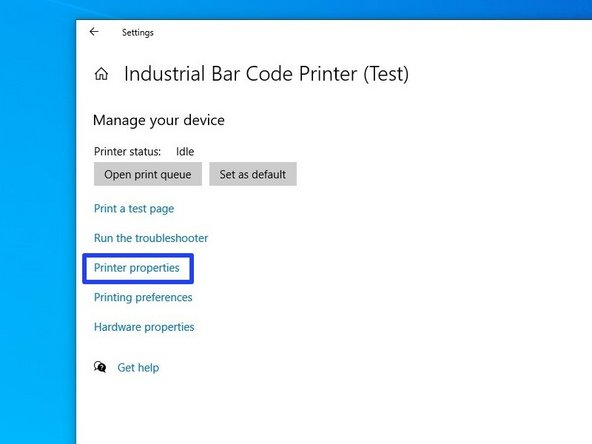
In the next window, choose "Printer Properties."
-
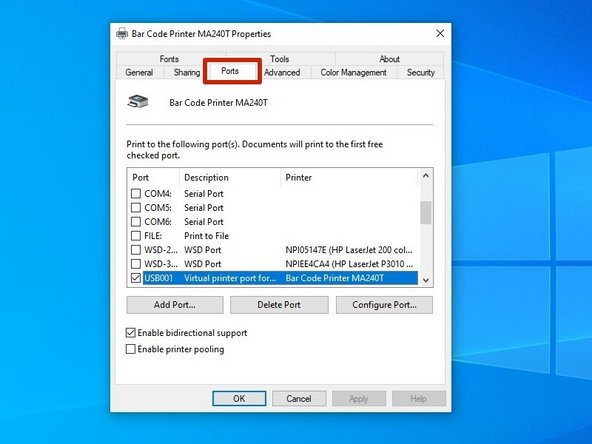
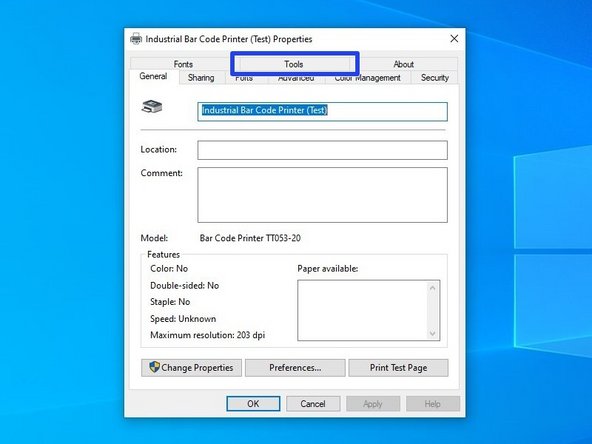
At the top of this new menu, click "Ports."
-
-
-
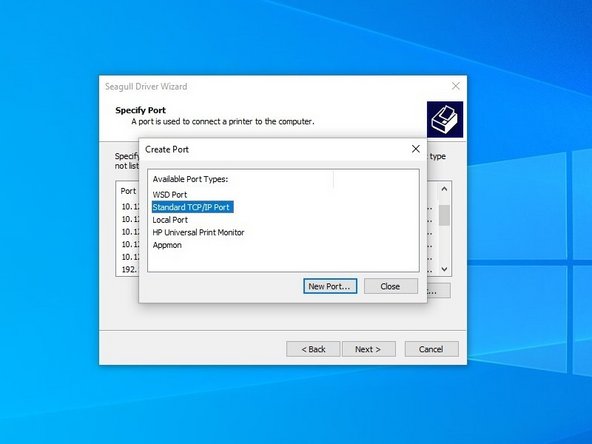
Click "Add Port," and then in the new window, select "Standard TCP/IP Port." Click "New Port" to confirm the selection.
-
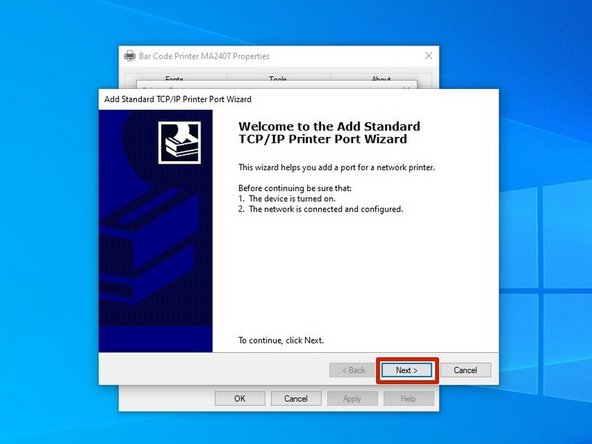
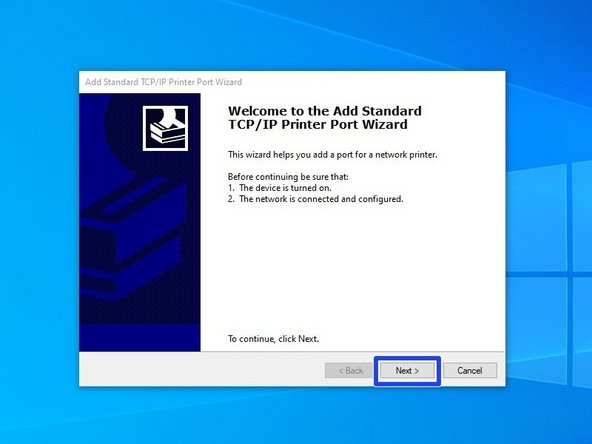
This should open a port wizard; hit "Next."
-
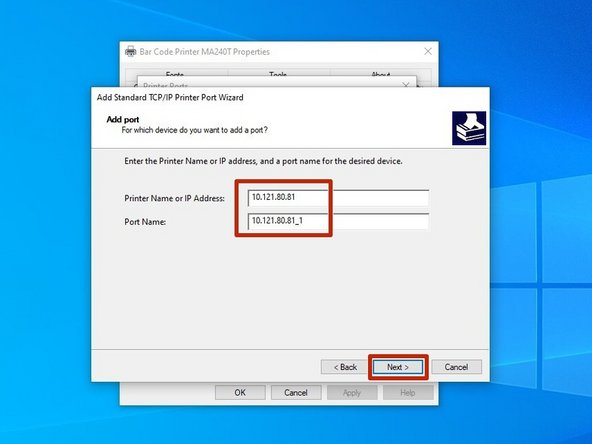
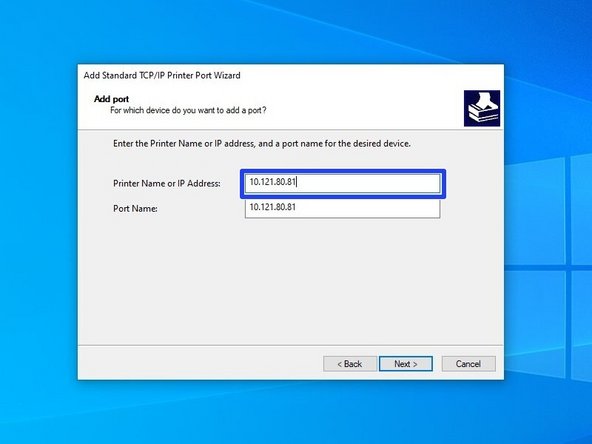
In the Printer Name box, type the printer's IP address. It should automatically fill in the same number in the field for Port Name. Hit "Next."
-
-
-
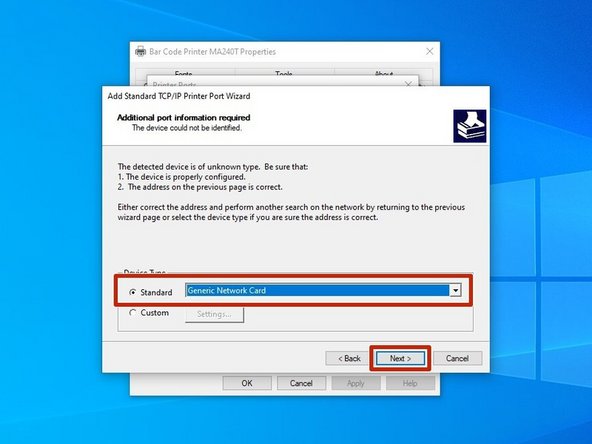
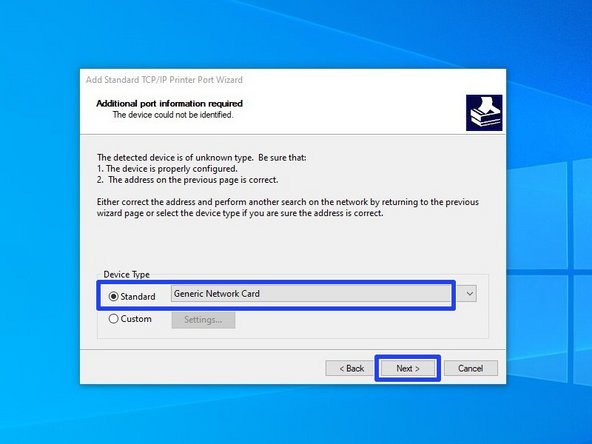
Make sure "Generic Network Card" is selected; hit "Next."
-
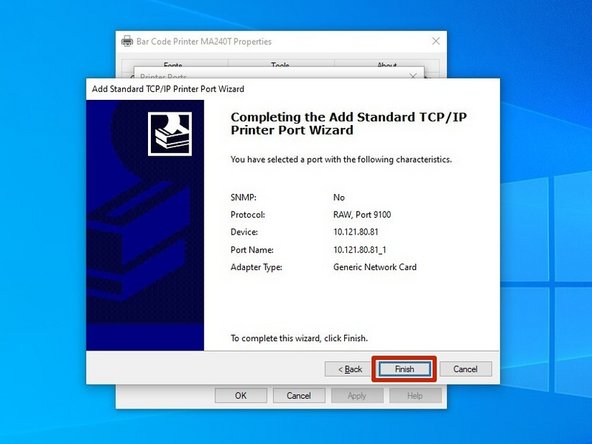
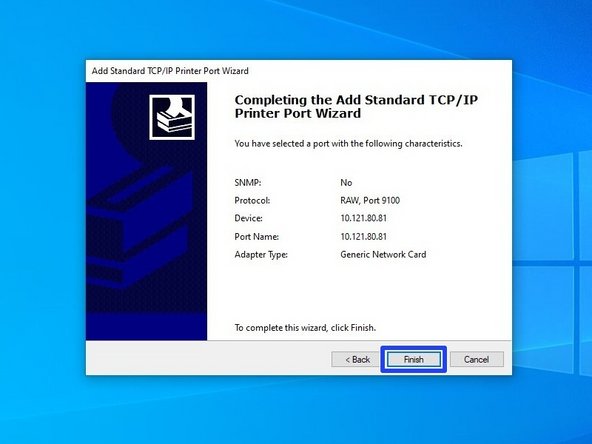
Review the settings, and hit "Finish" to confirm and make the port.
-
-
-
Steps 6-9 explain how to install drivers for a printer connected to your PC over the network. If your printer is plugged directly into your computer, please see steps 2-5.
-
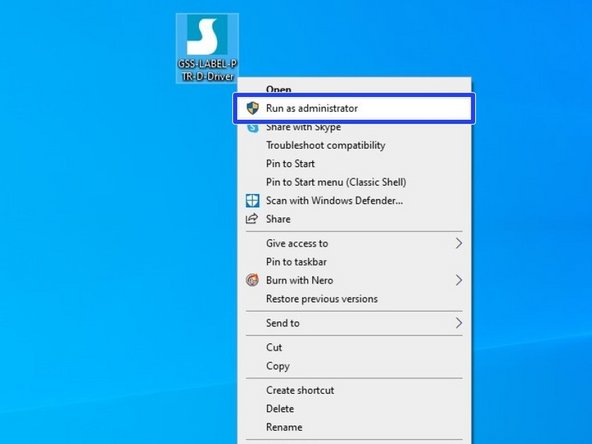
After downloading the driver program, right click the program and click "Run as Administrator."
-
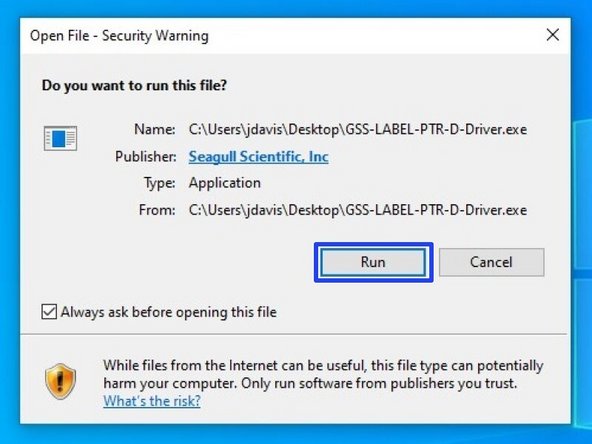
If the Security Warning window opens, click "Run" to run the program.
-
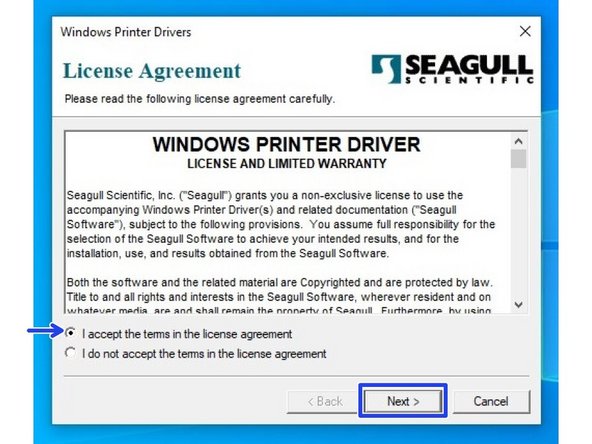
Review the EULA. If you agree to the terms of use, select the appropriate response and press the "Next" button.
-
-
-
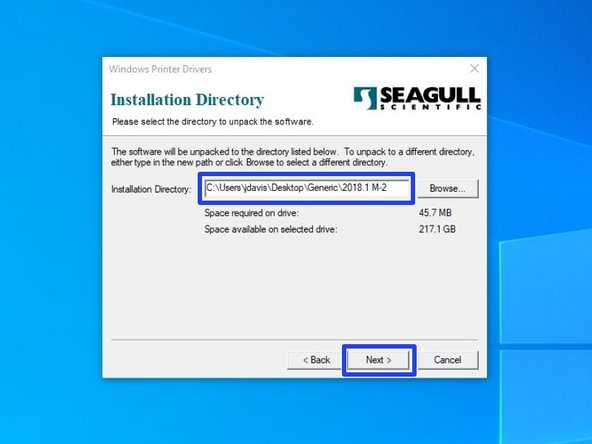
Review the Installation Destination and charge the location, if desired. Click "Next" to continue.
-
Choose to "Run Driver Wizard..."; the second option is unnecessary. Then select "Finish."
-
After installation is completed, the Driver Wizard will start. Choose the option to "Install printer drivers" and click "Next."
-
-
-
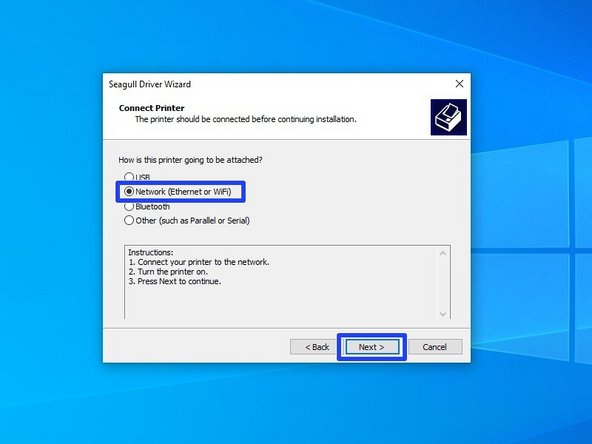
Choose the option for "Network (Ethernet or WiFi)," then click the "Next" button.
-
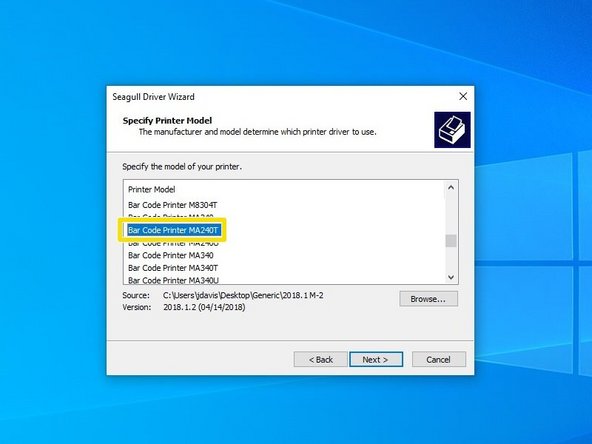
Scroll down until you fin the Printer Model "Bar Code Printer MA240T." Click on it, and while it is highlighted, click the "Next" button.
-
Select the option to create a port.
-
-
-
Select "Standard ICP/IP Port," and then click "New Port."
-
Make sure the printer is turned on, connected to the network, and configured, then select "Next." If you've followed our other guides so far, you should be good.
-
For the IP Address, list the IP that you set for your printer (it will be displayed on the printer's screen).
-
-
-
Select the option for "Standard" device type, and from the dropdown select "Generic Network Card" - this is the built-in network card of the printer. Once it's selected, hit the "Next" button.
-
Review the selections, then hit "Finish."
-
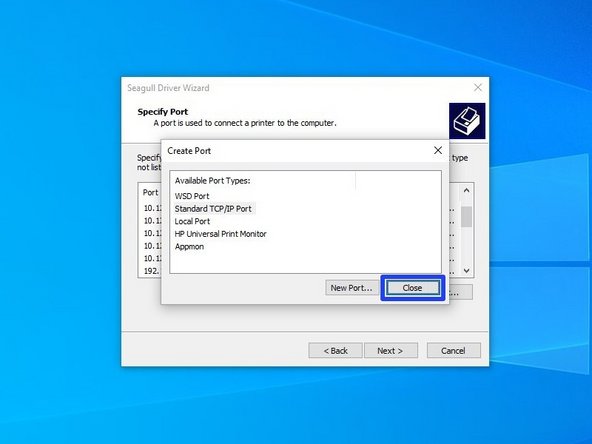
Once the wizard is done making the port and closes, click "Close" to close the "Create Port" window as well.
-
-
-
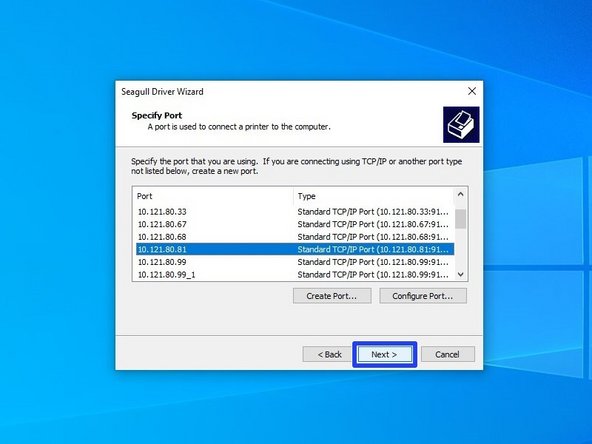
Select the new port you just made, and hit "Next."
-
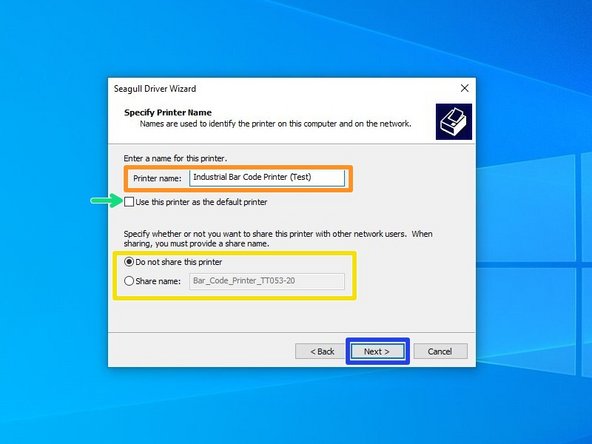
There are some options that can be customized before installation of the driver. You can choose to rename the printer (Orange), check it as the Default printer (Green), and make it visible on your network with a specific name (Yellow). Hit "Next" when you've made your choices.
-
For standard setup, we recommend against setting the printer as default printer or sharing it. If you know what you're doing, adjust the settings as you please.
-
Confirm setup option before pressing "Finish". If anything needs to be changed, press "Back".
-
You may receive a Security Warning from Windows. If you do, choose the option to "Install".
-
-
-
At this point, make sure to unplug any cables directly connecting the printer to the computer, so that they are only connected via the network. This to make sure that you can print through the port you just set up.
-
Open the "Printers & Scanners" menu. Click on the printer we just installed a port for.
-
Click on "Manage."
-
Click on "Printer Properties."
-
-
-
Click on the "Tools" tab at the top, then click on the "Print" option.
-
From the dropdown, select "Generic Print."
-
The printer should print a test sheet like the one pictured. If the test page has printed over the network, that means the port you set up is working. If the page doesn't print, go back through this guide and the previous guide (5 - Assigning an IP to your printer [Wired and Wireless]).
-


![The printer should print a test sheet like the one pictured. If the test page has printed over the network, that means the port you set up is working. If the page doesn't print, go back through this guide and the previous guide (5 - Assigning an IP to your printer [Wired and Wireless]).](https://d3t0tbmlie281e.cloudfront.net/igi/emsbarcode/CmEk1xMsQDrDcKwi.medium)