Introduction
For labels to be sent to this printer, the device will have to be connected to your network and be given an IP address. For the best results, this IP address should never be changed. To do that, if you are not IT, you will need to get the IT department involved for this step. There are two ways to set an IP address. The first way is through DHCP reservation, and the second is by assigning a static IP address.
DHCP reservation begins with an IP address being given to a device automatically. Then, the IT department can indefinitely reserve the IP & MAC addresses so that no other device, current or future, will ever be given that specific IP address.
A static IP can be given to you by the IT department, then manually typed into the printer. This method will also keep the IP address from ever being used for another device.
Both the Static and DHCP reservation methods will be covered in this guide, along with how to see the IP & MAC addresses.
-
-
Make sure the printer is connected via USB and Ethernet before powering the printer on. To see how to connect it via USB and Ethernet click HERE and to see how to confirm it's connection, click HERE.
-
Launch the GSS Certified Printer Tool software.
-
If you do not have it downloaded, download HERE.
-
Select "Add Printers" in GSS Certified Printer Tool if your printer is not yet connected. If you already have the printer added, continue to Step 2.
-
Make sure USB is selected by clicking the bullet point next to 'USB," shown by the orange box.
-
Select the drop down menu, shown by the blue box, to find and select 'GSS-LABEL-PTR-I'
-
If it does not show up, try selecting the 'refresh USB list' button shown by the pink arrow. If it still does not appear, try turning off the printer, waiting a moment for it to fully power off, then powering it back on and repeating this step.
-
Select 'OK.'
-
-
-
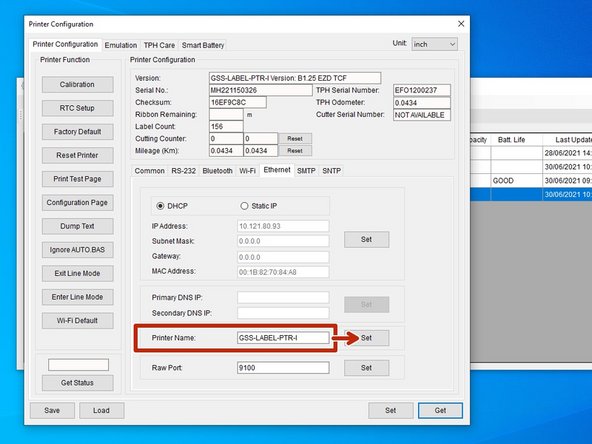
Double click the printer name, 'GSS-LABEL-PTR-I,' to open up the Printer Configuration Menu.
-
In the Printer Configuration Menu select the 'Ethernet' tab in this menu.
-
Click on 'Get' in the bottom right hand of the pop up, shown by the orange box.
-
The fields will now populate with information given from the printer, shown by the green box.
-
-
-
You may change the printer's ethernet name in this menu.
-
Set the printer's name to anything you want that's simple and easily understood. For example, GSS-PTR-TST for Global Shop Solutions Printer Test.
-
There is a character limit of 15 characters for the name. If there are more than 15 characters, the printer name will not be applied.
-
If you changed the name, apply this change by clicking 'Set' next to the 'Printer Name' text box.
-
After you click 'Set,' the printer will restart. This is normal.
-
-
-
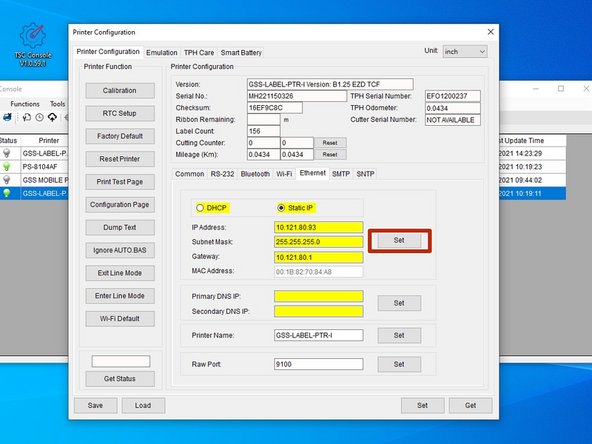
On the 'Ethernet' tab, click on 'Static IP.'
-
Refer to Steps 1 & 2 on how to get to the 'Ethernet' options if necessary.
-
You can now change the IP to whatever you need it the 'IP Address' text box shown by the green box in picture 2.
-
If IT gave you a static IP address, enter that number into the IP address box
-
Once you create your new IP, click 'Set' next to the 'IP Address' text box.
-
After you click 'Set,' the printer will restart. This is normal.
-
-
-
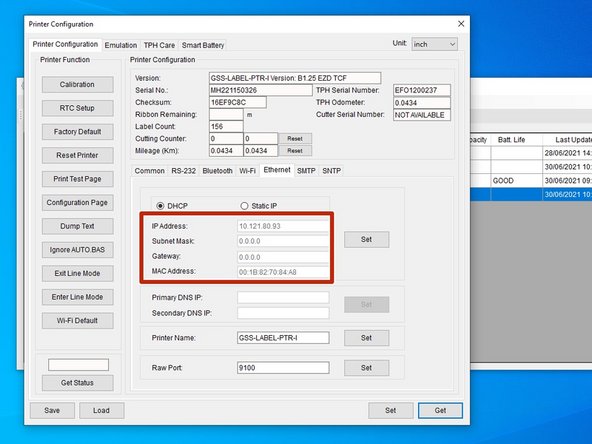
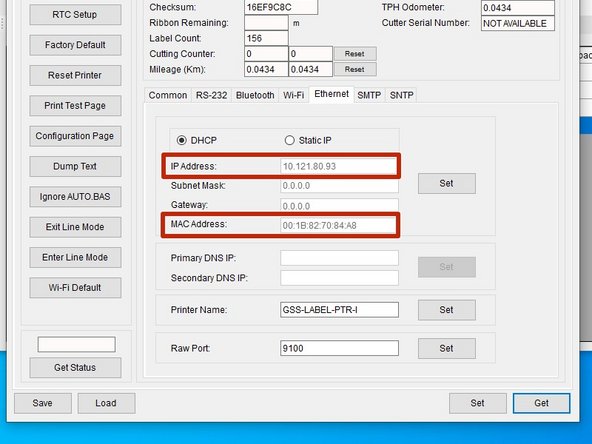
These two addresses are what IT needs for a DHCP Reservation.
-