-
-
Search for printers and scanners in the taskbar search bar.
-
Confirm that the selection looks like the first picture, and hit "Open."
-
Click on the printer you set up in the previous guides.
-
In this case, I named the printer "Industrial Bar Code Printer (Test)."
-
Select the "Manage" option.
-
Select the "Printer Properties" option.
-
-
-
Select the "Tools" tab at the top of the new window.
-
Click on the drop-down menu labeled "Print" in the "Printer" section.
-
Select "Generic Test" from the list of options.
-
This should print a test label, which should look like the example image.
-
If no page printed, check that the roll of labels is loaded correctly, and that the correct printing options are selected.
-
-
-
Launch the Diagnostic Tool software, which we installed earlier.
-
You can download it from HERE if necessary.
-
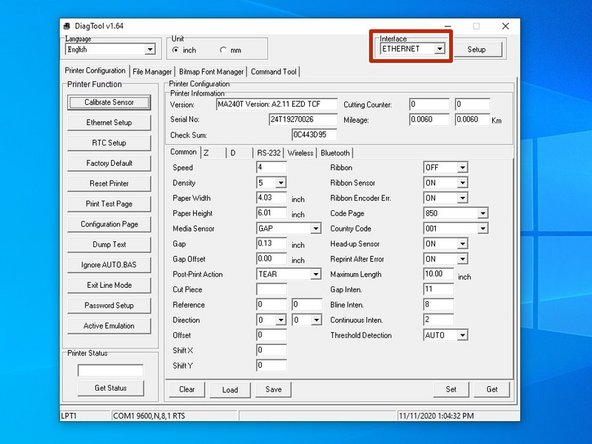
Select the correct interface and printer from the drop down menu at the top left of the image.
-
If your printer is connected by USB cable, then simply select the USB interface.
-
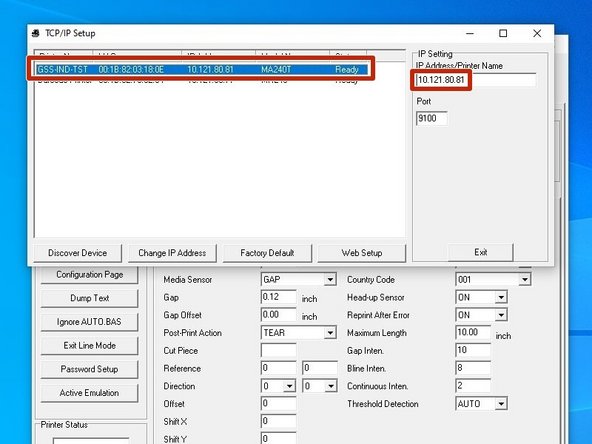
If your printer is connected over your network, then select the "ETHERNET" option. Select the printer with the correct IP (it should be displayed on the printer's display) and model name. Select the "Exit" button to confirm.
-
It's important to hit the "Exit" button - this is how you tell the program to lock in the selected printer. If you just close the window, the printer won't be selected.
-
-
-
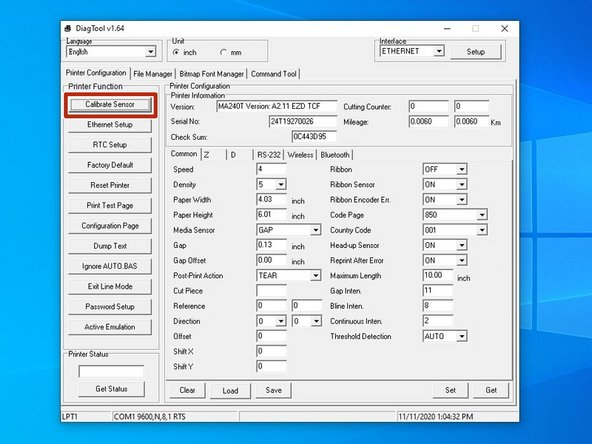
Once you have the printer selected, we'll calibrate it to make sure the settings are correct.
-
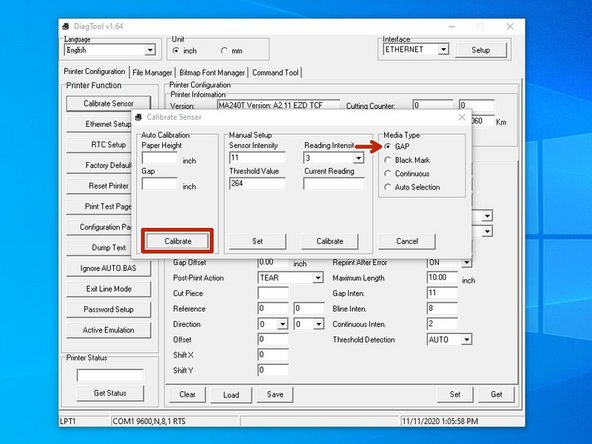
Select the "Calibrate Sensor" option at the top left. This will open a new window.
-
In the new window, make sure the "GAP" option is selected, and then hit the "Calibrate" button.
-
The printer will print several blank labels to calibrate. When it is done, hit the "Get" button in the lower right o the first window to update the fields.
-
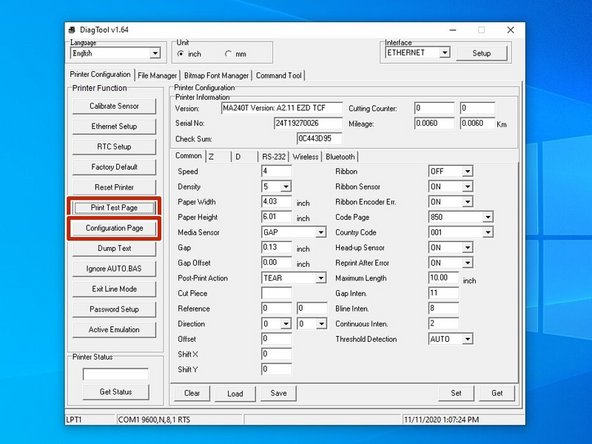
After the fields stop populating, verify that the fields under "Printer Configuration" match your setup.
-
For example, my printer is setup with 4 in. x 6 in. labels, so I make sure that the paper width and height are correct (within a few thousandths on a inch is good).
-
If the configurations are incorrect, please review the printer setup guides. If necessary, the printer can be reset, or set to factory default (options highlighted in red on the 1st photo).
-
-
-
Select the "Print Test Page" option. This will print a test page from the printer.
-
Once it's done printing, select the "Configuration Page." This will print a few pages of configuration settings.
-
Once the printer is done printing, verify that the pages look like the example images.
-
The config page is printed as two continuous pages - I separated them to fit them into frame.
-