-
-
If you are calibrating the printer via USB, click HERE to go to Step 2 and continue to Step 3.
-
If you are calibrating the printer via Ethernet, click HERE to go to Step 4 and continue to Step 5.
-
If you are calibrating the printer via Printer Screen, click HERE to go to Step 6.
-
Regardless of the way you calibrate, click HERE to read Step 7 to check your calibration.
-
-
-
Make sure the printer is connected via USB before powering the printer on. To see how to connect it via USB click HERE and to see how to confirm it's connection, click HERE.
-
Launch the GSS Certified Printer Tool software.
-
If you do not have it downloaded, download HERE.
-
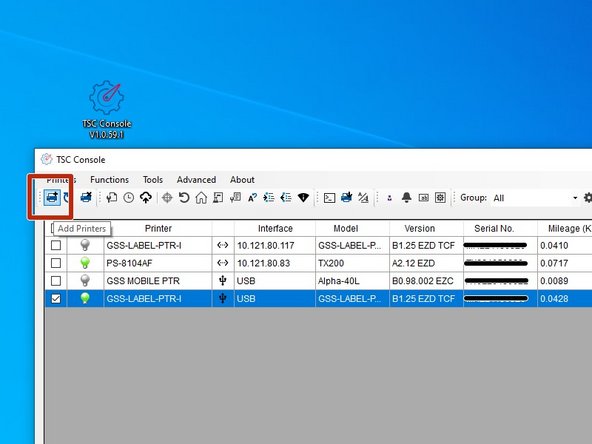
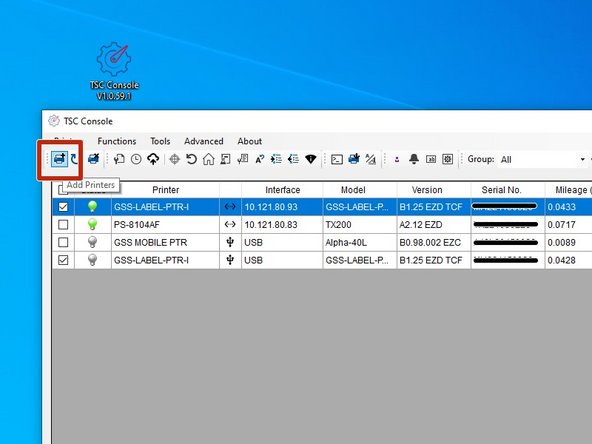
Select "Add Printers" in GSS Certified Printer Tool..
-
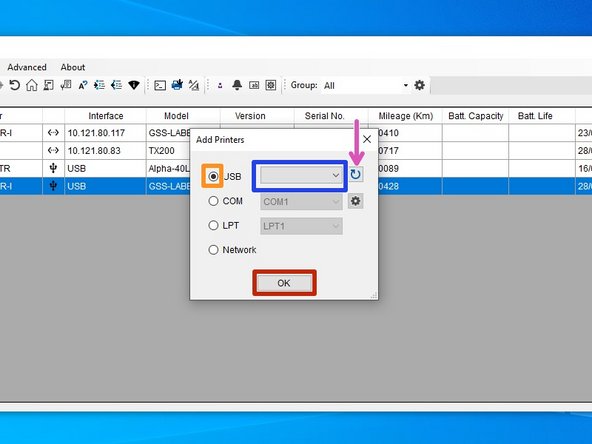
Make sure USB is selected by clicking the bullet point next to 'USB," shown by the orange box.
-
Select the drop down menu, shown by the blue box, to find and select 'GSS-LABEL-PTR-I'
-
If it does not show up, try selecting the 'refresh USB list' button shown by the pink arrow. If it still does not appear, try turning off the printer, waiting a moment for it to fully power off, then powering it back on and repeating this step.
-
Select 'OK.'
-
-
-
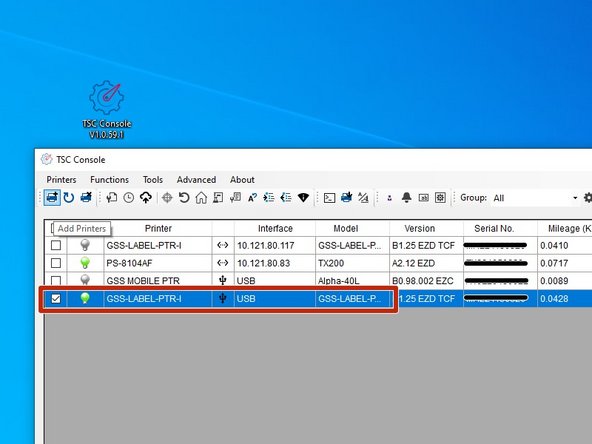
Now that the GSS Certified Printer Tool can read the printer, you should see the printer, 'GSS-LABEL-PTR-I,' like in image 1 of this step.
-
Double click the printer name, 'GSS-LABEL-PTR-I,' to open up the Printer Configuration Menu.
-
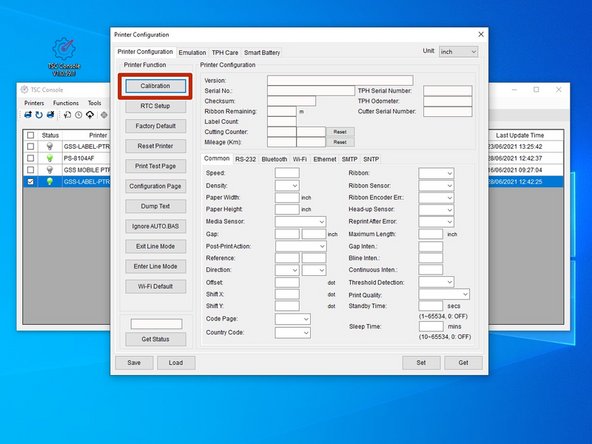
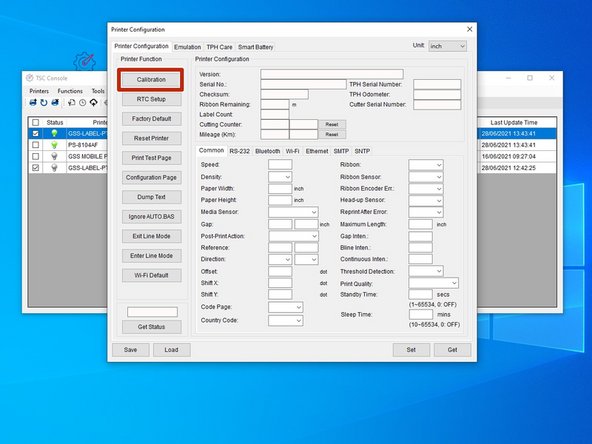
In the Printer Configuration Menu, select the 'Calibration' option under the 'Printer Function' table.
-
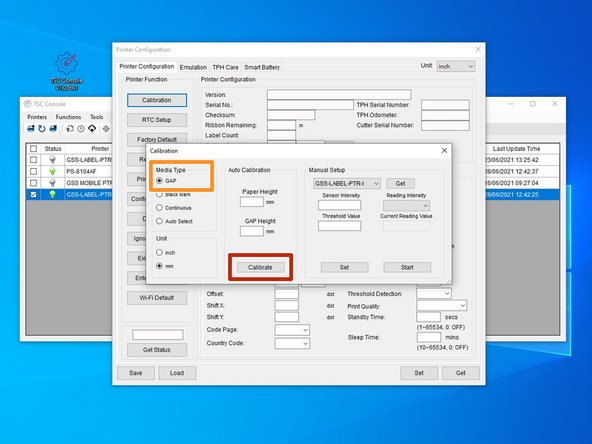
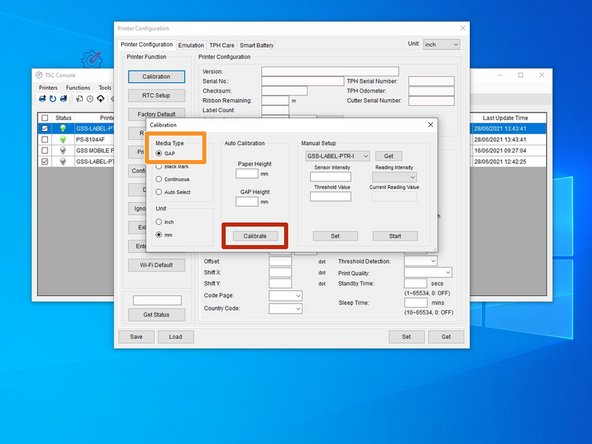
Confirm that 'GAP' is selected under the 'Media Type' table shown by the orange box. If it is not, select it now.
-
Select 'Calibrate.'
-
The printer should now start calibrating - in this process it will print a few blank labels.
-
-
-
Make sure the printer is connected to the network via Ethernet before powering the printer on. To see how to connect it to Ethernet, click HERE and to see how to confirm it's connection click HERE
-
Launch the GSS Certified Printer Tool software.
-
If you do not have it downloaded, download HERE.
-
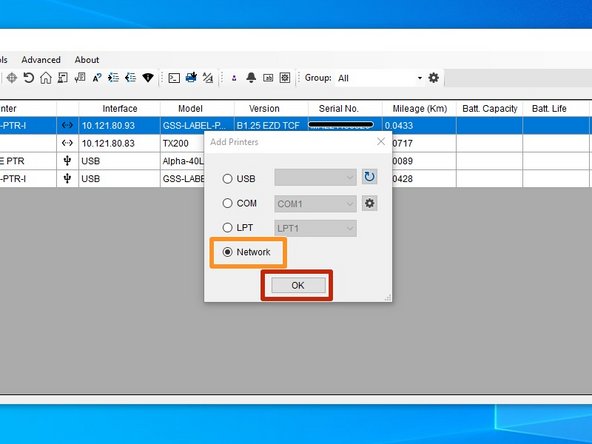
Select "Add Printers" in GSS Certified Printer Tool.
-
Make sure Network is selected by clicking the bullet point next to 'Network,' shown by the orange box, then select 'OK.'
-
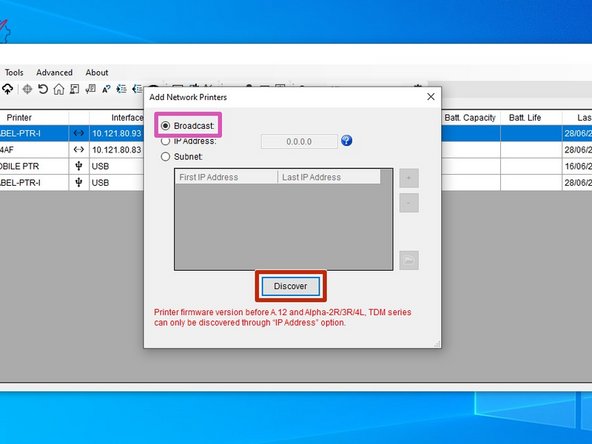
Confirm 'Broadcast' is selected, shown by the pink box then select 'Discover.'
-
It will then automatically add computers connected to your network, which should include the 'GSS-LABEL-PTR-I.'
-
If it says 'Add 0 printers' or the GSS-LABEL-PTR-I is not added as an option in the console, try turning off the printer, waiting a moment for it to fully power off, then powering it back on and repeating this step.
-
-
-
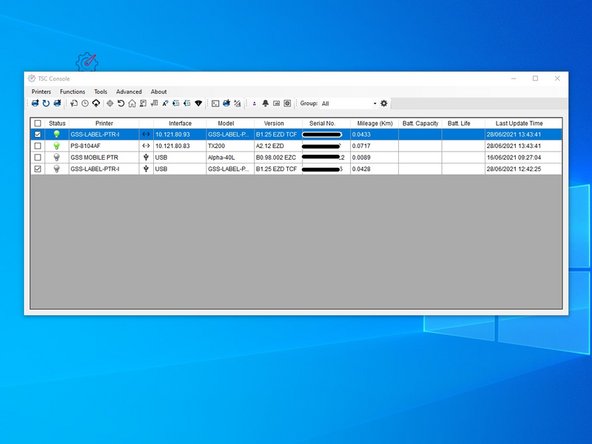
Now that the GSS Certified Printer Tool can read the printer, you should see the printer, 'GSS-LABEL-PTR-I,' like in image 1 of this step.
-
Double click the printer name, 'GSS-LABEL-PTR-I,' to open up the Printer Configuration Menu.
-
In the Printer Configuration Menu, select the 'Calibration' option under the 'Printer Function' table.
-
Confirm that 'GAP' is selected under the 'Media Type' table shown by the orange box. If it is not, select it now.
-
Select 'Calibrate.'
-
The printer should now start calibrating - in this process it will print a few blank labels.
-
-
-
Make sure the printer is connected to power and turned on.
-
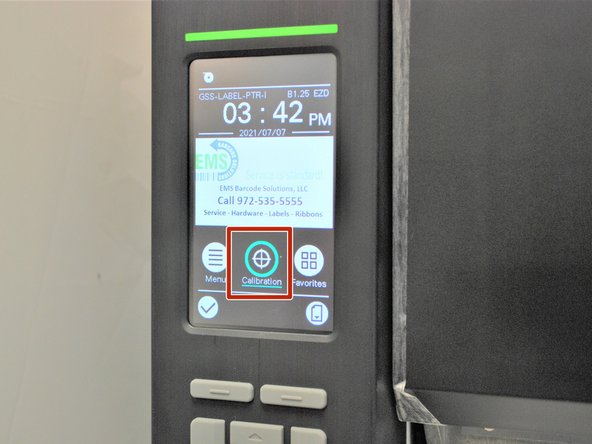
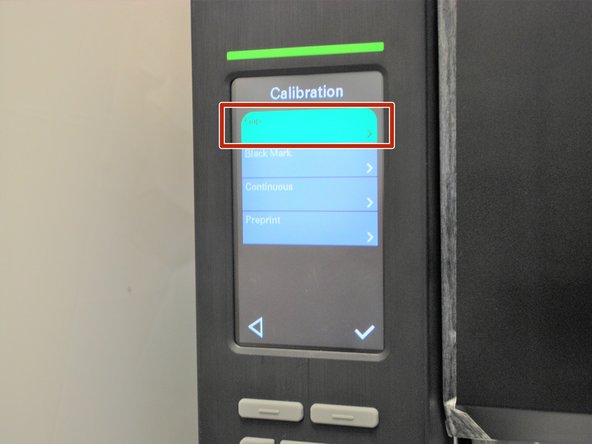
On the printer screen, select "Calibrate," and then "GAP."
-
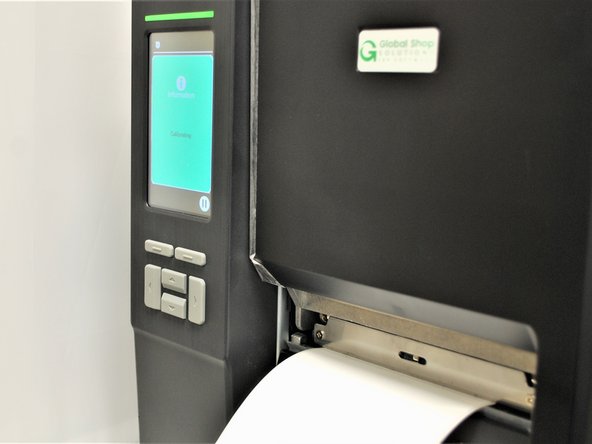
The printer will now self-calibrate; several blank labels will be printed in the process.
-
-
-
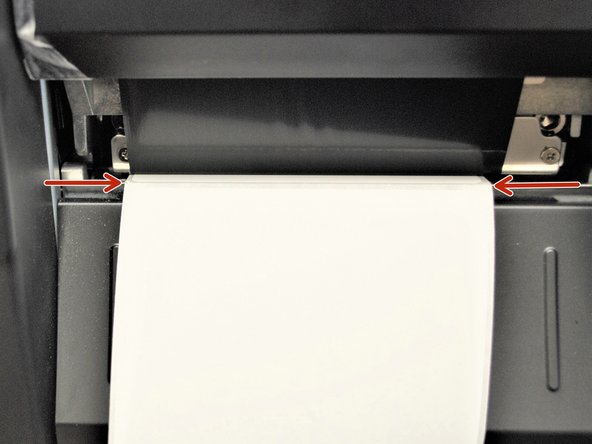
If the Calibration has worked correctly, you can know by checking the following:
-
The edge of the label paper is lined up with the edge of the printer, such that printed labels can easily be torn off.
-
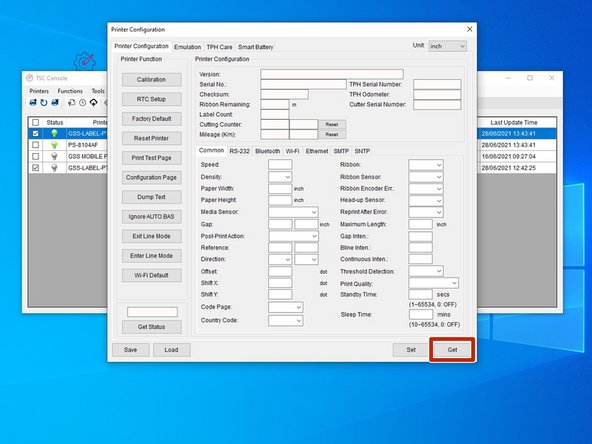
In the GSS Certified Printer Tool, select "Get," the correct label size should then be displayed (within a few hundredths of an inch is fine).
-
For my setup, I'm using 4 inch wide by 6 inch long labels, which is what the software now displays.
-