-
-
Search for printers and scanners in the taskbar search bar.
-
Confirm that the selection looks like the first picture, and hit "Open."
-
Click on the printer you set up in the previous guides.
-
In this case, I named the printer "Bar Code Printer PR40."
-
Select the "Manage" option.
-
Select the "Printer Properties" option.
-
-
-
Select the "Tools" tab at the top of the new window.
-
Click on the drop-down menu labeled "Print" in the "Printer" section.
-
Select "Generic Test" from the list of options.
-
This should print a test label, which should look like the example image.
-
If no page printed, check that the roll of labels is loaded correctly, and that the correct printing options are selected.
-
-
-
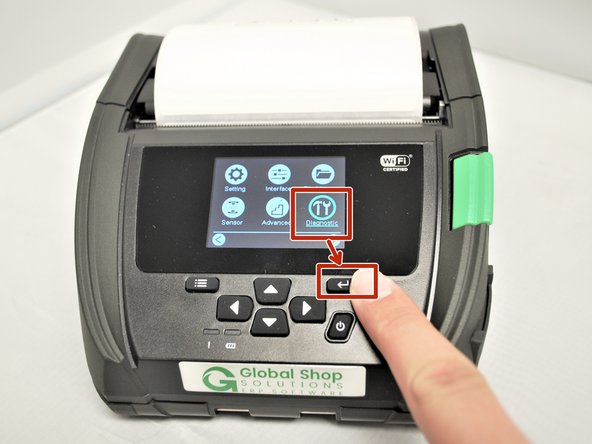
Select the 'Menu' on the home screen of the printer
-
Choose 'Diagnostic'
-
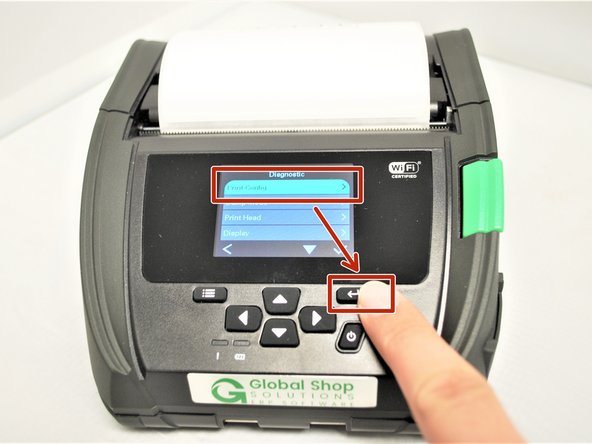
Select 'Print Config'
-
-
-
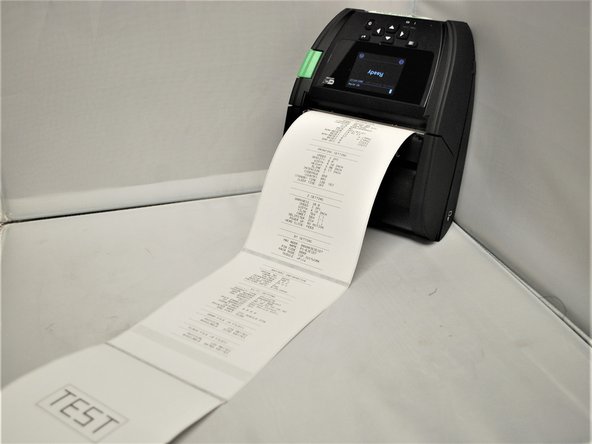
The printer will begin printing and you will see the screen shown in Image 1.
-
Once it is done printing, you will then have the three labels shown in Image 2 from the Test print and the Configuration Print.
-