-
-
If any time during this guide you get lost or confused, please feel free to reach out to us at EMS for Support.
-
You can book an appointment under '000 - Support,' or click HERE.
-
Service is Standard!
-
-
-
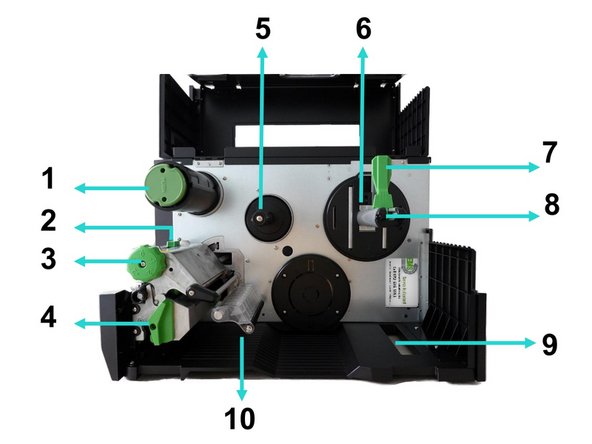
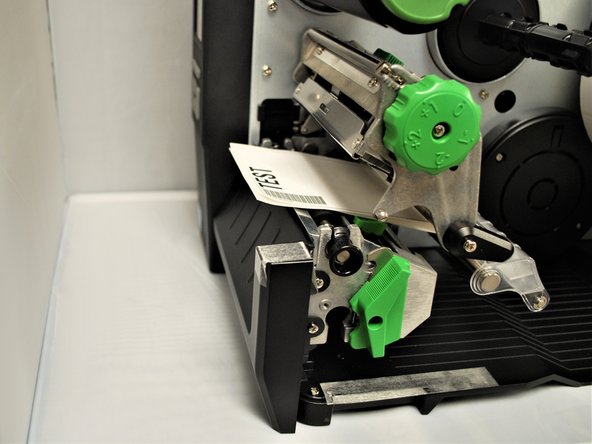
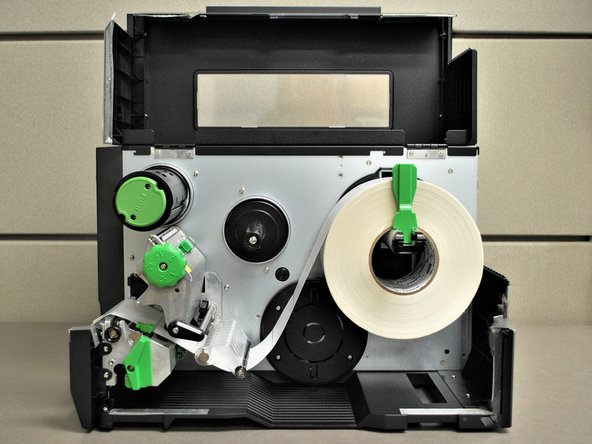
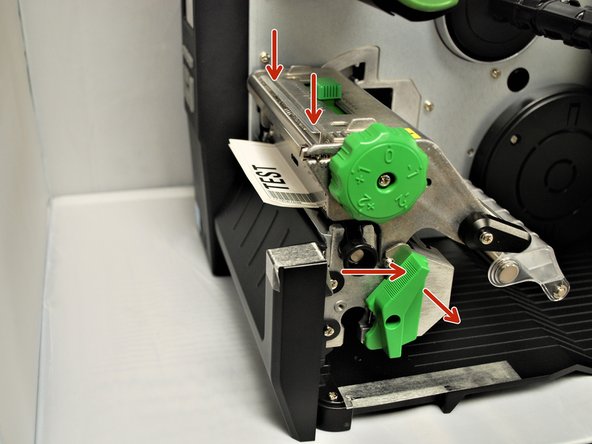
1. Ribbon rewind spindle
-
2. Print head pressure position adjustment knob
-
3. Print head pressure adjustment knob
-
4. Print head release lever
-
5. Ribbon supply spindle
-
6. Media near end sensor
-
7. Label roll guard
-
8. Label supply spindle
-
-
-
9. External label entrance chute
-
10. Damper
-
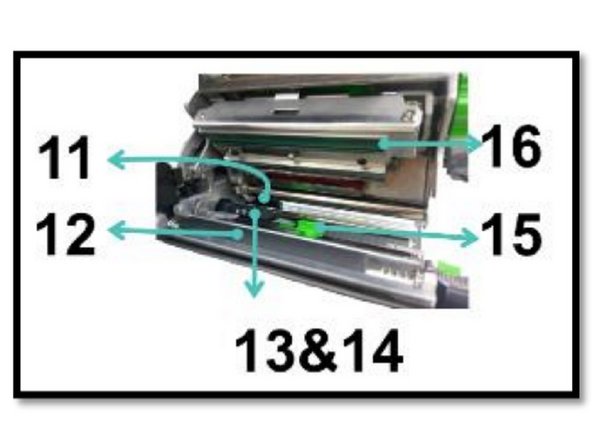
11. Ribbon sensor
-
12. Platen roller
-
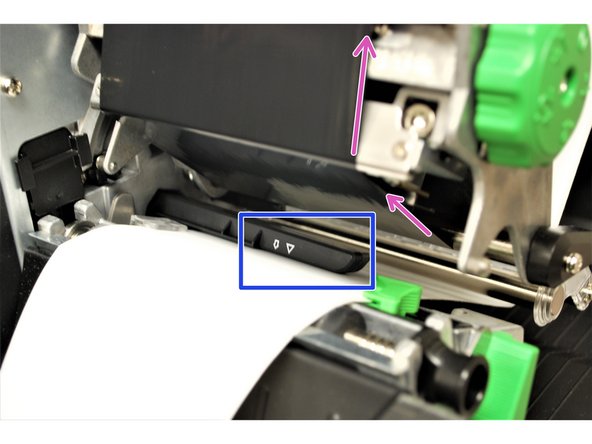
13. Black mark sensor (shown as ↓)
-
14. Gap sensor (shown as ▽)
-
15. Front label guide
-
16. Print head
-
-
-
-
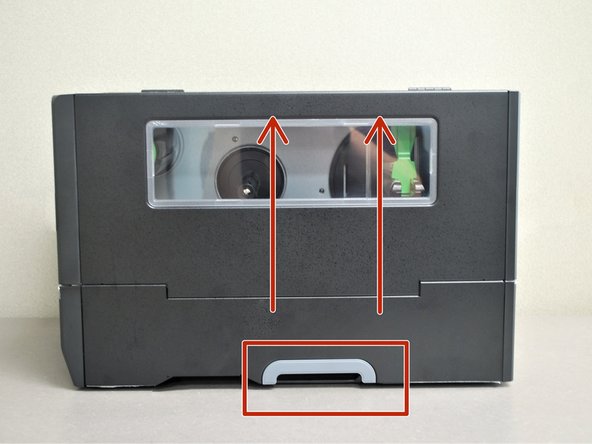
Grab the bottom of the cover and lift all the way open, until it's resting on the top of the printer.
-
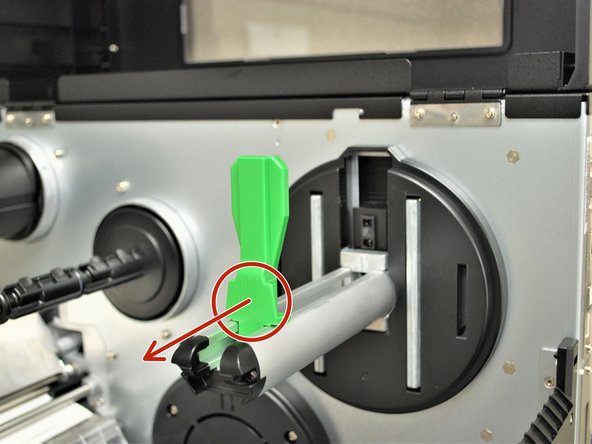
Locate the green label roll guard pictured and pull away from the printer.
-
Be sure to grab this by the bottom of the guard to help pull it with ease.
-
Fold down the label roll guard away from the printer.
-
-
-
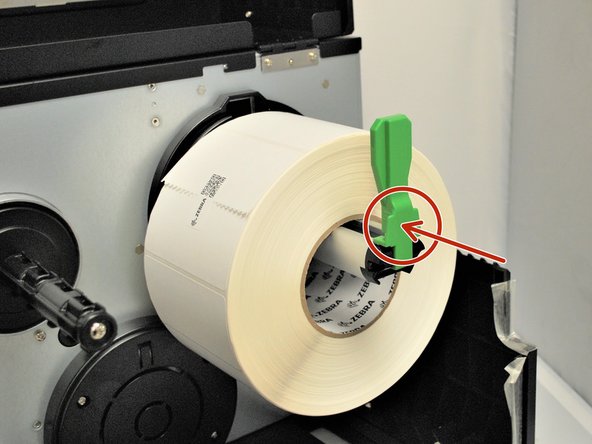
Place the roll of labels on the label supply spindle, so that they unroll from the top
-
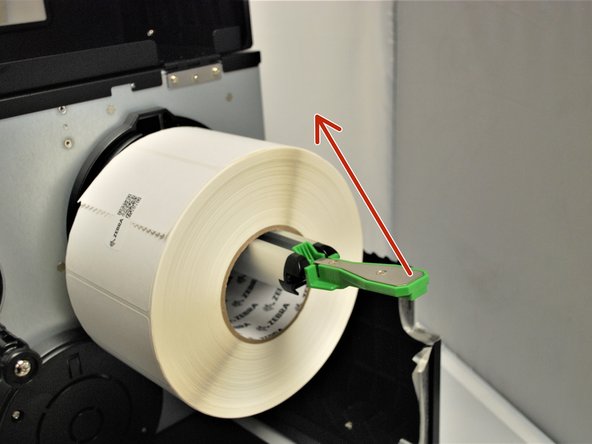
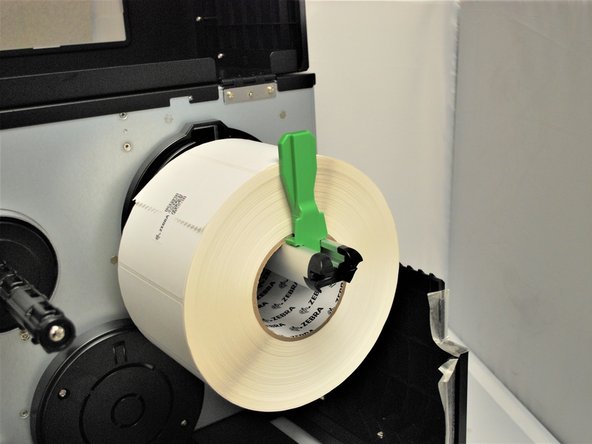
Fold the label roll guard back up.
-
Press the label roll guard against the side of the roll.
-
Be sure to press this by the bottom of the guard to help push it with ease.
-
-
-
With one hand, press down on the top of the printhead.
-
With the other hand, rotate the green print head release lever clockwise.
-
Remove your hand from the printhead and the printhead should now be able to be lifted up.
-
-
-
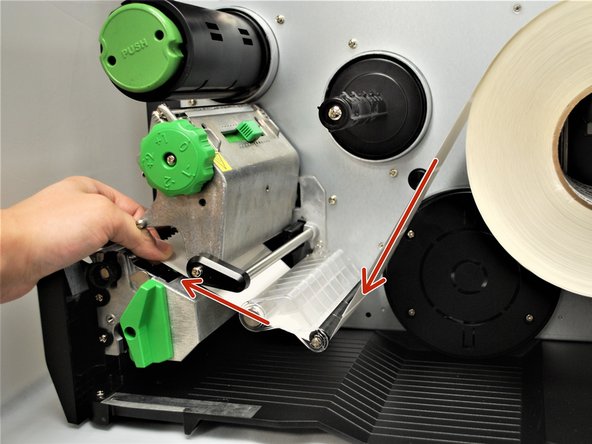
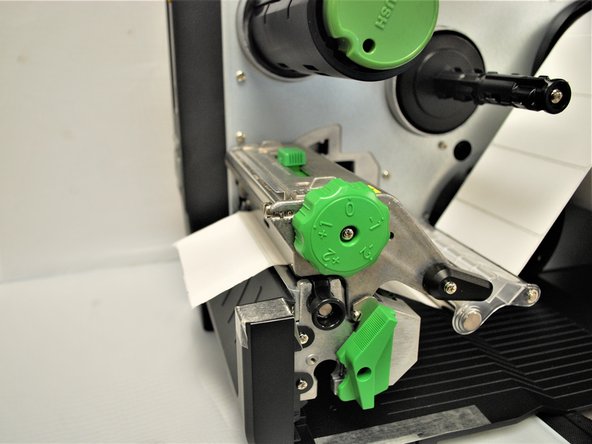
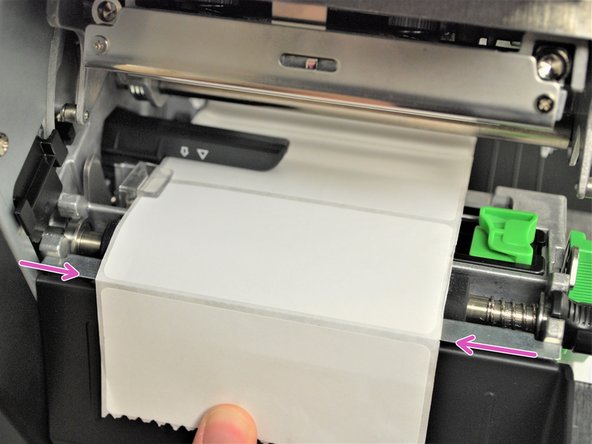
Feed the labels under the damper roller (1st picture).
-
Feed the labels through/under the black ribbon sensor (blue arrow in the picture) and clear label guide (orange arrow in picture).
-
Pull through until the leading edge of one label is even with the tear-off edge (pink arrows).
-
The length of the label shown may vary from your own. Be sure to pull it through to a distance equivalent to one label to the first tear-off edge.
-
-
-
Make sure the far edge of the label roll lines up with the clear label guide.
-
Slide the green front label guide forward until it fits against the close edge of the labels.
-
These guides keep the labels running straight, so it's important to make sure they're not so tight they stop the labels from coming out smoothly.
-
-
-
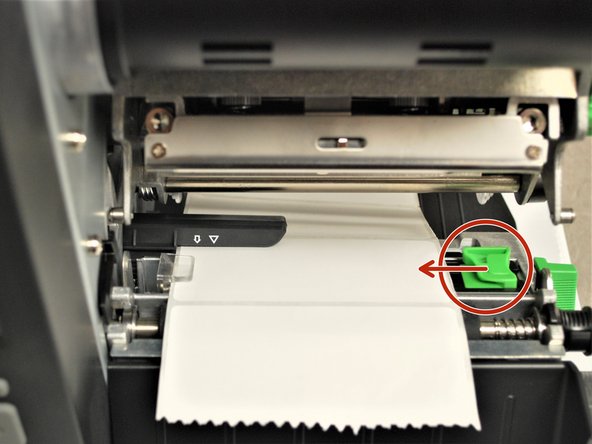
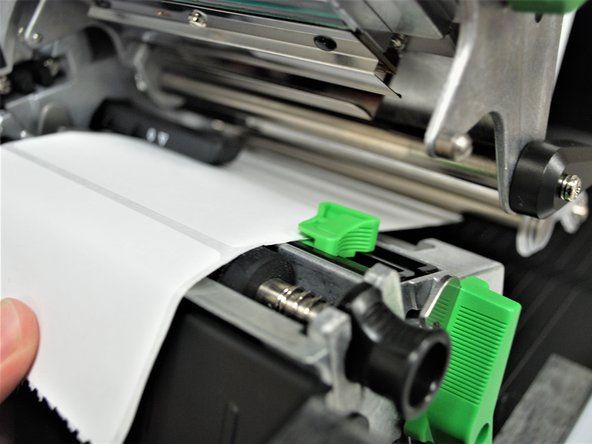
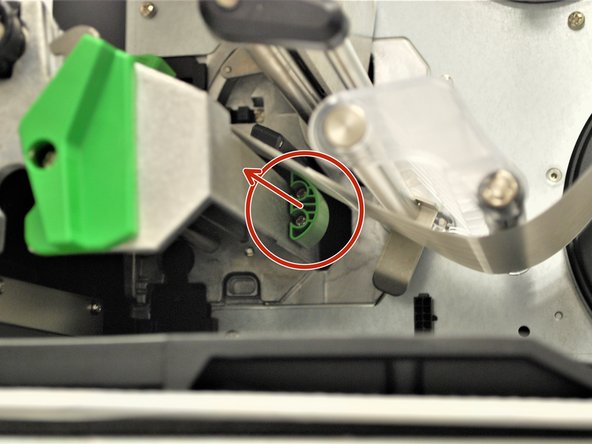
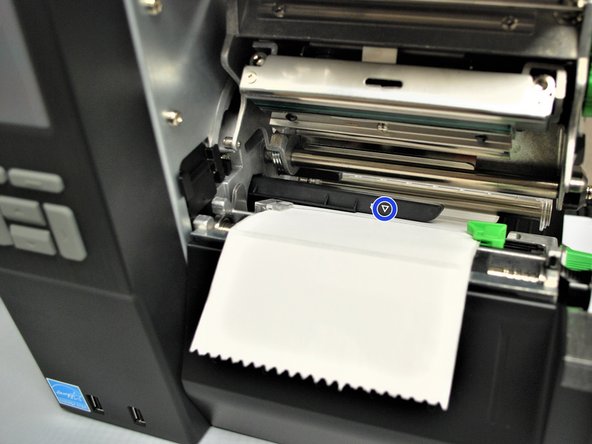
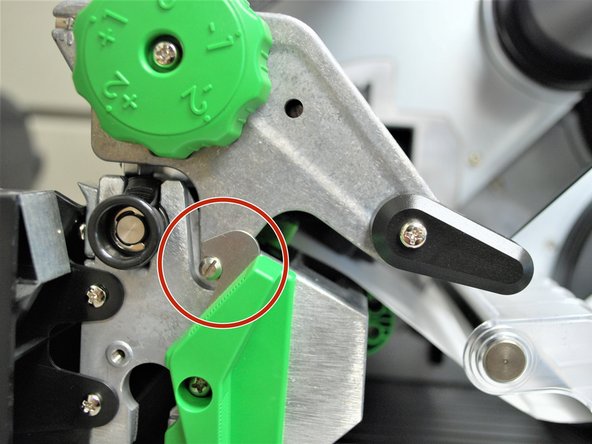
Use the green tab (first picture) underneath the damper roller to adjust the ribbon sensor.
-
The gap sensor (shown as ▽) on the ribbon sensor (shown with a blue circle in the 2nd picture) should be approximately centered on the label.
-
The gap sensor marking indicates the position of the sensor the printer uses to calibrate, so it's important to make sure it's in the right place.
-
-
-
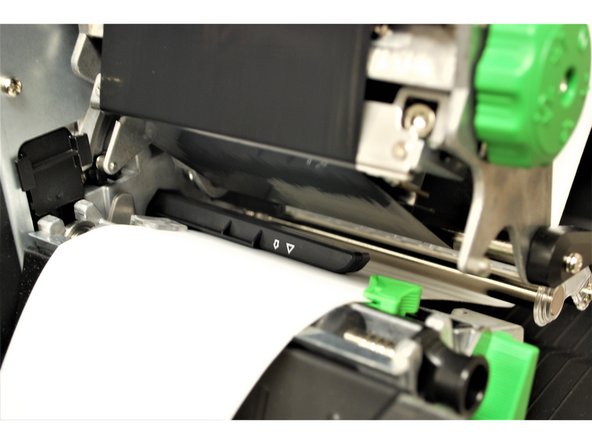
Check the path of the labels. It should look like the first picture here.
-
Close the printhead by pressing down firmly on top until you hear a 'click,' making sure that the green print head release lever is latched closed.
-
Close the cover.
-
Now that Direct Thermal labels are loaded, skip to Step 23 or click HERE.
-
-
-
Grab the bottom of the cover and lift all the way open, until it's resting on the top of the printer.
-
Locate the green label roll guard pictured and pull away from the printer.
-
Be sure to grab this by the bottom of the guard to help pull it with ease.
-
Fold down the label roll guard away from the printer.
-
-
-
Place the roll of labels on the label supply spindle, so that they unroll from the top
-
Fold the label roll guard back up.
-
Press the label roll guard against the side of the roll.
-
Be sure to press this by the bottom of the guard to help push it with ease.
-
-
-
With one hand, press down on the top of the printhead.
-
With the other hand, rotate the green print head release lever clockwise.
-
Remove your hand from the printhead and the printhead should now be able to be lifted up.
-
-
-
Feed the labels under the damper roller (1st picture).
-
Feed the labels through/under the black ribbon sensor (blue arrow in the picture) and clear label guide (orange arrow in picture).
-
Pull through until the leading edge of one label is even with the tear-off edge (pink arrows).
-
The length of the label shown may vary from your own. Be sure to pull it through to a distance equivalent to one label to the first tear-off edge.
-
-
-
Make sure the far edge of the label roll lines up with the clear label guide.
-
Slide the green front label guide forward until it fits against the close edge of the labels.
-
These guides keep the labels running straight, so it's important to make sure they're not so tight they stop the labels from coming out smoothly.
-
-
-
Use the green tab (first picture) underneath the damper roller to adjust the ribbon sensor.
-
The gap sensor (shown as ▽) on the ribbon sensor (shown with a blue circle in the 2nd picture) should be approximately centered on the label.
-
The gap sensor marking indicates the position of the sensor the printer uses to calibrate, so it's important to make sure it's in the right place.
-
-
-
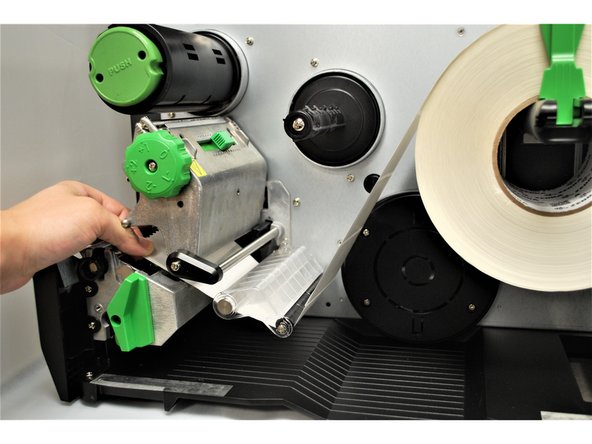
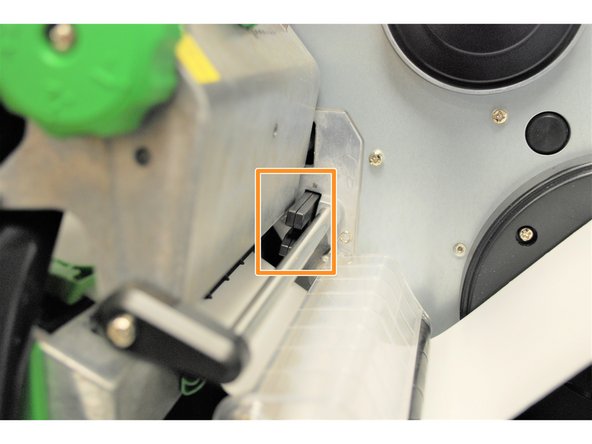
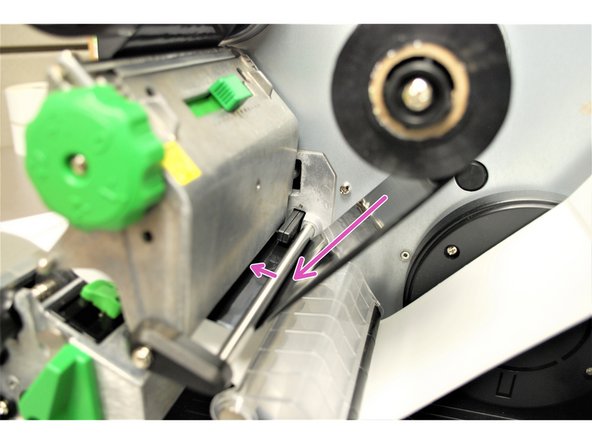
Place the roll of ribbon on the ribbon supply spindle - the black plastic spindle located a little bit above and behind the print head.
-
Identify the Ribbon Sensor located behind the printhead (shown by the orange box in Image 2).
-
Feed the Ribbon through the Ribbon Sensor following the purple arrows in Image 3.
-
-
-
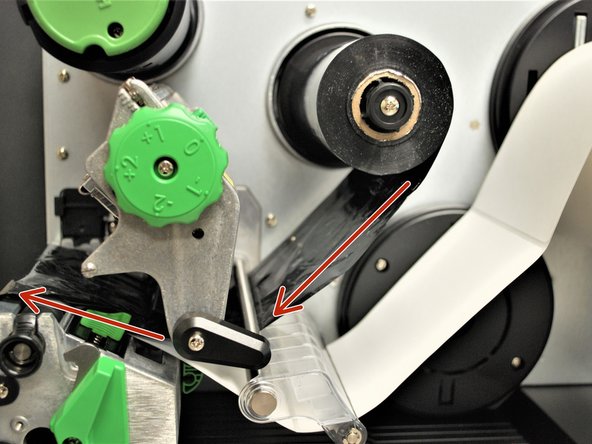
Feed the ribbon under the printhead and out to the front, making sure to feed it above the media sensor (the black clip on the bottom of the printhead, shown by the blue box).
-
The path of the ribbon is shown by the pink arrows.
-
-
-
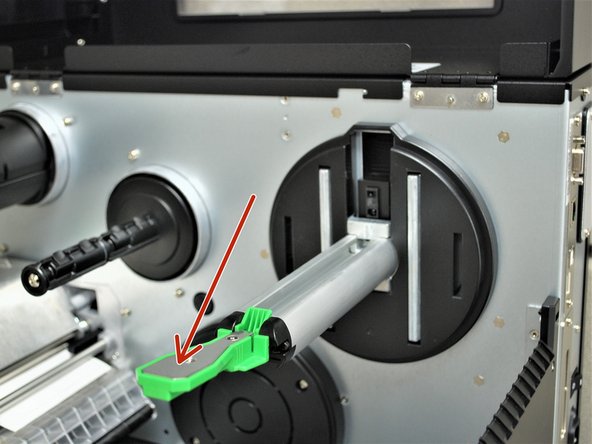
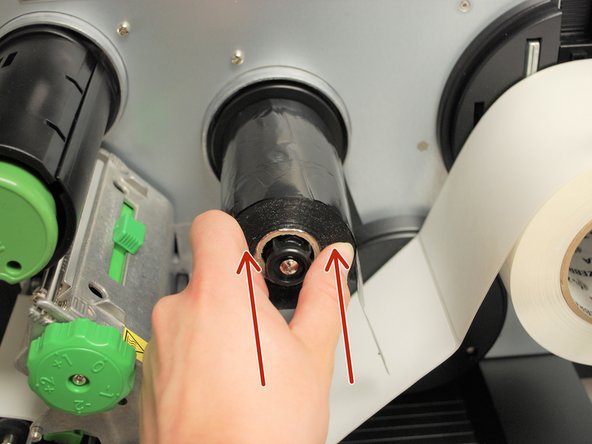
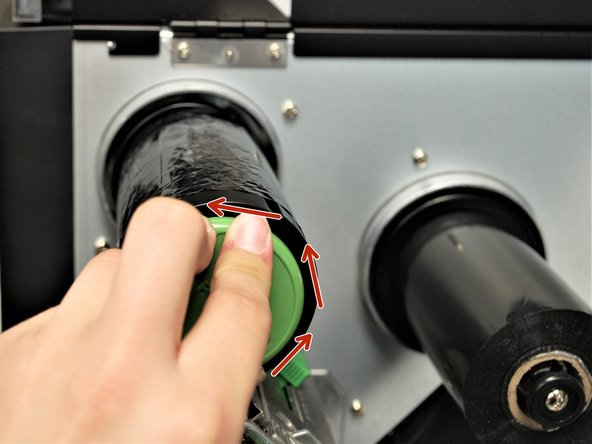
Wrap the ribbon around the rewind spindle.
-
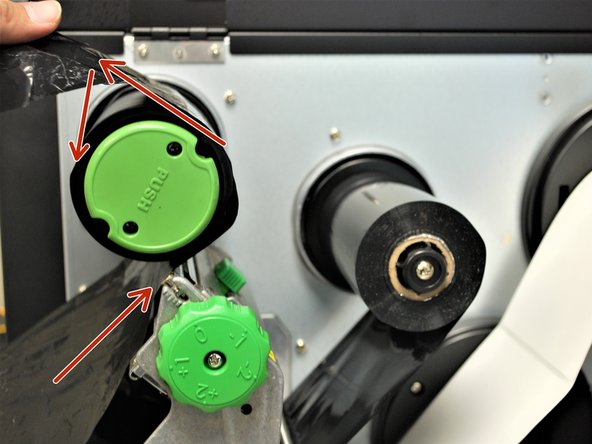
While keeping the ribbon on the rewind spindle. push and hold the green button that says "PUSH" on the spindle.
-
While holding the green 'PUSH' button, rotate the whole spindle counter-clock wise until the ribbon is taut.
-
-
-
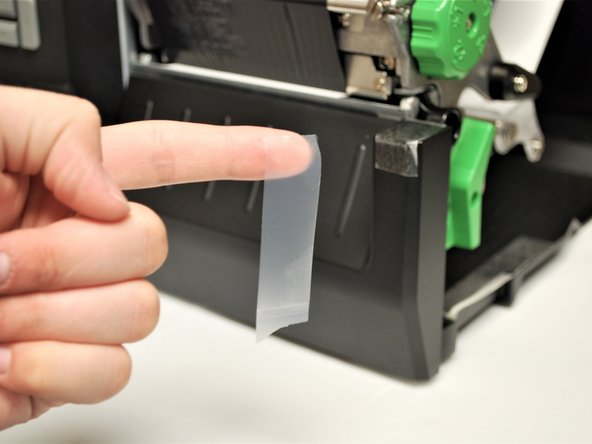
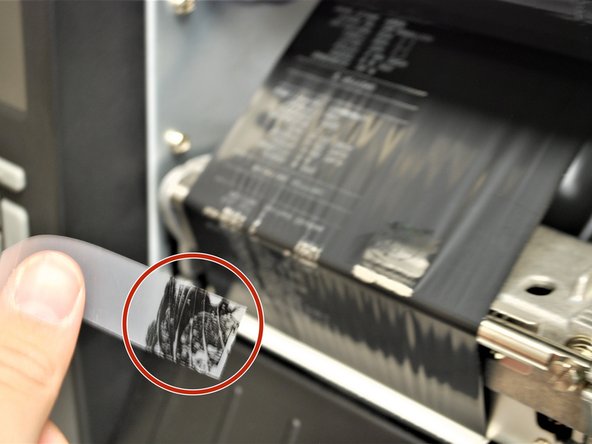
Test the orientation of the ribbon:
-
Get a piece of regular tape.
-
Put the piece of tape on the ribbon.
-
Remove the piece of tape.
-
If there is ink on the tape and ink came off the ribbon, the ribbon is facing the correct direction. If there is no ink, repeat Steps 18-20 with the ribbon facing the correct direction.
-
-
-
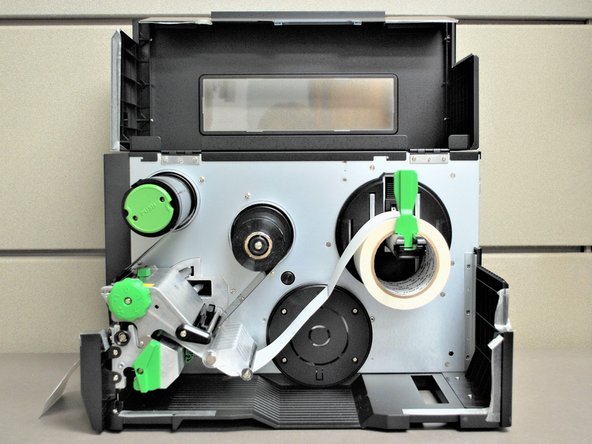
Close the printhead by pressing down firmly on top until you hear a 'click,' making sure that the green print head release lever is latched closed.
-
Close the cover on the printer.
-
-
-
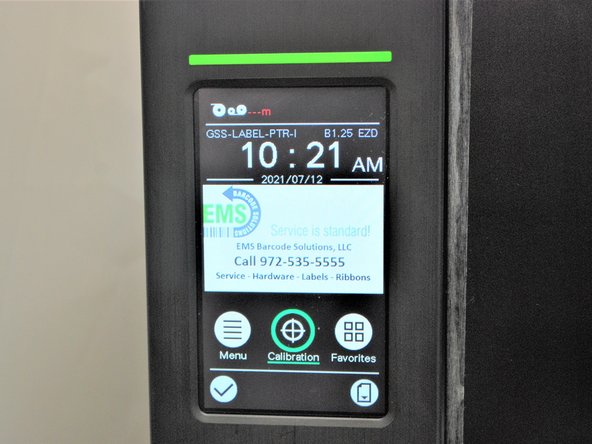
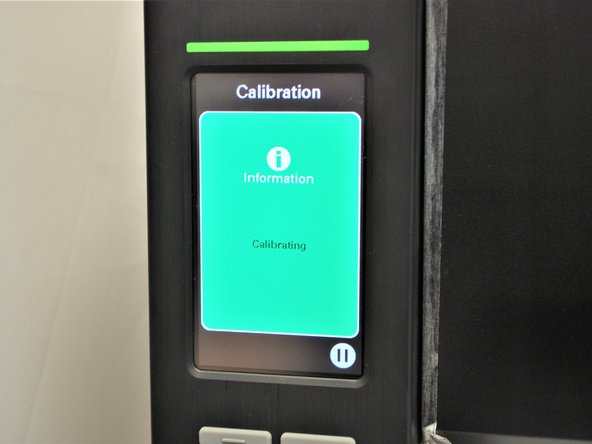
On the printer screen, select 'Calibrate'
-
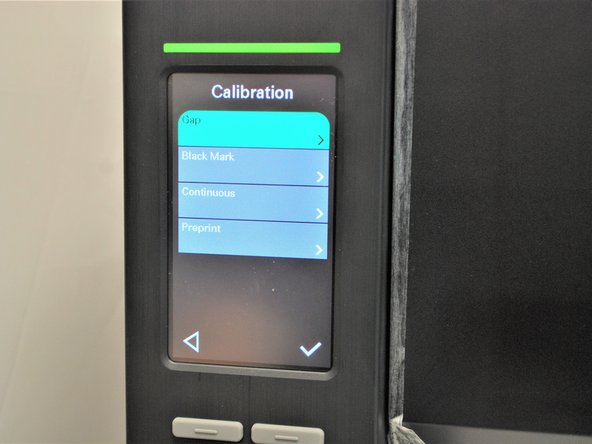
Select 'GAP.'
-
The printer will now self-calibrate; several blank labels will be printed in the process.
-
-
-
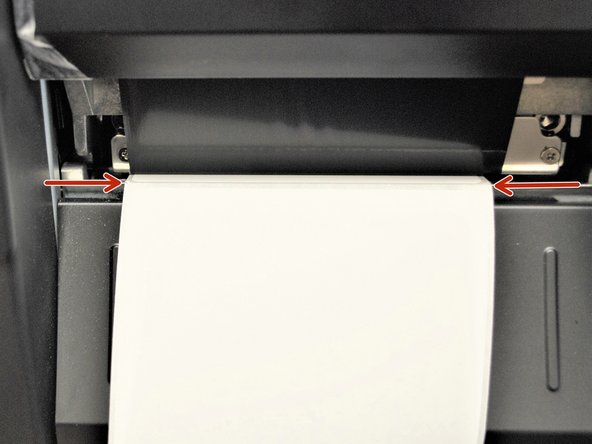
If the Calibration has worked correctly, you can know by checking the following:
-
The edge of the label paper is lined up with the edge of the printer, such that printed labels can easily be torn off.
-
-
-
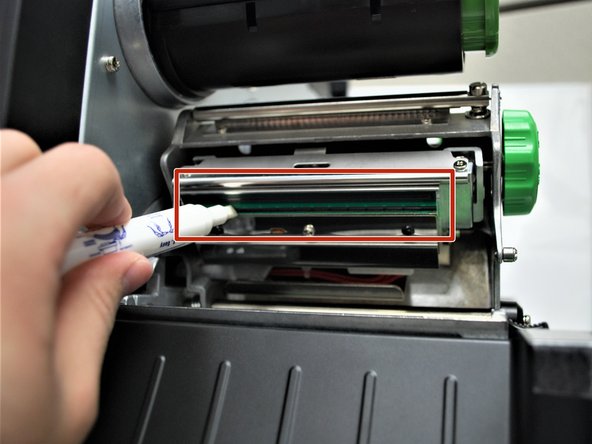
Make sure the printer is turned off, then open the cover, lifting gently until it rests on top of the printer.
-
With one hand, press down on the top of the printhead.
-
With the other, rotate the green release lever clockwise.
-
Remove your hand from the printhead and the printhead should now be able to be lifted up.
-
Uncap the cleaning pen and use the tip to clean the glass surface of the print head, ensuring there is no label or ribbon residue, or dust or other particulate.
-
You should do this each time you go through a roll of labels to ensure optimal print quality and performance. Doing so regularly can extend the lifespan of your printer by 2 to 3 times.
-
-
-
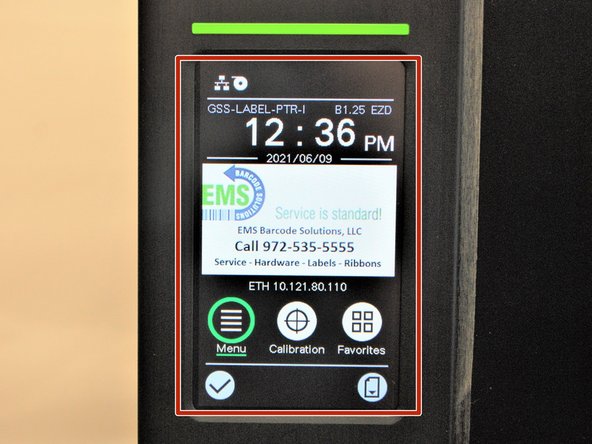
Does the printer have power?
-
Shown in Image 1. This can be shown by if the screen is displaying the menu or not and if the printer is plugged into a functioning outlet.
-
Is the label icon on the screen white or red?
-
Shown in Image 2. If this icon appears white, that indicates the printer is loaded with labels. If it is red, that indicates the printer is low/out of labels.
-
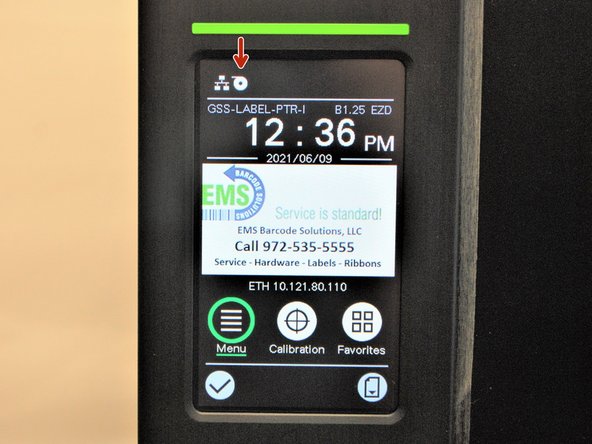
Does the printer have an IP address?
-
Shown in Image 3. This will be displayed on the home screen of the printer under the EMS image.
-