-
-
If any time during this guide you get lost or confused, please feel free to reach out to us at EMS for Support.
-
You can book an appointment under '000 - Support,' or click HERE.
-
Service is Standard!
-
-
-
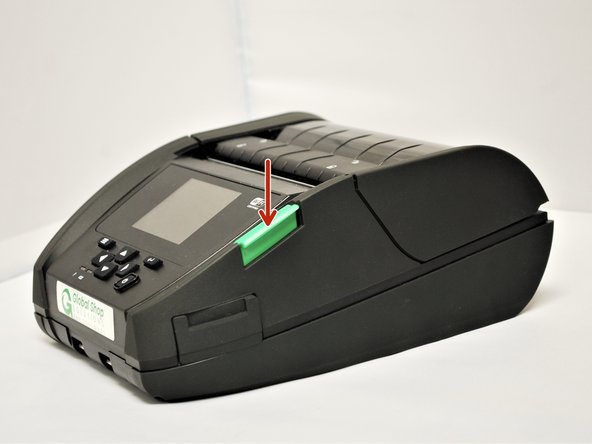
1. Media Cover Release Button
-
2. Interface Cover
-
-
-
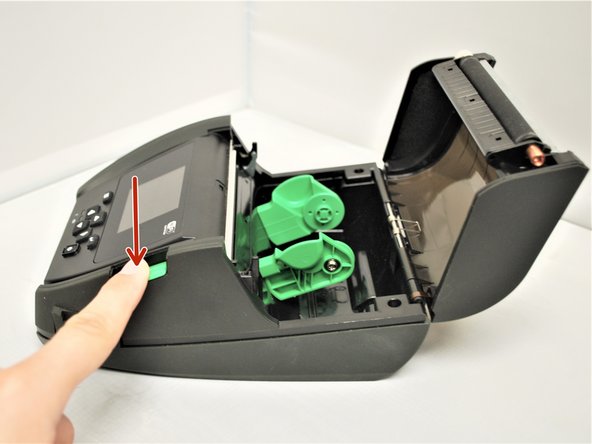
To open the printer, press down on the green media cover release button on the right side of the printer. The lid is spring loaded, and should pop open.
-
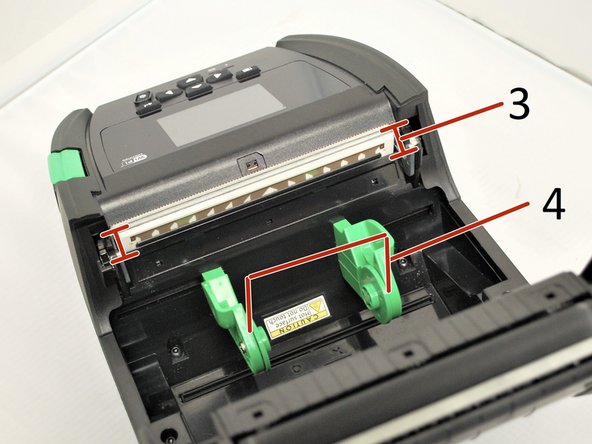
3. Print Head
-
4. Media Holder
-
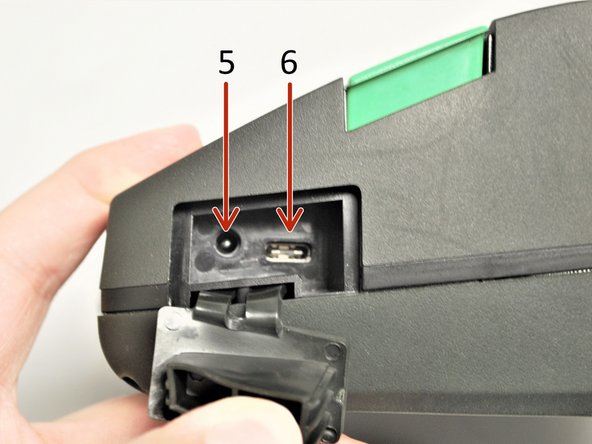
5. Power Jack
-
6. Type C Interface
-
-
-
Make sure the labels you have are the direct thermal printing type, and that they have a black mark between each label.
-
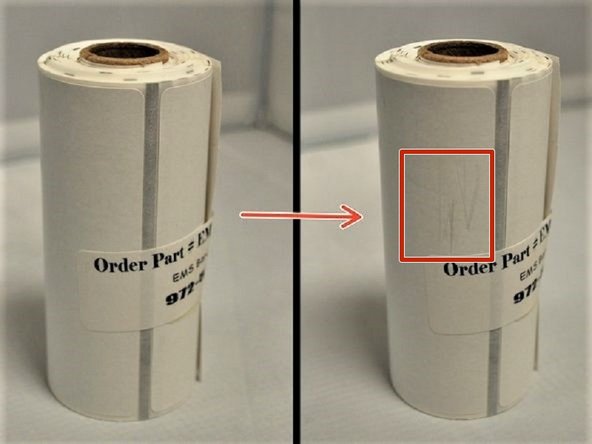
Check that the labels are direct thermal (DT) by lightly scratching the paper surface of one label. DT labels will show a light grey mark when scratched.
-
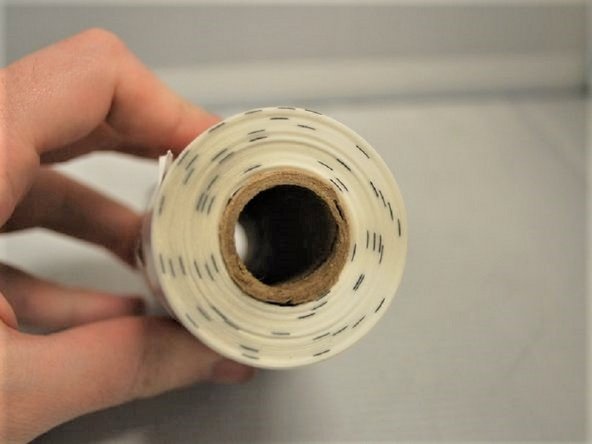
You should be able to see the black marks from the outside of the roll as dark grey stripes that run from end to end. You can also see them by looking at one end of the roll.
-
-
-
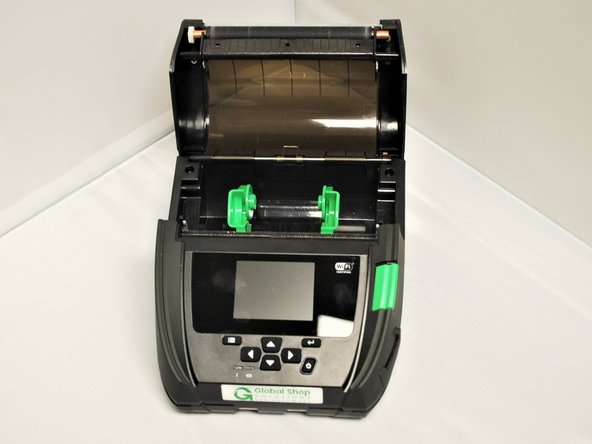
Open the printer by pressing down on the green media cover release button on the right side of the printer. The lid is spring loaded, and should pop open.
-
Remove the printer info sheet, if present, and make sure the media bay is clear.
-
-
-
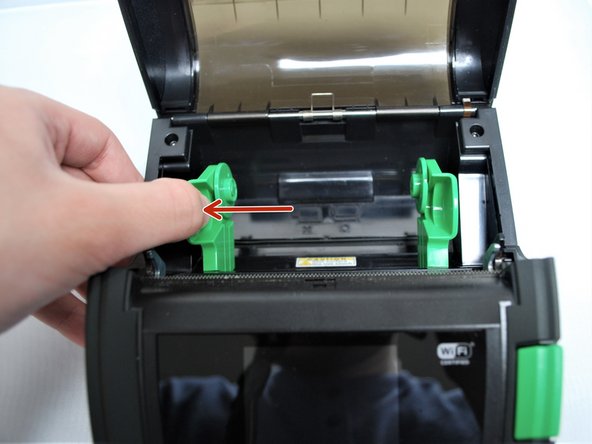
With one hand, pull the media holder open, and with the other hand load the roll of labels.
-
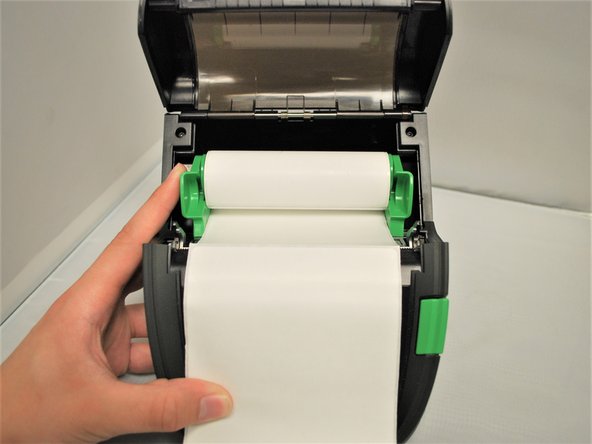
Make sure that the labels are loaded in the correct orientation.
-
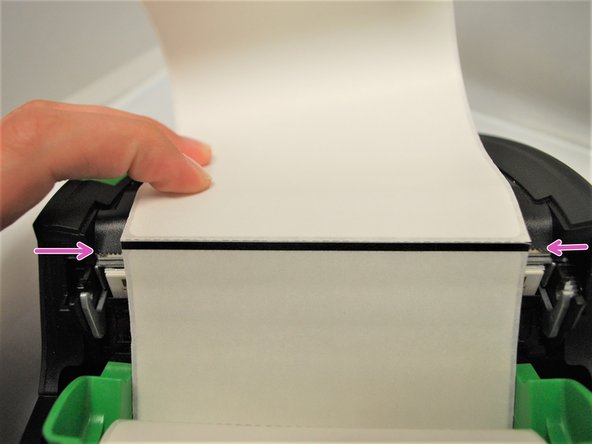
Pull the leading edge of the labels down, past the front of the printer. The black mark between labels should face upwards, and the actually labels should be face-down, facing the printhead.
-
Pull through until the leading edge of one label is even with the tear-off edge (pink arrows).
-
-
-
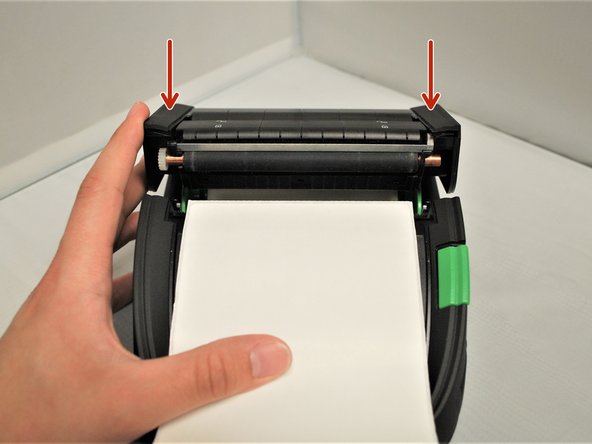
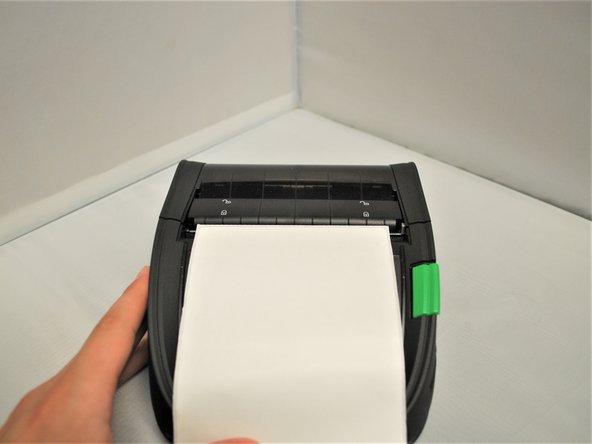
Close the lid, pressing down firmly on both sides to make sure the lid shuts all the way.
-
It should snap into place, and sit flush with the rest of the printer.
-
-
-
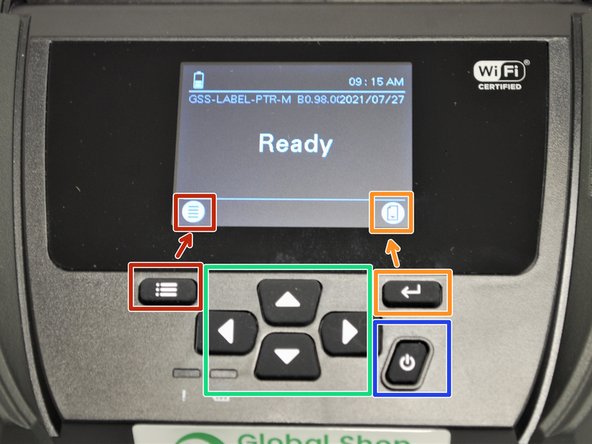
The buttons can be used to perform numerous printer functions without the use of a separate computer. There is:
-
Menu Key which correlates with the menu icon on the home screen;
-
In the Menus, this button correlates with the 'Back' icon;
-
Enter Key which correlates with the feed icon on the home screen;
-
In the Menus, this button correlates with the 'Select' icon
-
Navigational Keys used to select items, menu selection, and navigation in the interface;
-
Power Button used to power on and off the printer.
-
-
-
1. Enter the menu list
-
2. Back button
-
3. Enter cursor (be marked in green) located option
-
4. Scroll down button/ Scroll up button
-
-
-
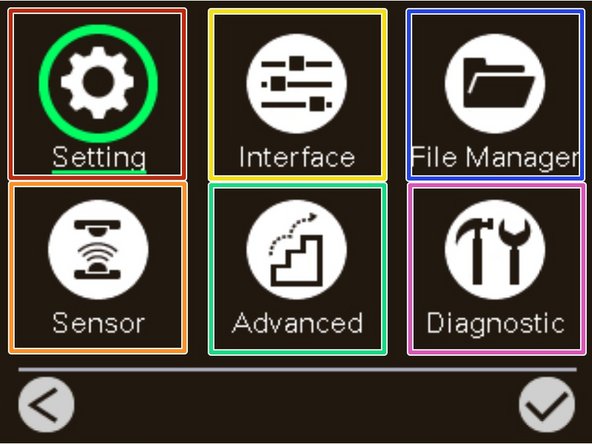
There are 6 categories for the main menu. You can easy to set the settings of printer without connecting the computer.
-
Setting can set up the printer settings for TSPL & ZPL2.
-
Sensor is used to calibrate the selected media sensor. We recommend calibrate the sensor before printing when changing the media.
-
Interface is used to set the printer interface settings.
-
Advanced is used to set the printer language, initialization, battery information, LCD display setting %...etc.
-
File Manager is used to check/ manager the printer available memory.
-
Diagnostic is used to review printer to troubleshoot problems and other issues.
-
-
-
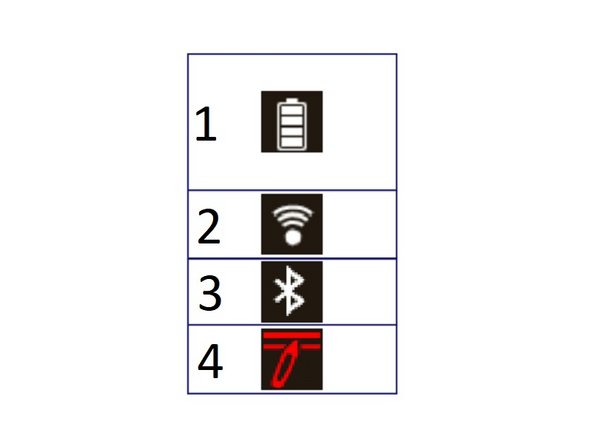
1. Charging Level;
-
1 of 4 bars: 0-25%
-
2 of 4 bars: 25-50%
-
3 of 4 bars: 50-75%
-
4 of 4 bars: 75-100%
-
2. Wi-Fi is enabled
-
3. Bluetooth is enabled
-
4. Printhead cleaning notice
-
-
-
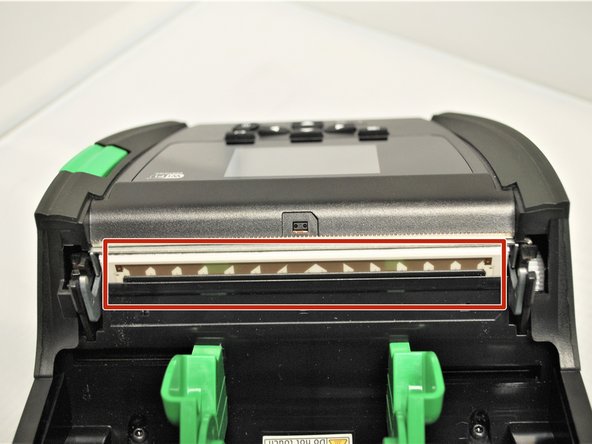
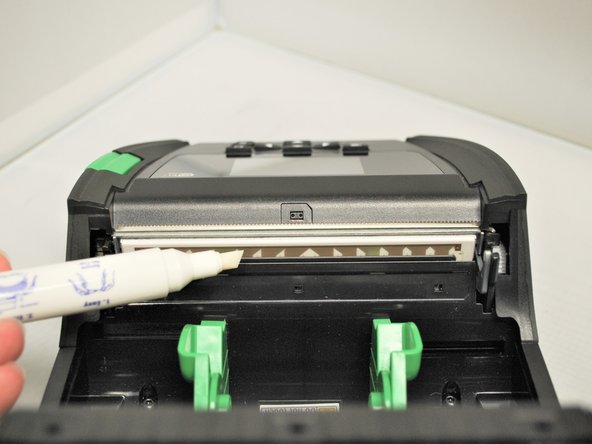
Make sure the printer is turned off, then open the cover by pressing the green Media Cover Release Button.
-
Identify the Printhead as shown in Image 2.
-
Uncap the cleaning pen and use the tip to clean the glass surface of the print head, ensuring there is no label or ribbon residue, or dust or other particulate.
-
You should do this each time you go through a roll of labels to ensure optimal print quality and performance. Doing so regularly can extend the lifespan of your printer by 2 to 3 times.
-
-
-
Does the printer have power?
-
Shown in Image 1. This can be shown by if the screen is displaying the menu or not and if the printer is plugged into a functioning outlet.
-
Does the printer have an IP address?
-
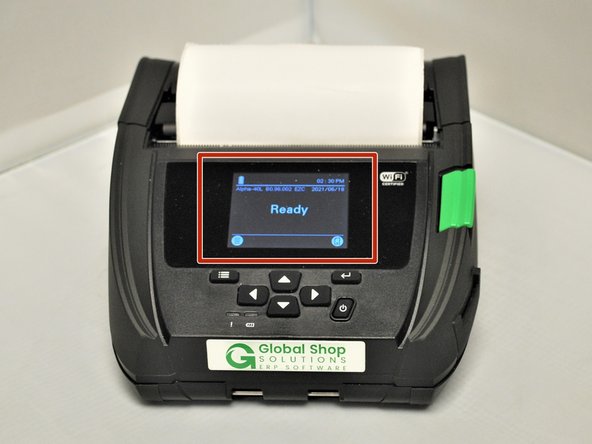
Shown in Image 2. This will be displayed on the home screen of the printer under 'Ready.'
-
Almost done!
Finish Line


