-
-
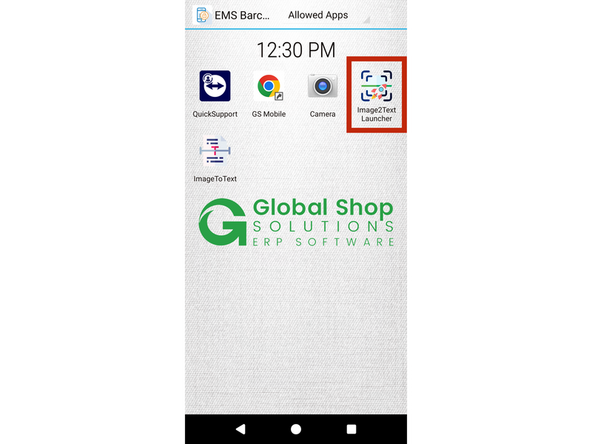
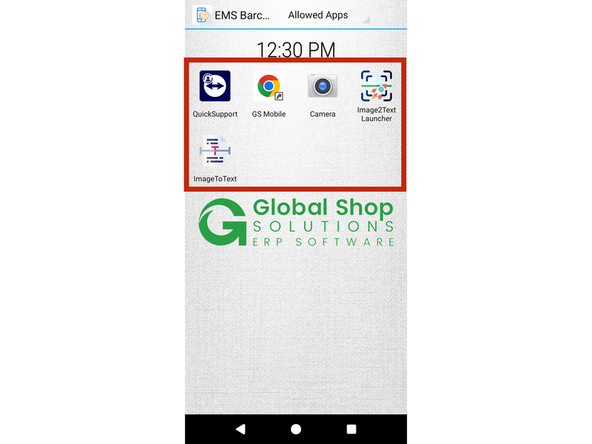
Ensure your device is on the AppLock Admin screen with the apps shown in the reference photo. If any are missing, follow the app-adding or unhide guides to match.
-
Tap on the Image2Text Launcher app (highlighted with a red box); this opens the settings for your SmartScan screen.
-
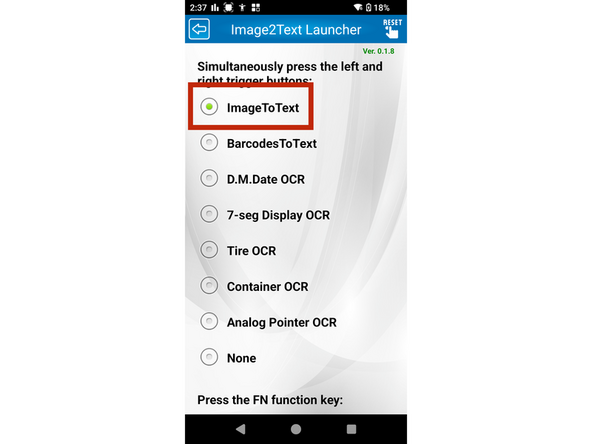
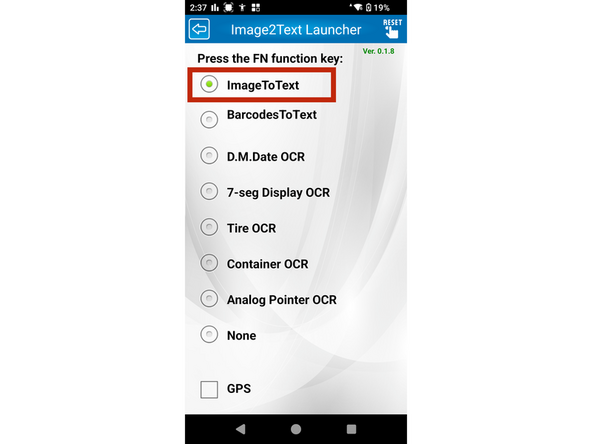
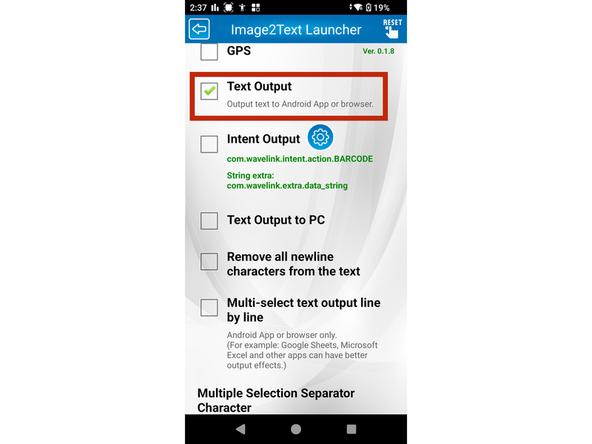
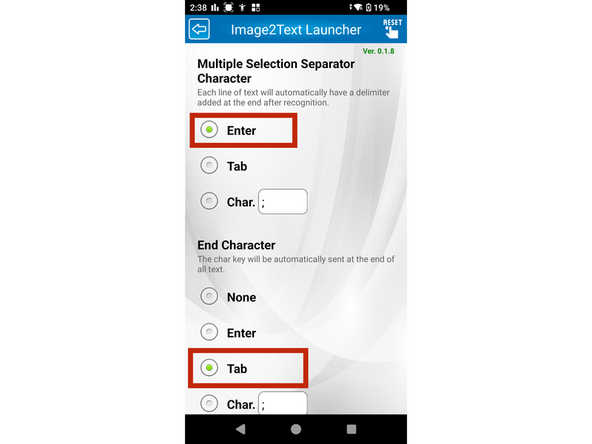
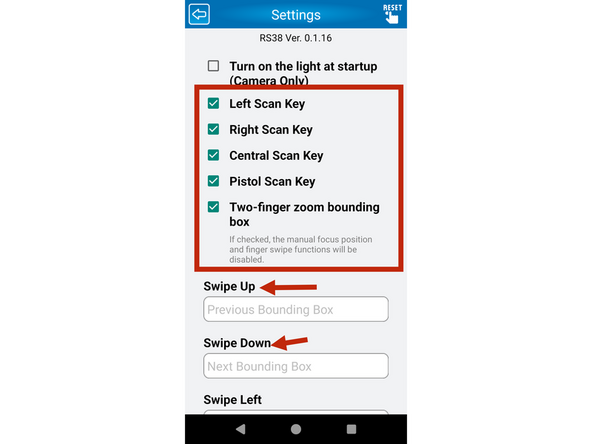
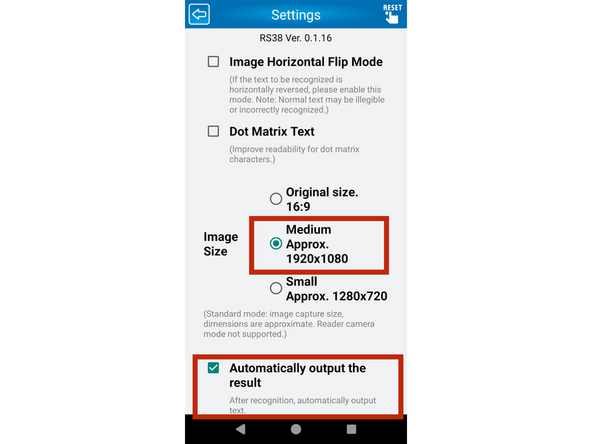
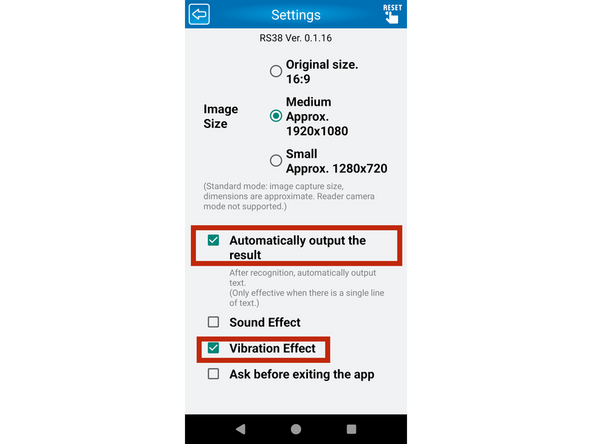
The next photos will show the required checked and unchecked settings under the Launcher app. Refer to the included documents and checklist to ensure proper SmartScan setup and functionality.
-
-
-
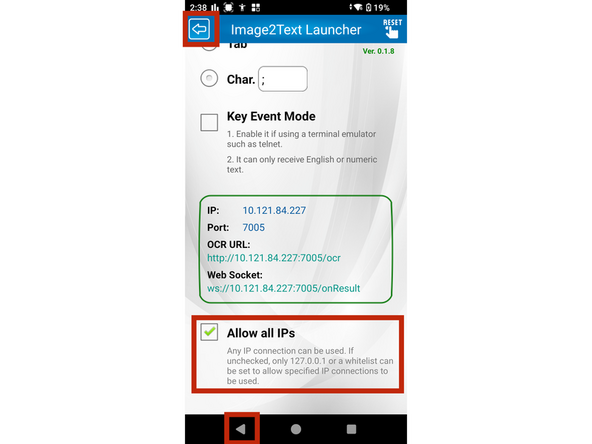
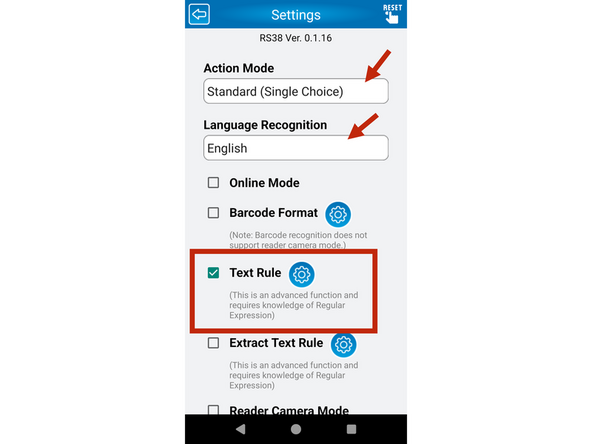
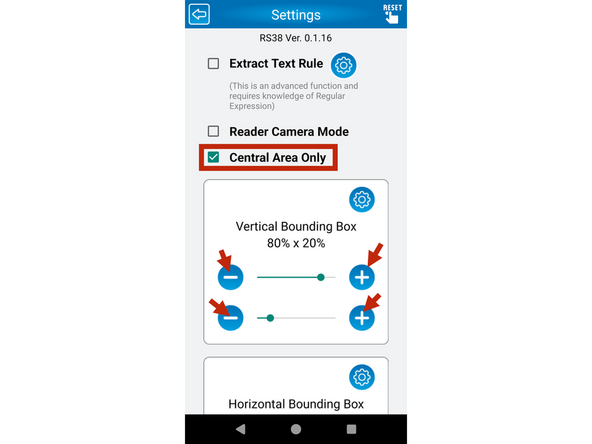
Ensure all options highlighted with red boxes are checked before proceeding.
-
-
-
Once all settings are matched, tap the Back button highlighted in the red boxes—either one will work.
-
Once back on the AppLock Admin screen, tap on the ImageToText app (highlighted in a red box). Note the difference between this and the Launcher app.
-
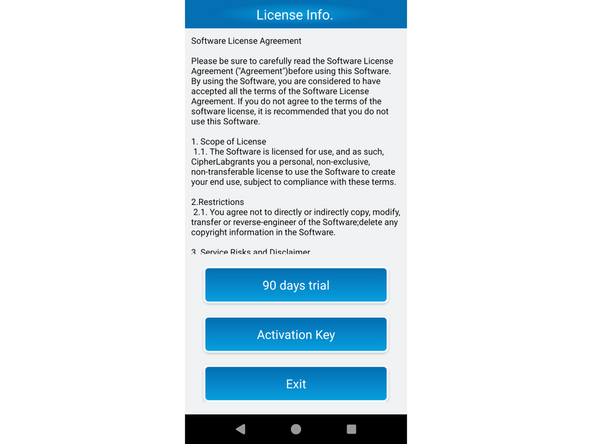
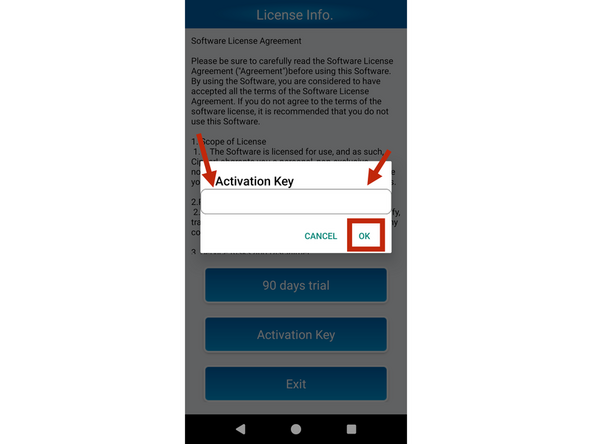
The license page will appear the first time you open the app. Ensure you have a license through EMS Barcode. If not, select the trial version to proceed.
-
-
-
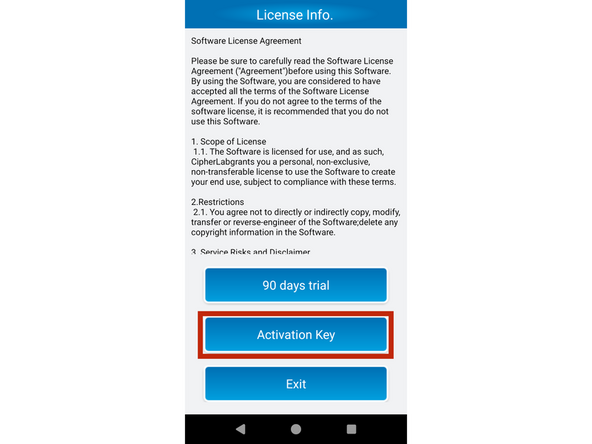
Tap on the activation button.
-
Tap the import box marked by a red arrow, then use the keyboard to enter your activation key.
-
After entering the activation key, tap the OK button highlighted in a red box to continue.
-
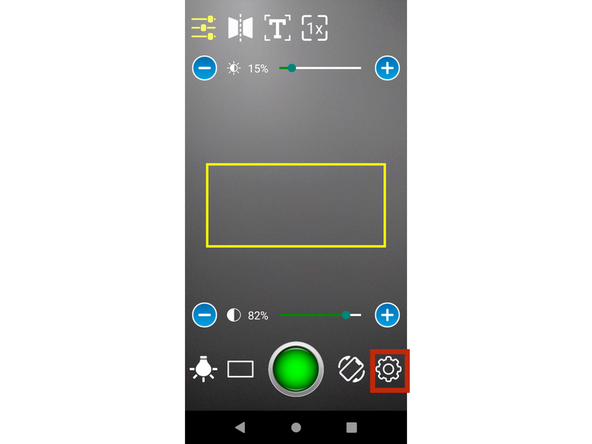
You should now see a camera-like screen with additional setting toggles available.
-
-
-
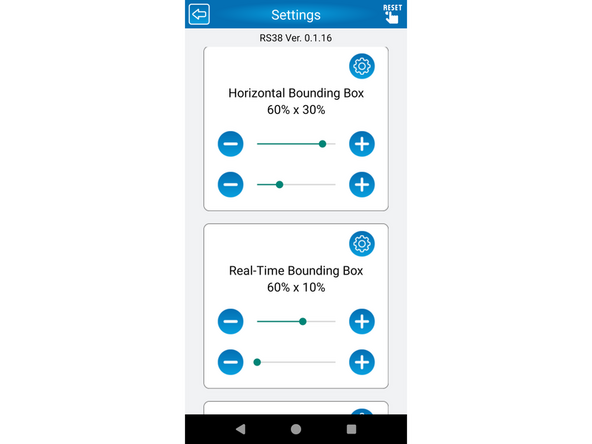
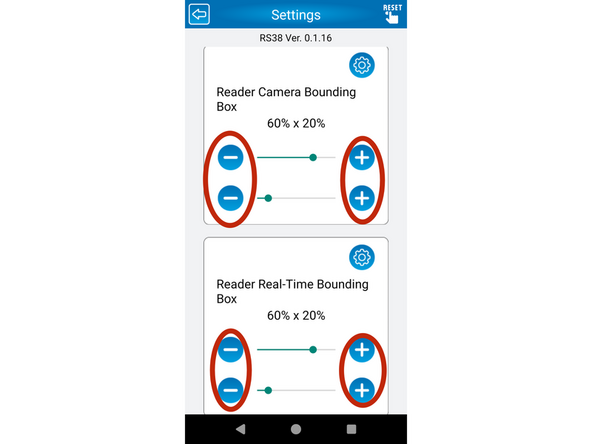
Confirm your settings match those shown in the reference photos.
-
Use the plus and minus buttons to adjust the settings to match the reference. These can be changed later, but this configuration works best for most users.
-
-
-
The arrows in the photo point to settings that should be grayed out and cannot be changed. Make sure these match what is shown.
-
-
-
the sound setting is very important unless you want it to make alot of noise
-
Tap the Back button to return to the main camera screen.
-