-
-
Make sure the printer is connected via USB before powering the printer on. To see how to connect it via USB click HERE and to see how to confirm it's connection, click HERE.
-
Launch the GSS Certified Printer Tool software.
-
If you do not have it downloaded,download here.
-
Select "Add Printers" in GSS Certified Printer Tool if your printer is not yet connected. If it is, skip this step.
-
Make sure USB is selected by clicking the bullet point next to 'USB," shown by the orange box.
-
Select the drop down menu, shown by the blue box, to find and select 'GSS-LABEL-PTR-I'
-
If it does not show up, try selecting the 'refresh USB list' button shown by the pink arrow. If it still does not appear, try turning off the printer, waiting a moment for it to fully power off, then powering it back on and repeating this step.
-
Select 'OK.'
-
-
-
Double click the printer name, 'GSS-LABEL-PTR-I,' to open up the Printer Configuration Menu.
-
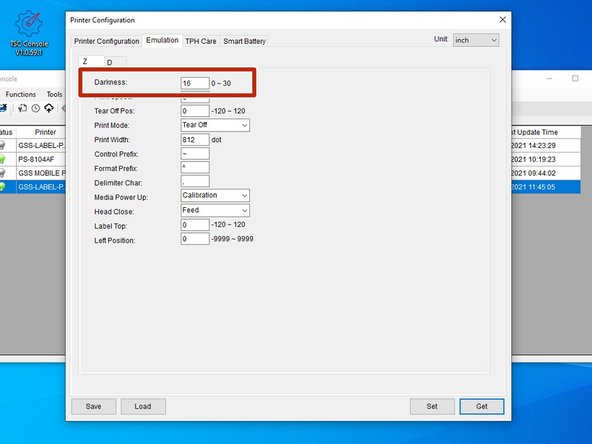
In the Printer Configuration Menu select the 'Emulation' tab.
-
Click on 'Get' in the bottom right hand of the pop up, shown by the orange box.
-
The fields will now populate with information given from the printer, shown by the green box.
-
-
-
The Darkness is how dark your printer prints labels.
-
The default is preloaded and it is recommended it remains about the same darkness as it came as.
-
To change it, click in the text box and enter a number between 0 and 30.
-
The closer the number is to 0, the lighter your prints will be.
-
The closer the number is to 30, the darker your prints will be.
-
-
-
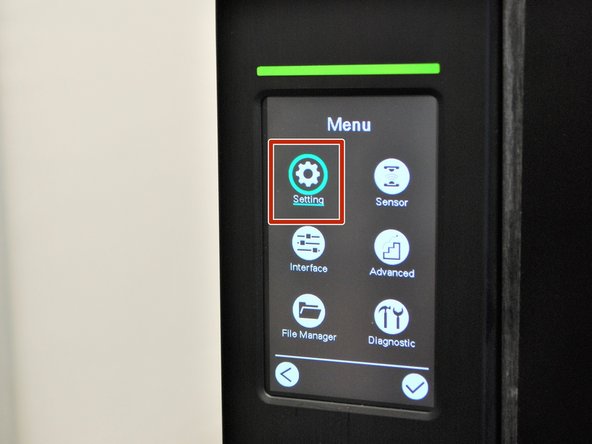
Tap or select the 'Menu' option on the printer screen.
-
Tap or select 'Setting.'
-
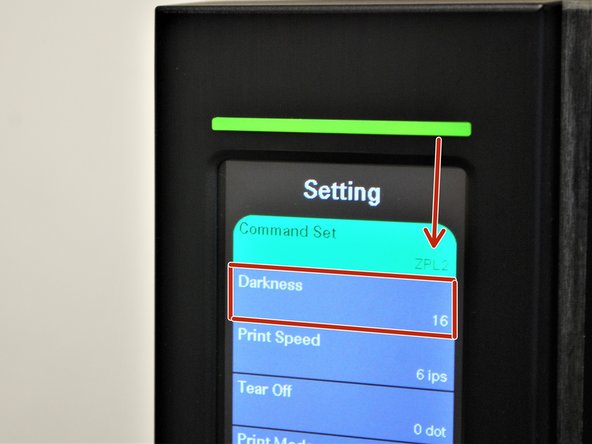
Confirm that the 'Command Set' reads as 'ZPL2.'
-
If it does not, tap or select it to switch to 'ZPL2.'
-
Tap or scroll down and select 'Darkness.'
-
-
-
Tap the green arrows on the screen or use the arrow keys below the print screen to adjust the darkness.
-
The Darkness is how dark your printer prints labels.
-
The default is preloaded and it is recommended it remains about the same darkness as it came as.
-
To change it, click in the text box and enter a number between 0 and 30.
-
The closer the number is to 0, the lighter your prints will be.
-
The closer the number is to 30, the darker your prints will be.
-